9
Mixer
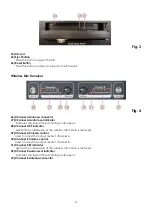
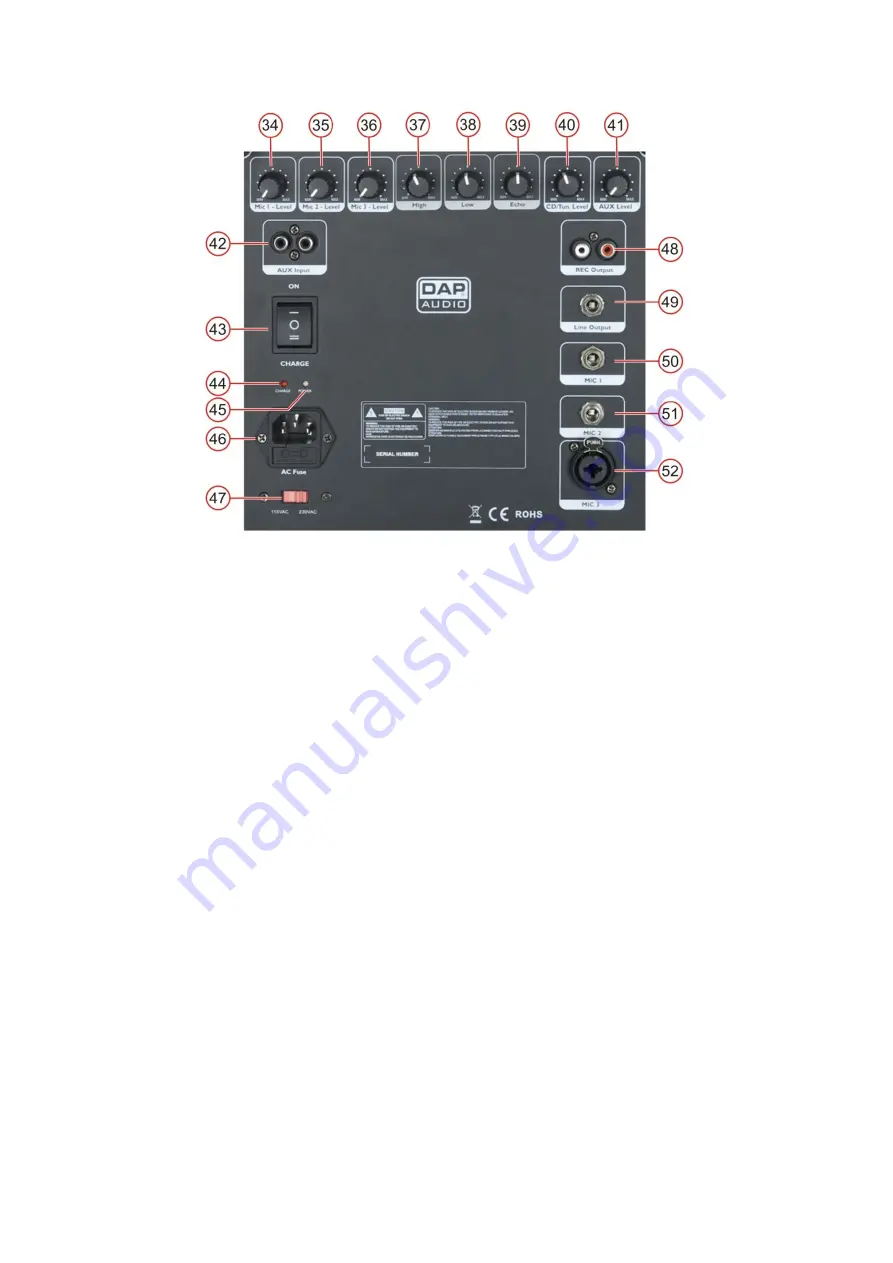
Fig. 5
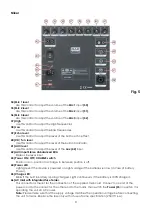
34) Mic 1 level
Use this control
to adjust the volume of the
Mic 1
input
(50)
.
35) Mic 2 level
Use this control
to adjust the volume of the
Mic 2
input
(51).
36) Mic 3 level
Use this control
to adjust the volume of the
Mic 3
input
(52).
37) High
Use this control to adjust the High frequencies.
38) Low
Use this control to adjust the Bass frequencies.
39) Echo level
Use this control to adjust the level of the built in echo effect.
40) CD/ Tun. level
Use this control to adjust the level of the built in Car Radio.
41) AUX level
Use this control to adjust the level of the
Aux (42)
input.
42) AUX input Stereo Unbalanced RCA
Stereo Line level input.
43) Power ON/ OFF/ CHARGE switch
Position I is on, position II is charge, in between position is off.
44) Power LED
Lights green if the device is powered on. Lights orange if the batteries run low (in case of battery
Power).
45) Charge LED
Blinks if the built in battery is being charged. Light continuously if the battery is 100% charged.
46) AC Inlet with integrated fuse holder.
This connector is meant for the connection of the supplied main cord. Connect one end of the
power cord to the connector, the other end to the mains, then switch the
Power (43
) in positon I
for
operating the unit on AC power.
Note:
Please make sure that the supply voltage matches the operation voltage before connecting
the unit to mains. Replace the fuse only with a fuse of same specification (250V:T1,6A).

