background image


12)


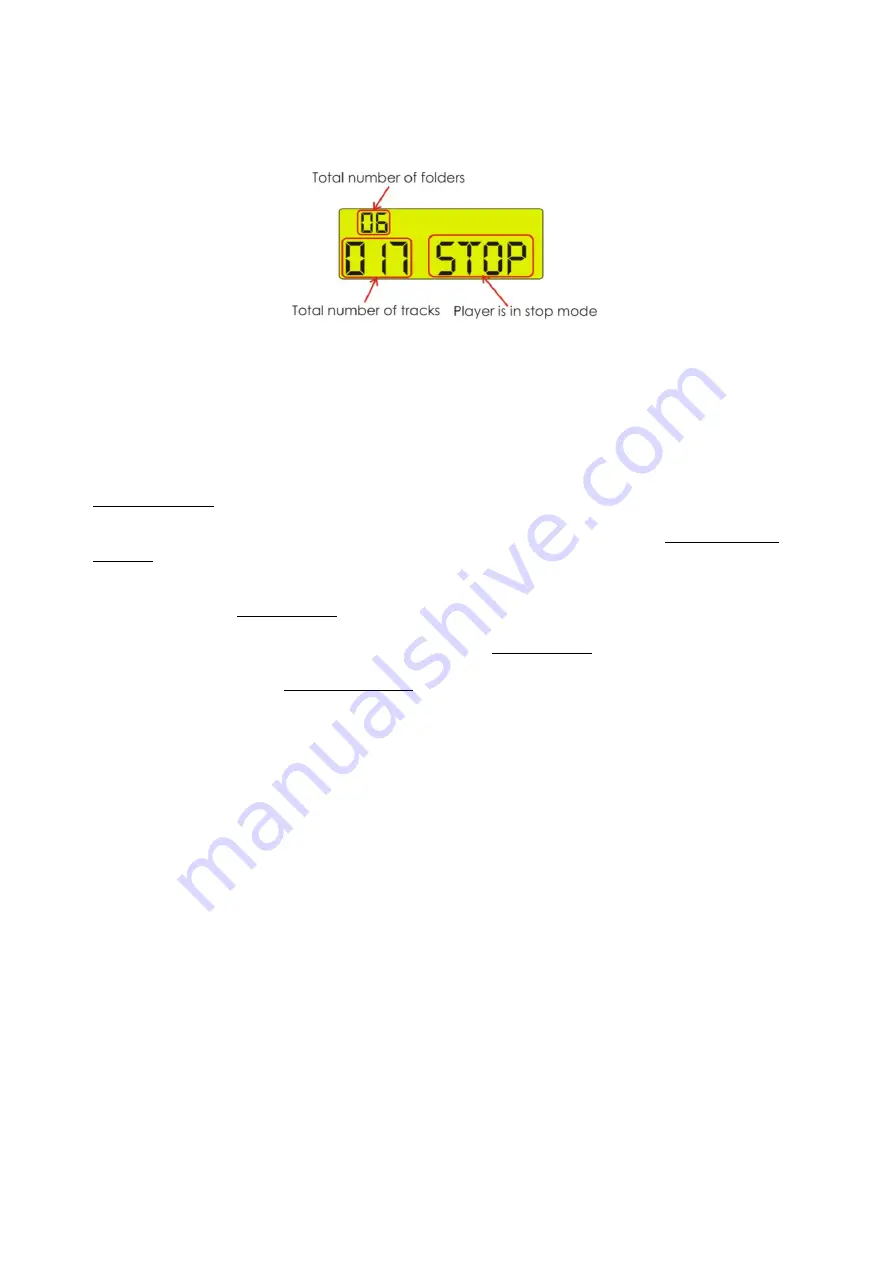
LCD: 


When powering on the CDR-110 without a USB stick or a SD/MMC card inserted, the CDR-110      

       will start searching for a source, indicated by “USB” blinking in the display. If the CDR-110 does not  
       detect a source within approximately 6 seconds, the display will show “No USB”. If you insert a USB  
       stick or a SD/ MMC card, the display will look as shown in figure 4.  


Fig. 4


       Showing the total number of folders and the total number of tracks (total of all tracks in all folders).  

13)


SD MMC card:


       Use this port to connect your SD/MMS card for playback/recording.


14)


USB:


       Use this port to connect your USB stick for playback/recording.


15, 34)


Program:


       Press the Stop button to stop playback. Now press the Program


button to enter program mode. See  

       12. Program Play


on page 11


for more info. 

19, 28)


Repeat:


       Use this button to repeat one track, one folder or all tracks of the medium. See 6. Using the find  
       function


on page 9


for more info. 

17, 35)


Find:


       Press the Find button once to start track search, twice for folder search. Pressing the button again will  
       exit find mode. See 1. Play Modes on page 8 for more info. 

20, 39)


Record/Delete: 


 Pressing this button activates the recording mode. See 10. Recording on page 10 for more info. 

       Pressing and holding this button for 3 seconds enables you to delete a track from either the USB-stick  
       or the SD/MMC-card. See 11. Delete a track on page 11.  

21, 40)


Function:


       Press this button to select between CD, USB, SD/MMC-Card or AUX as recording source. 

22)


Line out:


      Connect to the line input of the Mixer. 

23)


Aux in:


      Connect an external device from which you want to record.  

24) 

AC Inlet with integrated fuse holder

 This connector is meant for the connection of the supplied main cord. Connect one end of the power    
 cord to the connector, the other end to the mains, then turn on the power switch to operate the unit.    
 

Note: 

Please make sure that the supply voltage matches the operation voltage before connecting  


the unit to mains. 

Replace the fuse only with a fuse of same specification (T630mA).


Summary of Contents for CDR-110

Page 1: ...CDR 110 ORDERCODE D1253...

Page 2: ...Audio for more excellent audio products We design and manufacture professional audio equipment for the entertainment industry New products are being launched regularly We work hard to keep you our cu...

Page 3: ...dure Claims Description Features and Overview Frontside Backside Installation Set Up and Operation Names and functions Operations Play Modes Selecting tracks forward Selecting tracks backwards Selecti...

Page 4: ...nd do not use the system To maintain perfect condition and to ensure a safe operation it is absolutely necessary for the user to follow the safety instructions and warning notes written in this manual...

Page 5: ...ng the INPUT control Avoid ground loops Always be sure to connect the power amps and the mixing console to the same electrical circuit to ensure the same phase If system is dropped or struck disconnec...

Page 6: ...ethod to use Note If you are given an RMA number please include the following information on a piece of paper inside the box 1 Your name 2 Your address 3 Your phone number 4 A brief description of the...

Page 7: ...nput RCA Overview Frontside Fig 1 Backside Fig 2 1 Power On Off Button 13 LCD Liquid Crystal Display 2 Direct Access Buttons 14 USB Stick Connector 3 CD Slot playback only 15 Prog Program Button 4 Fol...

Page 8: ...der Button 34 Prog Program Button 27 Folder Button 35 Find Button 28 Repeat Button 36 ESP Button 29 Display Button 37 Cue Skip Button 30 Eject Button 38 Rev Reverse Skip Button 31 Mute Button 39 Rec D...

Page 9: ...controls 1 Power When the power switch is pressed the device turns on 2 25 Direct Access buttons Press track 0 9 buttons to select tracks directly 3 CD Slot Place the CD gently in the slot The CD will...

Page 10: ...page 9 for more info 17 35 Find Press the Find button once to start track search twice for folder search Pressing the button again will exit find mode See 1 Play Modes on page 8 for more info 20 39 Re...

Page 11: ...ard In Stop mode Press the Folder 6 26 button to move to the next folder In Program entry mode Pressing the Folder 6 26 button will skip the current file and select the next folder s first file In Pla...

Page 12: ...ayback to return to Stop mode 9 Pausing Press the Play Pause 10 32 button to switch between play and pause Playback resumes when the Play Pause 10 32 button is pressed again 10 Recording Use the Func...

Page 13: ...their original names 11 Delete a track Stop playback by pressing the Stop 9 33 button Press and hold the Rec Del 20 39 button for 3 seconds Now you re in delete mode Select a folder by using the Rev...

Page 14: ...2 Insert a flat head screwdriver into a slot in the fuse cover Gently pry up the fuse cover The fuse will come out 3 Remove the broken fuse If brown or unclear it is burned out 4 Insert the replacemen...

Page 15: ...ut USB memory stick SD MMC card slot RCA stereo audio signal THD 1kHz 0 3 S N Ratio 60dB Separation 60dB Output level 1 kHz 0 dB 1 2V 2dB Max record input signal 800mV Dimensions 482 x 250 x 44 mm LxW...

Page 16: ...2010 Dap Audio...

Reviews: