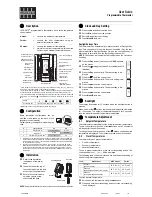
Sequence of button presses whilst adjusting time, day and programme settings.
Read the section Error free programming first.
Press and r or - to change the time by one minute.
Press and hold down + or - to change the time quickly.
BUTTON
SEQUENCE
ACTION
STEP
PRESS
STARTING FROM RUN MODE,
Fig. 1 - Colon blinking
1
PROG
Go to SET CLOCK mode. (Fig. 2)
2
DAY
Select current day of week. (for display only)
3
+ or -
Adjust time of day.
4
PROG
Start clock and display Central Heating and
Hot Water ON/OFF times. (Fig.3)
5
+ or -
Adjust first event ON time.
6
NEXT/ON/OFF
Step forward to first event OFF time.
7
-
Repeat steps 5 & 6 for second event
ON/OFF times. (Figs. 3, 4 & 5)
8
PROG
Complete programming and return to run
mode, colon blinks.
Fig. 1
Fig. 2
Fig. 3
Fig. 4
Fig. 5
ERROR FREE PROGRAMMING.
ON/OFF times cannot be set out of sequence. The limits of adjustment are:
Setting 1 (first ON) 12:00am to 11:59pm (normally in the morning).
Settings 2 to 4 (first OFF to last OFF) anywhere between the previous Setting and 23 hours 59 minutes
after Setting 1.
The - button stops responding when the previous Setting is reached, but the + button continues to its
limit, also changing any later Settings that would have been overlapped.
While becoming familiar with the Setting Sequence the ON/OFF times may become grouped together.
If this should happen use NEXT ON/OFF to select Setting 1, then check/alter each Setting in turn, using
+ or -, until the desired programme is entered.
NOTES ON TYPICAL DISPLAYS (See left)
Fig. 1
Immediately following a manual RESET [RUN mode with colon blinking]
Fig. 2
SET TIME and DAY mode [colon steady, day, hours and minutes blink]
Fig. 3
SET FIRST EVENT ON TIME
[setting number and programming period shown, ON blinks]
Fig. 4
SET FIRST EVENT OFF TIME
[setting number and programming period shown, OFF blinks]
Fig. 5
SET LAST EVENT PROGRAMMED FOR OFF TIME AFTER MIDNIGHT
[programming period when output will switch off blinks]
Fig. 6
Typical CH ALLDAY, HW
AUTO programme with HW +1
HOUR selected.
IMPORTANT NOTES
A)
Day of week is for display purposes only.
B)
The COPY button on CP10C has no function, please disregard.
C)
Should the unit be disconnected from the mains a small battery symbol will blink
on the left hand side of the display.
FACTORY PRE-SET PROGRAMME
The following ON/OFF times are programmed at the factory and are re-instated by pressing the
recessed R/S button behind the flap.
s
e
m
m
a
r
g
o
r
P
t
e
s
-
e
r
P
y
r
o
t
c
a
F
g
n
it
t
e
S
F
F
O
/
N
O
e
m
i
T
1
2
3
4
N
O
F
F
O
N
O
F
F
O
M
A
0
3
:
6
M
A
0
3
:
8
M
P
0
0
:
5
M
P
0
3
:
0
1


