background image


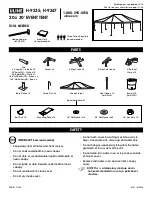
Figure 2   Sketch  of  parts 


Summary of Contents for Oceancover PVC

Page 1: ...26 09 2014 QJ 5 5x15x4 1x5 3m Manual Boat tent Oceancover PVC...

Page 2: ...oof as heavy snow can cause the marquee tent to collapse In the event of rain there is a risk of rain puddles building up on top of the roof of the marquee tent Heavy rain puddles can cause the roof t...

Page 3: ...17mm Sockets or Box Wrench Large Flat Head Screwdriver 2lb maul or Sledgehammer 4 Foot Level 14 Step Ladder Stake String for aligning Base Plates Frame Assembly procedure 1 Prepare location and place...

Page 4: ...ing the poly rope that secures the main cover to the bottom rail of the frame assembly should be checked and adjusted as needed The tension on the main cover should be uniform from end and side to sid...

Page 5: ...idewall Tube of front and back panel 2 3B Sidewall Tube at right of front and back panel to connect the winch rail 2 4 Horizontal wall and roof purlin 30 5L Base flange in corner 2 5R Base flange in c...

Page 6: ...ning tube of front and back cover 4 17 Wind Brace Support 4 17A The tube clip for wind brace support 8 18 Hexagon bolt M10x90 100 19 Carriage bolt M10x100 40 8 1 0 3 x 0 1 M t l o b n o g a x e H 0 2...

Page 7: ...r cover 2 29 Single and Double Pulley 2sets 30 Winch 2 31 Rope for fastening the roof cover the door cover and the front back cover 18 40 Stake peg 50 42 Plastic cap of tensioning tube 12 43 Turnbuckl...

Page 8: ...Figure 1 Sketch of Model 185017 Size W5 5 L15 H5 3M...

Page 9: ...Figure 2 Sketch of parts...

Page 10: ...ine of the strings will represent the final location of the base flanges The initial location of each Corner Base Flanges 5R 5L is critical to the alignment and fit of the frame components and cover L...

Page 11: ...ot tighten down the nuts completely until frame is fully assembled and set in place THE FRONT PANEL FRAME ASSEMBLY Figure 5 Frame Installation for Front Panel Assemble the front panel frame According...

Page 12: ...ket while assembly continues Next stand first interior arch up to repeat insertion into Base flanges Figure 7 Immediately after putting first interior arch into place connect Front Arch and Interior a...

Page 13: ...ropes over top of frame as shown in picture below Having another person inside frame on a ladder to assist in getting Roof Cover over frame will insure the cover will go on without any damage Figure8...

Page 14: ...ROOF COVER ON FRAME FRONT TO BACK The roof cover is tensioned from front to back by the rope lacing to grommet flaps inside the main cover inside the unit at both front and rear arches Using the rope...

Page 15: ...Figure 10 Fastening the two ends of the Roof Cover Figure 11 Fastening the two ends of the Roof Cover Figure 12 Open Door Cover...

Page 16: ...bes 14 into the Door Tracks 5 Next install the steel wire that leads from the bottom of the door dropping tubes to the door winching assembly Take one of the Steel Wires in the Door kit and feed down...

Page 17: ...0 germany dancover com Switzerland 0840 000125 schweiz dancover com France 0975 181 800 france dancover com Austria 0662 626935 austria dancover com Sweden 040 233 262 sverige dancover com Finland 0 9...

Reviews: