15
Operating Instructions
38
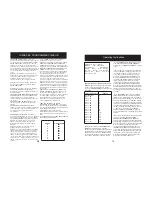
GUIDE DES PROGRAMMES CUISSON
“COOK BY WEIGHT” CODE DESCRIP-
TIONS Code Roast Internal
Maximum Type Temperature
Recommended After Standing
Weight Beef 1 Roast Rare-140
deg. 5lb.
Beef 2 and Medium-
160 deg. 5lb.
Lamb 3 Pork Well
done-170 deg. 5lb.
CONVERTING FRACTIONS OF A POUND TO
OUNCES: Most meat packages show weight in
pounds only. Convert fractions of a pound to
ounces for COOK BY WEIGHT feature by using
chart below.
Setting “defrost by weight” Set DEFROST BY
WEIGHT for any weight up to 6 pounds.
Because it is a more gentle defrost setting than
“Speed Defrost”, it is especially good for meats
which are dense in the center but vulnerable to
overcooking on the edges. For meats as small
as a pound of hamburger or delicate shrimp,
FRACTION OF POUND
OUNCES
less than 0.3
.03 to .09
.10 to .15
.16 to .21
.22 to .27
.28 to .34
.35 to .40
.41 to .46
.47 to .53
.54 to .59
.60 to .65
.66 to .71
.72 to .78
.79 to .84
.85 to .90
.91 to .97
0
1
2
3
4
5
6
7
8
9
10
11
12
13
14
15
choosing DEFROST BY WEIGHT will give more
even thawed results than SPEED DEFROST
setting. Choose DEFROST BY WEIGHT for large
roasts.
Check weight of meat. It must be in pounds and
ounces. If label gives weight in pounds only, you
can change the fraction of a pound to ounces
using chart on page 11. Unwrap meat before
defrosting. Touch DEFROST BY WEIGHT pad.
Word prompt ENTER shows in display and 0’s
show where LB and OZ should be entered. LB
flashes until you enter pound(s) by touching
correct number pad. When pound(s) has been
entered, LB will stop flashing and OZ will flash.
As soon as all these digits have been set, display
will immediately show cook time. Ounce weights
less than 10 must be preceded by a 0. As soon
as three digits are set, display immediately shows
cook time.
Touch START/STOP pad to start oven. CODE
flashes in display as time counts down. Interior
light goes on, turntable rotates and fan sound is
heard. After partial defrosting, oven beeps twice
and stops. Interior light goes off but time remains
on the display. This pause in operation is to allow
turning over, rearranging or shield. After attending
to meat appropriately, touch START to resume
the time on display and finish cooking. After total
cooking time, 4 long beeps sound and END
appears in display. Touch RESET or open oven
door to clear END before starting another cooking
function.
Notes: Allow enough time for defrosting because
it is more slow and gradual than SPEED
DEFROST. With DEFROST BY WEIGHT, low
power microwaving is interspersed within “resting”
and “standing” periods where no microwave at all
enter the oven. These no-microwave periods allow
meat to equalize in temperature before next
period of microwaving automatically comes on.
“DEPROST BY WEIGHT” automatically sets the
correct thawing time, but you must enter the food
weight accurately. Weight must be in pounds and
ounces. Place meat on microwave-safe rack in
microwave roasting dish. Place meats fat-side
down and poultry breast-side down.
1. RÉGLAGE DE L’HORLOGE: Lorsque vous
branchez le four dans une prise de courant, appuyez
une fois sur la touche CLOCK et l’affichage indique
ENTER CLOCK TIME. Entrez l’heure exacte en
appuyant sur les touches de chiffres.Vous devez
entrer au moins 3 chiffres.Pour entrer moins de dix
minutes,précédez le chiffre des minutes d’un zéro. Si
vous préférez ne pas afficher l’heure,réglez l’horloge
à 00:00 et le panneau n’affichera que les deux
points.
Appuyez sur CLOCK pour confirmer l’heure.Les
deux points cessent de clignoter et l’horloge se met
en marche.Lorsque l’horloge est réglée, le mot
CLOCK et l’heure s’affichent de façon
continue, tant que le four n’est pas en marche.
Changement de l’heure à l’horloge Appuyez une
fois sur la touche CLOCK et l’affichage indique
ENTER CLOCK TIME.
Remarques sur le réglage de l’horloge SI VOUS
FAITES UNE ERREUR en réglant l’horloge,
mettez le four en marche en appuyant deux fois sur
la touche CLOCK.
POUR CONSULTER L’HORLOGE EN COURS DE
CUISSON, appuyez sur la touché CLOCK L’heure
s’affiche pendant trios seconde avant que ne
revienne l’affichage du compte à rebours de la cais-
son en cours.
EN CAS DE PANNE DE COURANT,au retour du
courant,le contrôle est en mode de réglage de
l’horloge.
BIPS EN COURS DE RÉGLAGE DU FOUR
UN BIP : Le four accepte la commande. L’information
a été entrée dans l’ordre correct. DEUX BIPS : Le
four n’accepte pas la commande.Vérifiez et
recommencez.
RÉGLAGE DE LA MINUTERIE: La minuterie
fonctionne indépendamment de la caisson. Réglez la
durée comme suit: Appuyez sur la touche TIMER.
Les mots ENTER TIME s’affichent.Si vous réglez la
minuterie alors qu’une caisson est en cous, le
compte à rebours de la durée de caisson est
momentanément remplacé à l’affichage par la
minuterie.
Entrez la durée que vous désirez minuter en
appuyant sur les touches de chiffres.
Appuyez sur la touche START/STOP. Le mot TIMER
clignote et la minuterie commence son compte à
rebours. Si vous utilisez la minuterie alors qu’une
caisson est en cours, le mot TIMER clignote et le
compte à rebours de la minuterie s’affiche durant
trios secondes, après quoi le compte à rebours de la
caisson en cours s’affiche à nouveau.après quoi le
compte à rebours de la caisson en cours s’affiche à
nouveau.
Le mot TIMER est affiché avec un autre mot
indiquant le mode de caisson en cours.
Remarques sur le réglage de la minuterie. POUR
ARRÊTER LA MINUTERIE OU LA RÉGLER À
NOUVEAU alors qu’aucune caisson n’est en cours,
appuyez sur la touche RESET. POUR RÉGLER LA
MINUTERIE ALORS QU’UNE CUISSON EST EN
COURS, assurez vous de régler la minuterie
correctement.Une fois la minuterie réglée pendant
une caisson,le réglage ne peut pas être change
sans annuler la function de caisson en meme
temps.La touche RESET ne permet pas de changer
le réglage de la minuterie alors qu’une caisson est
en cours. À la fin du compte à rebours de la
minuterie,un long bip se fait entendre et la minuterie
disparaît.Si aucune caisson n’est en cours, le mot
CLOCK et l’horloge (si elle a été réglée) reviennent
s’afficher.Si une caisson est en cours,un long bip se
fait entendre et le mot TIMER s’éteint alors que le
compte à rebours de la caisson en cours continue
de s’afficher.
RÉGLAGE DE LA DURÉE DE CUISSON ET DU
NIVEAU D’INTENSITÉ: Pour une caisson à 100%
de l’intensité, réglez simplement la durée de
caisson à l’aide des touches de chiffres et appuyez
sur START/STOP. L’intensité 100% est réglée
automatiquement.Pour la caisson en une seule
étape, il n’est pas nécessaire d’appuyer sur la
touche COOK avant de régler la durée.
POUR UNE CUISSON À UN NIVEAU
D’INTENSITÉ PLUS FAIBLE Après avoir réglé la
durée de caisson, appuyez sur la touche POWER
suivi d’un seul chiffre indiquant le niveau d’intensité
desire. Appuyez sur la touche
START/STOP.Puisque le four presume
automatiquement l’intensité 100%, il faut modifier le
niveau d’intensité (si desire) après avoir réglé la
durée.
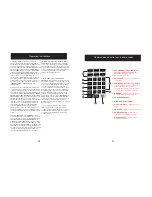
UTILISEZ CES CHIFFRES POUR REPRÉSENTER
LES NIVEAUX D’INTENSITÉ
Chiffre
9
8
7
6
5
4
3
2
1
% de intensité
90%
80%
70%
60%
50%
40%
30%
20%
10%
Summary of Contents for DMW758BL
Page 2: ......


