background image

OPERATING INSTRUCTIONS

6

WATER REMOVAL

2. Continuous Drain

Water can be removed from the appliance using the 

continuous drain connector and the provided drain 

hose.

Before using any automatic drain functions, 

check that all drain ports are clean and free of 

debris. There is one drain port inside the bucket 

compartment of the appliance, remove the bucket 

to see it. There is one drain port on the back of the 

appliance where the drain hose attaches. All drain 

ports should be cleaned with a pipe cleaner prior to 

use.

Note:

 Do not clean the drain ports with anything 

more rigid than a pipe cleaner as this can damage 

the appliance. 

Note:

 If the drain ports are clogged or dirty it 

can cause water to leak from the bottom of the 

appliance.

Remove the cover from the continuous drain outlet 

and attach the provided drain connector that 

is shipped inside the water bucket. Attach the 

provided drain hose to the drain connector and 

direct the other end of the drain hose to a bucket or 

fl oor drain.

Ensure that the drain hose is not bent and goes 

straight down from the back of the appliance. The 

continuous drain is only activated by gravity so any 

bends or upward motion in the hose will stop the 

water from draining. 

The drain hose is 2 m (6.6 feet) long. Do not 

connect this drain hose together with any other 

hose. If the drain hose is too long water may not 

drain completely which can lead to stagnant water 

and mildew build up inside the hose.

Note:

 When the ambient temperature is higher than 

the temperature of the water inside the drain hose, 

condensation may appear on the outside of the 

drain hose. This is normal.

WATER REMOVAL

3. Pump Drain

If the continuous drain is inconvenient, water can be 

removed from the appliance using the pump drain.

When using the pump, the appliance will fi rst fi ll the 

bucket with water and then the pump arm will pump 

water from the bucket through the drain and out the 

hose.

Remove the cover from the pump drain outlet and 

attach the provided drain hose. Direct the other end 

of the hose to a drain. Press the pump button to 

activate the pump function. When the bucket is full, 

the pump will begin to work.

Ensure that the drain hose is not bent, this can stop 

the water from draining correctly and overwork the 

pump. 

Do not connect the provided hose together with 

another hose. The maximum length of the pump 

drain hose should be no more than 4.6 m (15 feet). 

If the drain hose is too long water may not drain 

completely which can lead to stagnant water and 

mildew build up inside the hose.

When using the pump drain, the water bucket 

should be emptied every few days to ensure that the 

water in the bucket does not become stagnant or 

grow mildew.

Summary of Contents for DDR050BJPWDB

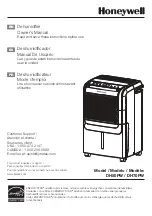
Page 1: ... OHIO USA 45840 OWNER S MANUAL MANUEL DU PROPRIÉTAIRE MANUAL DEL PROPIETARIO www Danby com DEHUMIDIFIER Owner s Manual 1 9 DÉSHUMIDIFICATEUR Manuel du propriétaire 10 18 DESHUMIDIFICADOR Manual del propietario 19 27 MODEL MODÈLE MODELO DDR050BJPWDB DDR050BJPWDB 6 2019 10 23 ...

Page 2: ...vide the original purchase receipt to validate your warranty and receive service Model Number _________________________________________________ Serial Number _________________________________________________ Date of Purchase _______________________________________________ Need Help Before you call for service here are a few things you can do to help us serve you better Read this owner s manual It ...

Page 3: ...ot use this dehumidifier for commercial or industrial applications GROUNDING INSTRUCTIONS This appliance must be grounded Grounding reduces the risk of electrical shock by providing an escape wire for the electrical current This appliance has a cord that has a grounding wire with a 3 prong plug The power cord must be plugged into an outlet that is properly grounded If the outlet is a 2 prong wall o...

Page 4: ...commended ambient operating temperature is between 5 C 41 F and 32 C 90 F Do not force rollers to move over carpeting as the appliance may tip over and spill water Any time the appliance is placed on its back or side it must be allowed to stand upright for 6 hours before plugging in to avoid damage to internal components The drain hose connector can be found inside the bucket The drain hose is att...

Page 5: ... Indicator Light Use this button to activate smart dehumidify mode Smart dehumidify mode will automatically set the humidity and fan speed based on the ambient temperature and humidity The indicator light will illuminate when smart dehumidify is active 6 Filter Button and Indicator Light The filter light will illuminate when the filter needs to be cleaned Press the filter button once the filter has be...

Page 6: ...l count down to the appliance either turning off or on whichever function was set first Note The timer will not cycle the appliance on and off indefinitely The auto on and auto off timers will function one time and then the appliance will return to regular functioning Turning the appliance off pressing the default button on the remote or unplugging the appliance will clear all memory settings includ...

Page 7: ... 6 6 feet long Do not connect this drain hose together with any other hose If the drain hose is too long water may not drain completely which can lead to stagnant water and mildew build up inside the hose Note When the ambient temperature is higher than the temperature of the water inside the drain hose condensation may appear on the outside of the drain hose This is normal WATER REMOVAL 3 Pump Dr...

Page 8: ...he error persists call for service AS Humidity sensor error ES Temperature sensor error P2 Full bucket E3 Sensor malfunction Eb Bucket removed or not in the correct position CLEANING To avoid possible electric shock ensure that the appliance is unplugged before performing any cleaning or maintenance The outside of the appliance can be wiped clean with a soft cloth or with a lukewarm damp cloth if ...

Page 9: ... humidity Bucket is full or is not in the proper position Insufficient dehumidifying Air filter is dirty Blocked air flow Appliance size is too small for application Ambient humidity is lower than the set humidity Noise Air filter is dirty Bucket is not in proper position Floor surface is not level Odors Formation of mold or mildew on internal wet surfaces Place an algaecide tablet in the water bucket...

Page 10: ...x 669 Findlay Ohio U S A 45840 Telephone 419 425 8627 FAX 419 425 8629 04 09 1 800 263 2629 Warranty Service In home Transportation charges to and from the service location are not protected by this warranty and are the responsibility of the purchaser During the first twenty four 24 months any functional parts of this product found to be defective will be repaired or replaced at warrantor s option ...

Page 11: ... reçu d achat original pour valider votre garantie et recevoir le service Numéro de modèle _____________________________________________ Numéro de serie _______________________________________________ Date d achat __________________________________________________ Besoin d assistance Avant d appeler pour service voici quelques choses que vous pouvez faire pour nous aider à mieux vous servir Lire c...

Page 12: ...umidificateur pour des applications commerciales ou industrielles INSTRUCTIONS DE MISE À LA TERRE Cet appareil doit être mis à la terre La mise à la terre réduit le risque de choc électrique en fournissant un câble d échappement pour le courant électrique Cet appareil possède un cordon doté d un fil de mise à la terre avec une fiche à 3 broches Le cordon d alimentation doit être branché sur une prise...

Page 13: ...ement recommandée est comprise entre 5 C 32 F et 32 C 90 F Ne pas forcer les rouleaux à se déplacer sur les moquettes car l appareil peut basculer et renverser de l eau Chaque fois que l appareil est placé sur son dos ou sur son côté il doit pouvoir se tenir debout pendant 6 heures avant de brancher pour éviter d endommager les composants internes Le raccord du tuyau de vidange se trouve à l intér...

Page 14: ...on intelligent Le mode de déshumidification intelligent définit automatiquement l humidité et la vitesse du ventilateur en fonction de la température ambiante et de l humidité Le témoin lumineux s allume lorsque le déshumidification intelligent est activé 6 Bouton de filtre et voyant lumineux La lumière du filtre s allume lorsque le filtre doit être nettoyé Appuyez sur le bouton de filtre une fois que le...

Page 15: ...s de temps jusqu à 10 heures puis à des incréments de 1 heure jusqu à un maximum de 24 heures 3 L heure sélectionnée apparaîtra sur le panneau d affichage et débutera jusqu à ce que l appareil s allume Fonction de désactivation automatique 1 Appuyez sur le bouton de la minuterie jusqu à ce que le témoin de désactivation automatique s allume 2 Utilisez les flèches haut et bas pour sélectionner la dur...

Page 16: ...onnectez pas ce tuyau d évacuation avec un autre tuyau Si le tuyau de vidange est trop long l eau risque de ne pas s écouler complètement ce qui peut entraîner une accumulation d eau stagnante et de moisissure à l intérieur du tuyau Remarque lorsque la température ambiante est supérieure à la température de l eau à l intérieur du tuyau de vidange de la condensation peut apparaître à l extérieur du...

Page 17: ...ppelez pour le service AS Erreur du capteur d humidité ES Erreur du capteur de température P2 Seau plein E3 Dysfonctionnement du capteur Eb Seau enlevé ou non dans la position correcte NETTOYAGE Pour éviter tout risque d électrocution assurez vous que l appareil est débranché avant d effectuer un nettoyage ou une maintenance L extérieur de l appareil peut être nettoyé avec un chiffon doux ou avec ...

Page 18: ...nne position La surface du plancher n est pas de niveau Odeurs Formation de moisissure sur des surfaces intérieures humides Placer un comprimé d algaïcide dans le seau à eau L eau sur le sol Le raccord du tuyau est desserré Le couvercle de drainage a été retiré Accumulation de givre Lorsque la température ambiante est inférieure à 5 C 41 F la gelée peut se former Mettez l appareil en mode ventilat...

Page 19: ...rantie et doivent être acquittés par l acheteur Pendant les premiers vingt quatre 24 mois toutes les pièces fonctionnelles de ce produit qui s avèrent défectueuses seront réparées ou remplacées selon le choix du garant sans frais à l acheteur initial Contactez le revendeur où l appareil a été acheté ou contactez le dépôt de service Danby autorisé le plus proche où le service doit être effectué par...

Page 20: ...n para obtener un servicio bajo garantía Debe proporcionar el recibo de compra original para validar su garantía y recibir servicio Número de modelo _____________________________________________ Número de serie _______________________________________________ Fecha de compra _______________________________________________ Necesitas ayuda Antes de llamar al servicio aquí hay algunas cosas que puede ...

Page 21: ... DE CONEXION A TIERRA Este aparato debe estar conectado a tierra La puesta a tierra reduce el riesgo de descarga eléctrica proporcionando un cable de escape para la corriente eléctrica Este aparato tiene un cable que tiene un cable de conexión a tierra con un enchufe de 3 clavijas El cable de alimentación debe estar enchufado en un tomacorriente que esté debidamente conectado a tierra Si el tomaco...

Page 22: ...amiento recomendada es entre 5 C 41 F y 32 C 90 F No fuerce los rodillos para moverse sobre alfombras ya que el aparato puede volcarse y derramar agua Siempre que se coloque el aparato en la parte posterior o lateral se debe permitir que se mantenga erguido durante 6 horas antes de enchufarlo para evitar daños a los componentes internos El conector de la manguera de drenaje se puede encontrar dent...

Page 23: ...o de deshumidificación inteligente El modo de deshumidificación inteligente ajustará automáticamente la velocidad de la humedad y del ventilador en función de la temperatura ambiente y la humedad La luz indicadora se iluminará cuando el deshumidificador inteligente esté activo 6 Botón del filtro y luz indicadora La luz del filtro se iluminará cuando el filtro necesite ser limpiado Presione el botón del ...

Page 24: ...ego la otra Ambas luces indicadoras se iluminarán y la pantalla contará hasta que el aparato se apague o se encienda sea cual sea la función que haya sido configurada en primer lugar Nota El temporizador no encenderá y apagará el aparato indefinidamente Los temporizadores auto on y auto off funcionarán una vez y luego el aparato volverá a su funcionamiento normal Apagando el aparato presionando el b...

Page 25: ...drenaje junto con ninguna otra manguera Si la manguera de drenaje es demasiado larga es posible que el agua no se drene por completo lo que puede provocar la acumulación de agua estancada y moho dentro de la manguera Nota Cuando la temperatura ambiente es más alta que la temperatura del agua dentro de la manguera de drenaje puede aparecer condensación en el exterior de la manguera de drenaje Esto ...

Page 26: ...cio técnico AS Error del sensor de humedad ES Error del sensor de temperatura P2 Cubo completo E3 Funcionamiento incorrecto del sensor Eb El cucharón quitado o no en la posición correcta LIMPIEZA Para evitar posibles descargas eléctricas asegúrese de que el aparato esté desenchufado antes de realizar cualquier limpieza o mantenimiento El exterior del aparato se puede limpiar con un paño suave o co...

Page 27: ... aire está sucio El cucharón no está en la posición adecuada Superficie del piso no nivelada Olores Formación de moho o moho en superficies mojadas internas Coloque una tableta algicida en el cubo de agua Agua en el piso La conexión de la manguera está suelta Se ha quitado la tapa del drenaje Acumulación de escarcha Cuando la temperatura ambiente es inferior a 5 C 41 F puede formarse escarcha Cambie...

Page 28: ...te defectuosa incluyendo cualquier sistema sellado será reparado o reemplazado a opción del fabricante sin cargo para el comprador original Póngase en contacto con el distribuidor donde adquirió el electrodoméstico o póngase en contacto con el centro de servicio autorizado más cercano de Danby donde el servicio debe ser realizado por un técnico cualificado Si el servicio es realizado por cualquier ...

Page 29: ...____________________ __________________________________________________________________________________________ __________________________________________________________________________________________ __________________________________________________________________________________________ __________________________________________________________________________________________ _______________...

Page 30: ...____________________ __________________________________________________________________________________________ __________________________________________________________________________________________ __________________________________________________________________________________________ __________________________________________________________________________________________ _______________...

Page 31: ...____________________ __________________________________________________________________________________________ __________________________________________________________________________________________ __________________________________________________________________________________________ __________________________________________________________________________________________ _______________...

Page 32: ...MODEL MODÈLE MODELO Printed in China Imprimé en Chine Impreso en China Danby Products Limited Guelph ON Canada N1H 6Z9 Danby Products Inc Findlay Ohio USA 45840 DDR050BJPWDB DDR050BJPWDB 6 ...

Reviews: