danalock V3 EURO, Mounting Manual
The Danalock V3 EURO is an advanced smart lock offering both security and convenience. Elevate your home's digital setup with seamless access control. For easy installation, download the free Mounting Manual directly from manualshive.com. Ensure flawless setup and usage by accessing the comprehensive manual available for download.
Share
Download


Reviews:
No comments
Related manuals for V3 EURO
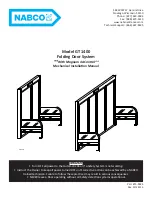
GT-1400
Brand: Nabco Pages: 28

LockerLock LL 200
Brand: Häfele Pages: 64

2740B
Brand: S&G Pages: 12

GATEMAN YDM 3109
Brand: Yale Pages: 60

VGLock vG-BL5
Brand: Wano Pages: 10

KFV Genius A
Brand: eKey Pages: 2

3VT9200-3HC10
Brand: Siemens Pages: 4

3VW9011-0BB10
Brand: Siemens Pages: 7

3VA9088-0LB10
Brand: Siemens Pages: 4

3VA5 125
Brand: Siemens Pages: 5

3VA9980-0LF20
Brand: Siemens Pages: 6
3VA9 7-0LF10 Series
Brand: Siemens Pages: 8

AD-200-CY
Brand: Schlage Pages: 12

AD-200
Brand: Schlage Pages: 20

YDM 3168
Brand: Yale Pages: 40

FS 2250E
Brand: Phoenix Pages: 2
Saflok Quantum Pixel
Brand: Dormakaba Pages: 14

SHERIFF-1 premium
Brand: PROMIX Pages: 6


