background image

DALTOOL SAFETY

ELECTRICAL REQUIREMENTS

AND GROUNDING 

INSTRUCTIONS.

In order to prevent potential electrical shock
and injury, the following electrical safety pre-
cautions and symbols should be followed at all
times!

In case of a malfunction or breakdown,
grounding provides a path of least
resistance for electric current to redu-

ce the risk of electric shock. This tool is equip-
ped with an electric cord having an equipment-
grounding conductor and a grounding plug.
The plug must be plugged into a matching out-
let that is properly installed and grounded in
accordance with all local codes and ordinances. 

Do not modify the plug provided – if it will 
not fit the outlet; have the proper outlet 
installed by a qualified electrician.

Improper connections of the equipment 
grounding conductor can result in a risk 
of electric shock. The equipment-groun-
ding conductor is the insulated conductor 
that has an outer surface that is green with 
or without yellow stripes. If repair or repla-
cement of the electric cord or plug is 
necessary, do not connect the equipment-
grounding conductor to a live terminal.

Check with a qualified electrician or serv-
ice personnel if the grounding instructions 
are not completely understood, or if in 
doubt s to whether the tool is properly 
grounded.

Use only 3-wire extension cords that have 
3-prong grounding plugs and 3-pole 
receptacles that accept the tool’s plug.

Repair or replace a damaged or worn 
cord immediately.

This tool is intended for use on a cir-
cuit that has a 3 pole outlet.

To reduce the risk of electrocutation,
keep all connections dry and off the
ground.

A Ground Fault Circuit Interrupter (GFCI)
should be provided on the circuit(s) or
outlet(s)to be used for the Saw. Receptacles are
available having built-in GFCI protections and
may be used for this measure of safety. A GFCI
is not supplied with the machine.

When using an extension cord, the GFCI should
be installed closest to the power source, follo-
wed by the extension cord and lastly, the saw.

Shock Hazard. For replacement, use only an
identical Daltool water pump, Item # 6.513.298

To avoid the possibility of the machi-
nes plug or electrical outlet getting
wet, position the saw to one side of a
wall mounted outlet. This will prevent

water from dripping onto the outlet or plug. A
“drip loop” should be arranged by the user to
properly position the power cord relative to the
power source. The “drip loop” is that part of the
cord below the level of the outlet, or the con-
nector, if an extension cord is used. 

Continued on page 10

▼▼

DALTILE 828 BrS OPERATING MANUAL   V02/2004R1   

PAGE 9

828  28-10-2004  09:47  Pagina 9

Summary of Contents for 828 BrS

Page 1: ...OPERATING MANUAL TILESAW 828 BrS...

Page 2: ...n the box below The Serial Number is located on the motor cover Carefully read and understand all Safety and Operating Procedures prior to using the Daltile 828 BrS Keep this Manual in a safe place fo...

Page 3: ...nstructions 9 Tile Saw Specific Warnings 10 Machine Specifications 11 2 UNPACKING AND SETTING UP Unpacking and Assembly 12 Cooling System 12 Connecting to Power Supply 12 Motor Protection 12 Installin...

Page 4: ...s important that all instructions within this manual be followed If the instructions are not followed it is possible that serious injuries could occur as well as death DAMAGE PREVENTION AND INFORMATIO...

Page 5: ...e equipment was designed to do a certain job Do not force the equipment to do something that it wasn t designed to do USING THE PROPER EXTENSION CORD If you plan to use an extension cord make sure it...

Page 6: ...inspect the power tool before using it to check for damaged parts Any part of the machinery that is damaged should be checked carefully to determine whether or not it should be used and whether or no...

Page 7: ...ore plugging the machine into an electrical outlet to prevent accidental starting of the machine ELECTRICAL SHOCK It is important to never touch electrical components of the machine while the machi ne...

Page 8: ...g sawing grinding and other construction activities contain chemicals known to the State of California to cause cancer birth defects or other reproductive harm Some examples of these chemicals are Lea...

Page 9: ...are not completely understood or if in doubt s to whether the tool is properly grounded Use only 3 wire extension cords that have 3 prong grounding plugs and 3 pole receptacles that accept the tool s...

Page 10: ...it from the outlet It is important to keep the cord away from heat and sharp edges It is important to disconnect the extension cord from the outlet before disconnecting the machi ne from the extensio...

Page 11: ...elded steel plate cap simple to remove and install for changing the saw blade by unscrewing 2 knobs Saw spindle The spindle flange is mounted on the saw spind le The saw flange is to be mounted on the...

Page 12: ...er pump without a sufficient supply of water may result in pump damage Place the plug in the drain of the water container Fill the container with water until the water pump is completely submerged Con...

Page 13: ...ith the 5 mm Allen wrench Unscrew the 19 mm hexagon nut with the wrench and remove the saw flange Attention Left handed screw threading Clean the saw flanges Fit the new cutting blade on the center ri...

Page 14: ...t on the sawing table and position against the fixed stop and eventually the adjustable stop Position the cutting head at the desired height Hold the material with one hand while making sure your hand...

Page 15: ...the sawing job and run the machine for a minute or so This also guarantees a longer lifetime of the pump When the machine is not used for a longer period the pump should not remain in the muddy cooli...

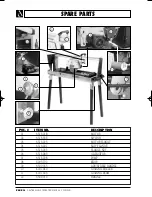
Page 16: ...ANGE 04 6 516 021 SAW FLANGE 05 6 516 023 FLANGE NUT 06 6 513 289 CAPACITOR 07 6 513 298 PUMP 08 6 005 792 KNOB 09 6 509 065 ADJUSTABLE HANDLE 10 4 207 040 GUIDING ROLLER 11 4 207 026 GUIDING BEAM 12...

Reviews: