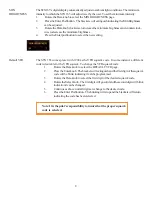
MODE-C ALT
The STX 165 is designed to turn on in the Standby (SBY) Mode. The user can
select an altitude at which the STX 165 will automatically select Mode-C (ALT)
Mode. This altitude is the differential altitude from when the STX 165 was first
turned on. To select an Auto On altitude:
1.
Rotate the Data knob to select the AUTO MODE C ALT page.
2.
Press the Enter Pushbutton. The Auto Alt On altitude will be blinking.
3.
Rotate the Data knob to select the desired Auto On Altitude. The
altitude will change in 25 foot or 10 meter increments.
4.
Press the Enter Pushbutton
Note: The Auto On Altitude is the differential Altitude from when the
STX 165 is turned on. For example if the Auto On altitude is set for
200 feet and the STX 165 is turned on at 1200 feet, the STX 165 will
automatically select ALT Mode at 1350 feet.
EFT START
ALT
Note: If 0 (zero) feet or meters is selected in AUTO MODE C ALT,
the STX 165 will turn on in the ALT Mode. This is generally not
recommended. If OFF is selected, the pilot will be required to select
the ON or ALT Mode.
The STX 165 starts with the EFT displayed in the lower right hand corner of the display. The user
can set the EFT to begin counting at turn on or at a specified Alt above the turn on altitude. It the
EFT is set at 0, then the EFT will begin counting at turn on. To set the EFT start altitude:
1.
Rotate the Data knob to select the EFT START ALT page.
2.
Press the Enter Pushbutton. The EFT start altitude will be blinking.
3.
Rotate the Data knob to select the desired Auto On Altitude. The altitude will change in
25 foot or 10 meter increments.
4.
Press the Enter Pushbutton
AUTO
ICING ALERT
If a SANDIA Aerospace STP 78 OAT probe is installed with the STX 165 the unit will provide an
icing alert. The icing alert is a snow flake that appears in the upper right corner of the display
whenever a user preset temperature is reached. To set the Icing Alert temperature:
1.
Rotate the Data knob to select the ICING ALERT page.
2.
Press the Enter Pushbutton. The brackets will extinguish and the Temperature will blink
3.
Rotate the Data knob until the desire Icing Alert temperature is displayed.
4.
Press the Enter Pushbutton.
7

