14
Module Testing and Removal
5. Insert the
1
/
8
" hex wrench into the bottom access hole and turn approximately a quarter-turn
clockwise or until you feel it latch in place.
6. Insert the
1
/
8
" hex wrench into the top access hole and turn approximately a quarter-turn
clockwise or until you feel it latch in place.
7. Gently pull on the module to verify it is properly seated.
Note: If the module is not latched properly, the latch springs on the module should force the
module away from the display face. If you notice this, attempt to reinstall the module.
5.4 Removing a Module (Rear Access)
Sometimes, when removing a module from the back of the display, certain display components
may inhibit module removal. If that occurs, remove the component according to the instructions
provided in
Section 6 and then remove the module. Replace all components when done servicing
the module.
Required Tools:
1
/
8
" hex wrench, module lanyard
(from the spare parts box)
To remove a module from the back of the display:
1. Attach one end of the safety lanyard to a
lanyard ring on the top of the module.
2. Feed the lanyard over a wire rod or through a
nearby upright in the display. Do not anchor
the lanyard to another module.
3. Attach the other end of the lanyard to the
lanyard attachment ring on the bottom of the
module.
4. Disconnect the SATA power cables from the
back of the module.
5. With a
1
/
8
" hex wrench, turn the bottom latch
gear approximately a quarter-turn clockwise
to disengage the latch.
6. With a
1
/
8
" hex wrench, turn the top latch gear
approximately a quarter-turn clockwise to
disengage the latch.
Note: Always maintain a firm grip on the
module as you remove it from the face sheet.
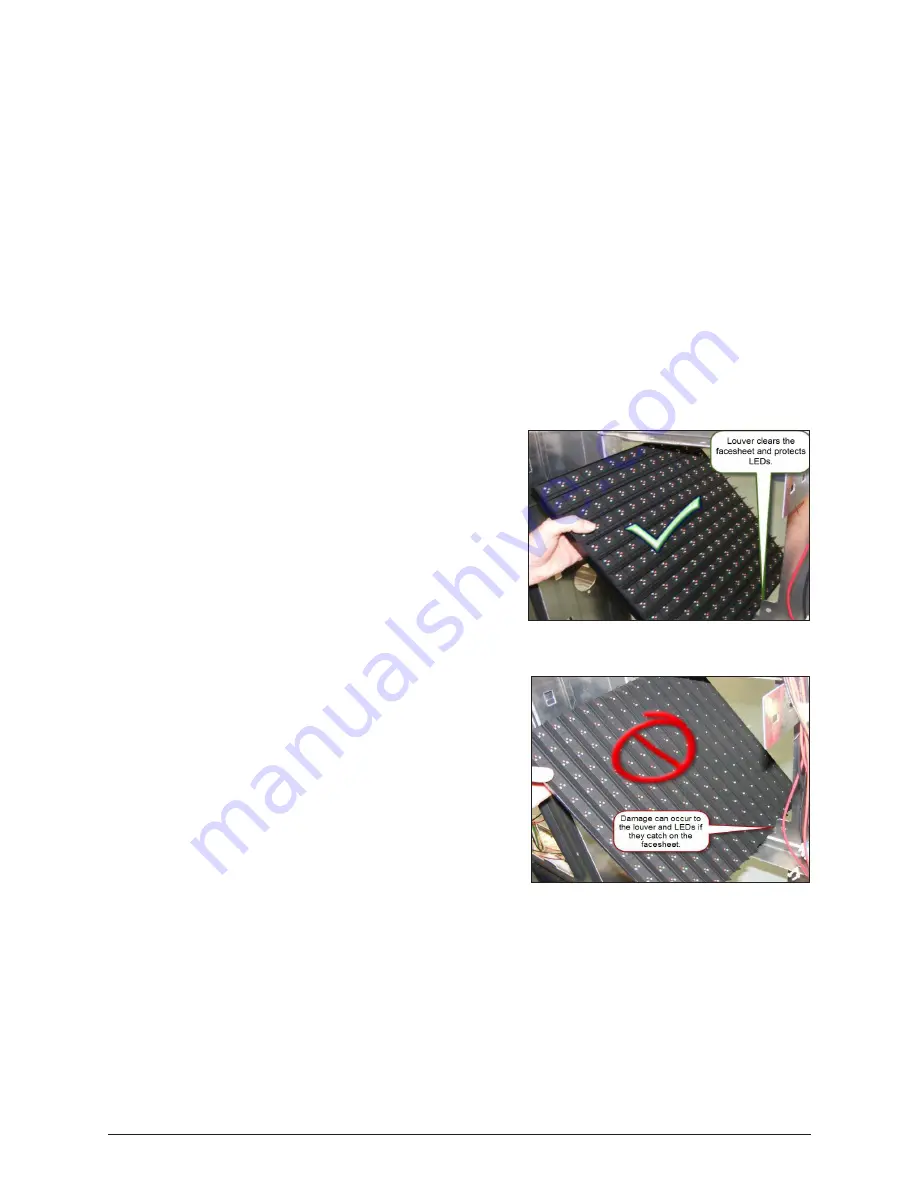
7. Rotate the module in a way that allows you to guide it through the frame opening
without catching the louvers or LEDs on the cabinet.
Figure 8 shows proper module
removal from the back.
Figure 9 shows improper module removal from the back.
Figure 8:
Proper Module Removal from Back
Figure 9:
Improper Module Removal from
Back


