Installer and user reference guide
VRV IV system air conditioner
RXMLQ8T7Y1B*RXYLQ10T7Y1B*RXYLQ12T7Y1B*RXYLQ14T7Y1B*
Page 1: ...Installer and user reference guide VRV IV system air conditioner RXMLQ8T7Y1B RXYLQ10T7Y1B RXYLQ12T7Y1B RXYLQ14T7Y1B...
Page 2: ...2 To use the dry program WITHOUT cool heat changeover remote control switch 29 8 3 3 To use the dry program WITH cool heat changeover remote control switch 29 8 4 Adjusting the air flow direction 30 8...
Page 3: ...rs 52 15 6 To remove the transportation stay 52 16 About the units and options 54 16 1 Overview About the units and options 54 16 2 Identification label Outdoor unit 54 16 3 About the outdoor unit 55...
Page 4: ...wiring 102 19 1 2 Field wiring Overview 104 19 1 3 About the electrical wiring 104 19 1 4 Guidelines when knocking out knockout holes 105 19 1 5 About electrical compliance 106 19 1 6 Safety device re...
Page 5: ...9 23 2 About service mode operation 140 23 2 1 To use vacuum mode 140 23 2 2 To recover refrigerant 140 24 Troubleshooting 142 24 1 Solving problems based on error codes 142 24 2 Error codes Overview...
Page 6: ...ion and operation manual Installation and operation instructions Format Paper in the box of the outdoor unit Installer and user reference guide Preparation of the installation reference data Detailed...
Page 7: ...result in minor or moderate injury NOTICE Indicates a situation that could result in equipment or property damage INFORMATION Indicates useful tips or additional information Symbols used on the unit S...
Page 8: ...NING Improper installation or attachment of equipment or accessories could result in electrical shock short circuit leaks fire or other damage to the equipment Only use accessories optional equipment...
Page 9: ...icient space around the unit for servicing and air circulation Make sure the installation site withstands the weight and vibration of the unit Make sure the area is well ventilated Do NOT block any ve...
Page 10: ...compressor does NOT have to operate WARNING ALWAYS recover the refrigerant Do NOT release them directly into the environment Use a vacuum pump to evacuate the installation NOTICE After all the piping...
Page 11: ...erant Possible consequence Incorrect refrigerant amount 2 1 4 Electrical DANGER RISK OF ELECTROCUTION Turn OFF all power supply before removing the switch box cover connecting electrical wiring or tou...
Page 12: ...ing of the earth leakage protector CAUTION When connecting the power supply connect the earth cable first before making the current carrying connections When disconnecting the power supply disconnect...
Page 13: ...nts box is connected securely Make sure all covers are closed before starting up the unit NOTICE Only applicable if the power supply is three phase and the compressor has an ON OFF starting method If...
Page 14: ...nded when the service cover is removed DANGER RISK OF BURNING SCALDING DANGER RISK OF ELECTROCUTION WARNING Take sufficient precautions in case of refrigerant leakage If refrigerant gas leaks ventilat...
Page 15: ...earth the unit to a utility pipe surge absorber or telephone earth Incomplete earthing may cause electrical shock Install the required fuses or circuit breakers Secure the electrical wiring with cabl...
Page 16: ...er supply stress relief and the terminal block itself must be as such that the current carrying wires are tautened before the earth wire is in case the power supply is pulled loose from the stress rel...
Page 17: ...For the user Installer and user reference guide 17 RXMLQ8 RXYLQ10 14T7Y1B VRV IV system air conditioner 4P543427 1A 2020 10 For the user...
Page 18: ...ons with reduced physical sensory or mental capabilities or lack of experience and knowledge can only use this appliance if they have been given supervision or instruction concerning the use of the ap...
Page 19: ...symbol This means that the batteries may NOT be mixed with unsorted household waste If a chemical symbol is printed beneath the symbol this chemical symbol means that the battery contains a heavy met...
Page 20: ...s in operation Fingers may become caught or the unit may break down CAUTION Do NOT insert fingers rods or other objects into the air inlet or outlet Do NOT remove the fan guard When the fan is rotatin...
Page 21: ...eakage has been repaired or corrected before resuming operation WARNING Stop operation and shut off the power if anything unusual occurs burning smells etc Leaving the unit running under such circumst...
Page 22: ...rect expansion indoor units air to air applications RA direct expansion indoor units air to air applications Hydrobox air to water applications HXY080 125 only AHU air to air applications EKEXV kit is...
Page 23: ...eatures have exclusive model rights or not g c g g h g g c c c d f e b i a a VRV IV Heat pump outdoor unit b Refrigerant piping c VRV direct expansion DX indoor unit d VRV LT Hydrobox HXY080 125 e BP...
Page 24: ...rts inside are dangerous to touch and appliance problems may happen For checking and adjusting the internal parts contact your dealer This operation manual offers a non exhaustive overview of the main...
Page 25: ...oom fumigation type insecticide Chemicals could collect in the unit and endanger the health of people who are hypersensitive to chemicals NOTICE Be sure to turn ON the power 6 hours before operation i...
Page 26: ...bout control systems 32 8 1 Operation range Use the system in the following temperature and humidity ranges for safe and effective operation Cooling Heating Outdoor temperature 5 43 C DB 20 21 C DB 25...
Page 27: ...it s coil During defrost operation the heating capacity on the indoor unit side will temporarily drop until defrosting is completed After defrosting the unit will regain its full heating capacity The...
Page 28: ...r heating Note In case a cool heat changeover remote control switch is used the position of DIP switch 1 DS1 1 on the main PCB needs to be switched to the ON position To start 1 Select operation mode...
Page 29: ...tton of the user interface Result The operation lamp lights up and the system starts operating 3 Press the air flow direction adjust button only for double flow multi flow corner ceiling suspended and...
Page 30: ...the following conditions a micro computer controls the air flow direction which may be different from the display Cooling Heating When the room temperature is lower than the set temperature When start...
Page 31: ...s shown in the figure above it is necessary to designate one of the user interfaces as the master user interface The displays of slave user interfaces show change over under centralised control and sl...
Page 32: ...ce is designated as the master user interface and the display showing change over under centralised control vanishes The displays of other user interfaces show change over under centralised control 8...
Page 33: ...ing Refer to Maintenance in the indoor unit manual When the display shows time to clean the air filter ask a qualified service person to clean the filters Refer to Maintenance in the indoor unit manua...
Page 34: ...temperature is set higher lower cooling heating compared to basic operation The focus under high sensible mode is comfort feeling for the customer The selection method of indoor units is important an...
Page 35: ...operation panel with benzine thinner chemical dust cloth etc The panel may get discoloured or the coating peeled off If it is heavily dirty soak a cloth in water diluted neutral detergent squeeze it w...
Page 36: ...position 10 3 About the refrigerant This product contains fluorinated greenhouse gases Do NOT vent gases into the atmosphere Refrigerant type R410A Global warming potential GWP value 2087 5 NOTICE App...
Page 37: ...emble remove reinstall or repair the unit yourself as incorrect dismantling or installation may cause an electric shock or fire Contact your dealer In case of accidental refrigerant leaks make sure th...
Page 38: ...nit cannot be used if power fluctuation is outside the allowable range Bumps and vibrations are frequent Dust salt harmful gas or oil mist such as sulphurous acid and hydrogen sulfide may be present i...
Page 39: ...r the operation lamp flashes and the malfunction code appears Notify your installer and report the malfunction code If the system does NOT operate properly except for the above mentioned cases and non...
Page 40: ...ration is possible but cooling and heating do not work 43 11 2 4 Symptom The fan speed does not correspond to the setting 43 11 2 5 Symptom The fan direction does not correspond to the setting 43 11 2...
Page 41: ...unction indoor Movement detector or floor temperature sensor malfunction indoor User interface thermistor malfunction indoor PCB malfunction outdoor Current leakage detector was activated outdoor High...
Page 42: ...y voltage Autocharge operation related Fin thermistor malfunction Autocharge operation related Autocharge operation related Autocharge operation related Capacity setting malfunction outdoor Abnormal l...
Page 43: ...ows that this is a slave user interface When the cool heat changeover remote control switch is installed and the display shows change over under centralized control this is because cool heat changeove...
Page 44: ...hen the noise ceases 11 2 9 Symptom Noise of air conditioners Indoor unit A zeen sound is heard immediately after the power supply is turned on The electronic expansion valve inside an indoor unit sta...
Page 45: ...y shows 88 This is the case immediately after the main power supply switch is turned on and means that the user interface is in normal condition This continues for 1 minute 11 2 16 Symptom The compres...
Page 46: ...and user reference guide 46 RXMLQ8 RXYLQ10 14T7Y1B VRV IV system air conditioner 4P543427 1A 2020 10 12 Relocation Contact your dealer for removing and reinstalling the total unit Moving units requir...
Page 47: ...This unit uses hydrofluorocarbon Contact your dealer when discarding this unit NOTICE Do NOT try to dismantle the system yourself dismantling of the system treatment of the refrigerant oil and other p...
Page 48: ...g webpage https energylabel daikin eu 2 To continue choose Continue to Europe for the international website Other country for a country related site Result You are directed to the Seasonal efficiency...
Page 49: ...For the installer Installer and user reference guide 49 RXMLQ8 RXYLQ10 14T7Y1B VRV IV system air conditioner 4P543427 1A 2020 10 For the installer...
Page 50: ...out the box This chapter describes what you have to do after the box with the outdoor unit is delivered on site It contains information about Unpacking and handling the outdoor unit Removing the acces...
Page 51: ...s the unit remains on its pallet as shown above 15 3 To unpack the outdoor unit Remove the packaging material from the unit Take care not to damage the unit when removing the shrink foil with a cutter...
Page 52: ...F LIQUID PIPE SIZE O15 9 x 0 18 TOTAL LENGTH OF LIQUID PIPE SIZE O12 7 x 0 12 TOTAL LENGTH OF LIQUID PIPE SIZE O9 5 x 0 059 TOTAL LENGTH OF LIQUID PIPE SIZE O6 4 x 0 022 105 CR 130 50 CR 105 50 CR 70...
Page 53: ...15 About the box Installer and user reference guide 53 RXMLQ8 RXYLQ10 14T7Y1B VRV IV system air conditioner 4P543427 1A 2020 10 1 1...
Page 54: ...oor units 56 16 5 3 Possible combinations of outdoor units 56 16 5 4 Possible options for the outdoor unit 57 16 1 Overview About the units and options This chapter contains information about Identifi...
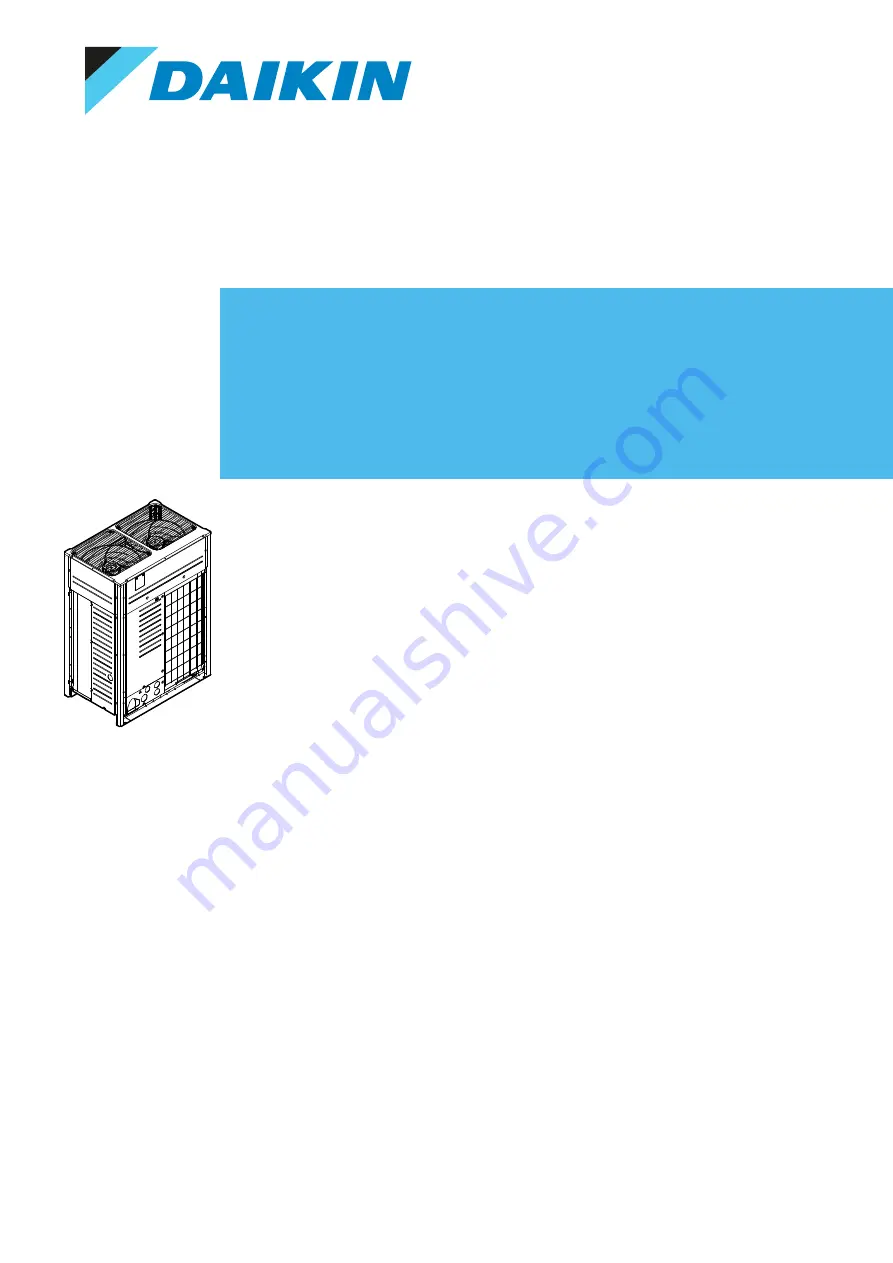
Page 55: ...s have exclusive model rights These units are intended for outdoor installation and aimed for heat pump applications including air to air and air to water applications These units have in single use h...
Page 56: ...rview is given indicating the allowed combinations of indoor units and outdoor units Not all combinations are allowed They are subject to rules combination between outdoor indoor single outdoor unit u...
Page 57: ...LQ30 RXYLQ10 10 10 RXYLQ32 RXYLQ10 10 12 RXYLQ34 RXYLQ10 12 12 RXYLQ36 RXYLQ12 12 12 RXYLQ38 RXYLQ12 12 14 RXYLQ40 RXYLQ12 14 14 RXYLQ42 RXYLQ14 14 14 16 5 4 Possible options for the outdoor unit INFO...
Page 58: ...up or individual can be instructed for low noise operation and power consumption limitation operation PC configurator cable EKPCCAB You can make several commissioning field settings through a personal...
Page 59: ...ocation is selected according the applicable legislation Do NOT install the unit in the following places In potentially explosive atmospheres In places where there is machinery that emits electromagne...
Page 60: ...ater cannot cause any damage to the installation space and surroundings When installing the unit in a small room take measures in order to keep the refrigerant concentration from exceeding allowable s...
Page 61: ...or unit in cold climates NOTICE When operating the unit in a low outdoor ambient temperature be sure to follow the instructions described below To prevent exposure to wind and snow install a baffle pl...
Page 62: ...ds may be applicable if local regulations are not available This system uses R410A as refrigerant R410A itself is an entirely safe non toxic non combustible refrigerant Nevertheless care must be taken...
Page 63: ...sary to comply 1 Calculate the amount of refrigerant kg charged to each system separately Formula A B C A Amount of refrigerant in a single unit system amount of refrigerant with which the system is c...
Page 64: ...shall be made Formula F G H F Total volume of refrigerant in the refrigerant system G Size m3 of smallest room in which there is an indoor unit installed H Maximum concentration level kg m3 4 Calcula...
Page 65: ...e To access the field setting components 4115 17 2 3 To open the electrical component box of the outdoor unit NOTICE Do NOT apply excessive force when opening the electronic component box cover Excess...
Page 66: ...o NOT use stands to only support the corners Stands under the unit must be at least 100 mm wide 100 mm 100 mm NOT allowed Allowed preferred installation The height of the foundation must at least be 1...
Page 67: ...dation to drain waste water from around the unit During heating operation and when the outdoor temperatures are negative the drained water from the outdoor unit will freeze up If the water drainage is...
Page 68: ...2 11 To remove the spun pipes 89 18 3 Checking the refrigerant piping 90 18 3 1 About checking the refrigerant piping 90 18 3 2 Checking refrigerant piping General guidelines 91 18 3 3 Checking refrig...
Page 69: ...een taken into consideration see About the piping length 473 18 1 2 Refrigerant piping insulation Use polyethylene foam as insulation material with a heat transfer rate between 0 041 and 0 052 W mK 0...
Page 70: ...90 x 420 28 6 12 7 420 x 640 15 9 640 x 920 34 9 19 1 920 41 3 Example Downstream capacity for E capacity index of unit 1 Downstream capacity for D capacity index of unit 1 capacity index of unit 2 E...
Page 71: ...Pipe size up is NOT allowed The pipe thickness of the refrigerant piping shall comply with the applicable legislation The minimal pipe thickness for R410A piping must be in accordance with the table...
Page 72: ...xample refer to To select the piping size 469 When using refnet joints at the first branch counted from the outdoor unit side choose from the following table in accordance with the capacity of the out...
Page 73: ...branching as indicated below Three patterns will be discussed including VRV DX indoor units combined with Hydrobox units or RA DX indoor units Definitions Term Definition Actual piping length Pipe le...
Page 74: ...a A h i j k l m n B C D E F G p b c d e f 1 2 3 4 5 6 7 8 g H1 H2 Single outdoor Branch with refnet joint Example 1 2 a b c d e f i k j g h A B 1 2 3 4 5 6 7 8 H1 H2 Single outdoor Branch with refnet...
Page 75: ...lowable length Between outdoor and indoor units single multi combinations Actual piping length 165 m 135 m Example 1 1 unit 8 a b c d e f g p 165 m Example 1 2 unit 6 a b h 165 m unit 8 a i k 165 m Ex...
Page 76: ...m minimum connection ratio connected 80 60 65 m minimum connection ratio connected 90 65 80 m minimum connection ratio connected 100 80 90 m minimum connection ratio connected 110 Liquid piping size u...
Page 77: ...e f g 40 m increase the pipe size of b c d e f g c When the piping size is increased step b the piping length has to be counted as double except for the main pipe and the pipes that are not increased...
Page 78: ...net header 1 m for calculation purposes of equivalent piping length not for refrigerant charge calculations Maximum allowable height difference on Hydrobox indoor unit H1 50 m 40 m if outdoor is locat...
Page 79: ...nch kit 5 m the refrigerant noise from the outdoor unit can be transmitted Example a 5 m Maximum allowable height difference H1 50 m 40 m if outdoor is located below indoor units H2 15 m H4 40 m H5 15...
Page 80: ...retention to the outmost outdoor unit always connect the stop valve and the piping between outdoor units as shown in the 4 correct possibilities of the figure below a b b b a b b b a b a b a b a a a...
Page 81: ...h c Outdoor unit multi connecting piping kit second branch 18 2 Connecting the refrigerant piping 18 2 1 About connecting the refrigerant piping Before connecting the refrigerant piping make sure the...
Page 82: ...es into contact with fire WARNING ALWAYS recover the refrigerant Do NOT release them directly into the environment Use a vacuum pump to evacuate the installation Only use phosphoric acid deoxidised se...
Page 83: ...ng knockout holes Avoid damaging the casing After making the knockout holes we recommend you remove the burrs and paint the edges and areas around the edges using repair paint to prevent rusting When...
Page 84: ...the multi connection piping kit NOTICE Improper installation may lead to malfunction of the outdoor unit Install the joints horizontally so that the caution label a attached to the joint comes to the...
Page 85: ...nstallation period Protection method Outdoor unit 1 month Pinch the pipe 1 month Pinch or tape the pipe Indoor unit Regardless of the period Seal the piping and wiring intake holes using sealing mater...
Page 86: ...anual valve e Pressure reducing valve f Nitrogen Do NOT use anti oxidants when brazing pipe joints Residue can clog pipes and break equipment Do NOT use flux when brazing copper to copper refrigerant...
Page 87: ...he valve body To open the stop valve 1 Remove the stop valve cover 2 Insert a hexagon wrench into the stop valve and turn the stop valve counterclockwise 3 When the stop valve cannot be turned any fur...
Page 88: ...tighten the stop valve cover securely and check for refrigerant leaks For the tightening torque refer to the table below To handle the service port Always use a charge hose equipped with a valve depr...
Page 89: ...ves are fully closed 2 Connect the vacuuming recovery unit through a manifold to the service port of all stop valves p p R410A N2 b c e a f g d A B a Pressure reducing valve b Nitrogen c Weighing scal...
Page 90: ...ethod 1 Before power ON regular method Yes No No Yes It is very important that all refrigerant piping work is done before the units outdoor or indoor are powered on When the units are powered on the e...
Page 91: ...for leaks Only field installed refrigerant piping needs to be checked Therefore make sure that all the outdoor unit stop valves are firmly closed before performing leak test or vacuum drying NOTICE Ma...
Page 92: ...ng should be done before the power supply is set to the unit If not see also the flow chart earlier described in this chapter see About checking the refrigerant piping 490 18 3 4 To perform a leak tes...
Page 93: ...1 hour 3 Should you fail to reach the target vacuum within 2 hours or maintain the vacuum for 1 hour the system may contain too much moisture In that case break the vacuum by pressurising with nitrog...
Page 94: ...charging refrigerant WARNING ONLY use R410A as refrigerant Other substances may cause explosions and accidents R410A contains fluorinated greenhouse gases Its global warming potential GWP value is 208...
Page 95: ...se of larger systems recommended to first pre charge a portion of refrigerant through the liquid line before proceeding with the manual charging This step is included in below procedure see To charge...
Page 96: ...factor Piping Weight factor 6 4 mm 0 022 6 mm 0 018 9 5 mm 0 059 10 mm 0 065 12 7 mm 0 12 12 mm 0 097 15 9 mm 0 18 15 mm 0 16 16 mm 0 18 19 1 mm 0 26 18 mm 0 24 22 2 mm 0 37 22 mm 0 35 Connection rat...
Page 97: ...arging refrigerant Step 1 Calculate additional refrigerant charge amount R kg Refrigerant overcharge happened recover refrigerant to reach R Q Step 2 Open valves C and B to the liquid line Execute pre...
Page 98: ...t stop valves R Q Continuation of previous page p p R410A d A 18 4 5 To charge refrigerant Follow the steps as described below Pre charging refrigerant 1 Calculate the additional amount of refrigerant...
Page 99: ...pre charging Close valves C and B disconnect the manifold connection to the liquid line and perform steps 4 8 INFORMATION If the total additional refrigerant amount was reached in step 4 by pre chargi...
Page 100: ...charged by operating the outdoor unit by means of the manual refrigerant charge operation mode 1 Take all the precautions mentioned in 20 Configuration 4 113 and 21 Commissioning 4133 into account 2...
Page 101: ...actory refrigerant charge see unit name plate c Additional refrigerant amount charged d Total refrigerant charge e Quantity of fluorinated greenhouse gases of the total refrigerant charge expressed as...
Page 102: ...e transmission wiring 108 19 4 To finish the transmission wiring 109 19 5 To route and fix the power supply 110 19 6 To connect the power supply 110 19 7 To check the insulation resistance of the comp...
Page 103: ...ace redundant cable length in the unit NOTICE The distance between the high voltage and low voltage cables should be at least 50 mm NOTICE Do NOT operate the unit until the refrigerant piping is compl...
Page 104: ...in switch c Earth connection d Outdoor unit e Indoor unit f User interface g Indoor power supply wiring sheathed cable 230 V h Transmission wiring sheathed cable 16 V i Outdoor power supply wiring she...
Page 105: ...b b h e f g g d c a Outdoor unit b Indoor unit c Main line d Branch line 1 e Branch line 2 f Branch line 3 g No branch is allowed after branch h Central user interface etc A Outdoor indoor transmissi...
Page 106: ...ess than or equal to Zmax EN IEC 61000 3 12 provided that the short circuit power Ssc is greater than or equal to the minimum Ssc value at the interface point between the user s supply and the public...
Page 107: ...all models Phase and frequency 3N 50 Hz Voltage 380 415 V Transmission line section 0 75 1 25 mm2 maximum length is 1000 m If the total transmission wiring exceeds these limits it may result in commu...
Page 108: ...b Transmission wiring possibility 2 a Fix to pipe insulation with tie wraps c Tie wrap Fix to factory mounted low voltage wiring d Tie wrap a Knockout hole has to be removed Close the hole to avoid s...
Page 109: ...door unit c Unit C slave outdoor unit d Master slave transmission Q1 Q2 e Outdoor indoor transmission F1 F2 f Outdoor unit other system transmission F1 F2 The interconnecting wiring between the outdoo...
Page 110: ...his instruction properly may adversely affect correct operation of other units connected to the same earth The power supply wiring can be routed from the front and left side Fix it to the lower mounti...
Page 111: ...necting the earth wire align the wire with the cut out section of the cup washer Incomplete earthing may cause electrical shock The power supply MUST be clamped to the plastic bracket using field supp...
Page 112: ...s can drop but if it is at least 1 M then the unit will not break down Use a 500 V mega tester when measuring insulation Do NOT use a mega tester for low voltage circuits 1 Measure the insulation resi...
Page 113: ...20 3 4 Example Automatic mode during heating 131 20 1 Overview Configuration This chapter describes what you have to do and know to configure the system after it is installed It contains information a...
Page 114: ...face for this option EKPCCAB is required The installer can prepare the configuration off site on PC and afterwards upload the configuration to the system See also To connect the PC configurator to the...
Page 115: ...inspection cover of the electrical component box front plate see figure You can see the three push buttons and the three 7 segment displays and DIP switches 2 a b c a Front plate b Main PCB with 3 7 s...
Page 116: ...le occurs lighted as indicated 8 10 min Ready for operation blank display indication as indicated 7 segment display indications Off Blinking On In case of malfunction the malfunction code is displayed...
Page 117: ...7 segment display indication is in the default situation normal operation 2 Push BS1 one time Result Mode 1 is accessed 3 Push BS2 10 times Result Mode 1 setting 10 is addressed 4 Push BS3 one time th...
Page 118: ...Result Mode 2 is accessed 3 Push BS2 18 times Result Mode 2 setting 18 is addressed 4 Push BS3 1 time the value which is returned depending on the actual field situation is the status of the setting...
Page 119: ...operation an optional accessory is required 1 2 Shows the status of power consumption limitation operation Power consumption limitation reduces the power consumption of the unit compared to nominal op...
Page 120: ...ode When the latest malfunction codes were reset by accident on an indoor unit user interface they can be checked again through this monitoring settings For the content or reason behind the malfunctio...
Page 121: ...ction delivered with the adaptor for further details 2 4 Cooling heating test run setting For settings 1 and 2 in case room temperature is below 25 C and ambient temperature is below 15 C a part of th...
Page 122: ...ed 2 20 Manual additional refrigerant charge In order to add the additional refrigerant charge amount in a manual way without automatic refrigerant charging functionality following setting should be a...
Page 123: ...escription 0 default Deactivated 1 Level 1 Level 3 Level 2 Level 1 2 Level 2 3 Level 3 2 25 Low noise operation level via the external control adaptor If the system needs to be running under low noise...
Page 124: ...mption limitation level step 2 via the external control adaptor DTA104A61 62 If the system needs to be running under power consumption limitation conditions when an external signal is sent to the unit...
Page 125: ...e highest position indoor units are installed on a lower position than outdoor units and the height difference between the lowest indoor unit and the outdoor unit exceeds 50 m the setting 2 49 has to...
Page 126: ...epending on the priority emphasises can be put on energy saving or comfort level Several parameters can be selected resulting in the optimal balance between energy consumption and comfort for the part...
Page 127: ...ncy E g when your system is operating in heating you do not need as much heating under high outdoor ambient temperatures e g 15 C as under low outdoor ambient temperatures e g 5 C Using this idea the...
Page 128: ...eration the condense temperature is allowed to go up to 49 C on temporary base depending on the situation When the request from the indoor units becomes more moderate the system will eventually go to...
Page 129: ...emporary base depending on the situation In case of heating operation the condense temperature is allowed to go up to 46 C on temporary base depending on the situation When the request from the indoor...
Page 130: ...A Actual load curve B Virtual load curve initial capacity automatic mode C Virtual target value initial evaporation temperature value automatic mode D Required evaporation temperature value E Load fa...
Page 131: ...c C D 49 C 46 C F 2 C A Virtual load curve default automatic mode peak capacity B Load curve C Virtual target value initial condensation temperature value automatic mode D Design temperature E Load fa...
Page 132: ...20 Configuration Installer and user reference guide 132 RXMLQ8 RXYLQ10 14T7Y1B VRV IV system air conditioner 4P543427 1A 2020 10 E Quick F Powerful...
Page 133: ...pletion of the test run 137 21 7 Operating the unit 137 21 1 Overview Commissioning After installation and once the field settings are defined the installer is obliged to verify correct operation Ther...
Page 134: ...he items listed below Once all checks are fulfilled the unit must be closed Power up the unit after it is closed You read the complete installation and operation instructions as described in the insta...
Page 135: ...terial Additional refrigerant charge The amount of refrigerant to be added to the unit shall be written on the included Added refrigerant plate and attached to the rear side of the front cover Install...
Page 136: ...the power 6 hours before operation in order to have power running to the crankcase heater and to protect the compressor 4 Make sure the default idle situation is existing see To access mode 1 or 2 411...
Page 137: ...137 to take actions for correcting the abnormality When the test operation is fully completed normal operation will be possible after 5 minutes 21 6 Correcting after abnormal completion of the test ru...
Page 138: ...properly please make sure the following is clear for the user Make sure that the user has the printed documentation and ask him her to keep it for future reference Inform the user that he can find th...
Page 139: ...23 2 1 To use vacuum mode 140 23 2 2 To recover refrigerant 140 23 1 Maintenance safety precautions DANGER RISK OF ELECTROCUTION DANGER RISK OF BURNING SCALDING NOTICE Risk of electrostatic discharge...
Page 140: ...the fan It is dangerous to inspect the unit while the fan is running Make sure to turn off the main switch and to remove the fuses from the control circuit located in the outdoor unit 23 2 About servi...
Page 141: ...frigerant circuit Do NOT use the unit s automatic pump down function with which you can collect all refrigerant from the system into the outdoor unit Possible consequence Self combustion and explosion...
Page 142: ...main malfunction code and a sub code The sub code indicates more detailed information about the malfunction code The malfunction code will be displayed intermittent Example Code Example Main code Sub...
Page 143: ...A Check connection on PCB or actuator Electronic expansion valve malfunction main Y1E A1P X23A Check connection on PCB or actuator Electronic expansion valve malfunction storage vessel Y3E A1P X22A Ch...
Page 144: ...ction R8T open circuit A1P X29A Check connection on PCB or actuator Compressor casing temperature sensor malfunction R8T short circuit A1P X29A Check connection on PCB or actuator Suction temperature...
Page 145: ...unit inverter INV2 transmission trouble A1P X20A X28A X40A Check connection INV1 unbalanced power supply voltage Check if power supply is within range INV2 unbalanced power supply voltage Check if po...
Page 146: ...malfunction and confirm indoor unit mix is allowed Connection malfunction over indoor units or type mismatch R410A R407C RA Hydrobox etc Check if other indoor units have malfunction and confirm indoor...
Page 147: ...procedure Automatic charging nearly finished Prepare for autocharge stopping Automatic charging finished Finish autocharge mode Leak detection function related Unit is not prepared to execute leak de...
Page 148: ...itioner 4P543427 1A 2020 10 25 Disposal NOTICE Do NOT try to dismantle the system yourself dismantling of the system treatment of the refrigerant oil and other parts MUST comply with applicable legisl...
Page 149: ...6 2 Piping diagram Outdoor unit 151 26 3 Wiring diagram Outdoor unit 151 26 1 Service space Outdoor unit Make sure the space around the unit is adequate for servicing and the minimum space for air inl...
Page 150: ...obstacles the wall heights of sides A C have no impact on service space dimensions Refer to the figure above for impact of wall heights of sides B D on service space dimensions In case of an installa...
Page 151: ...Y1E g Expansion valve subcool heat exchanger Y2E h Subcool heat exchanger i Oil separator j 4 way valve main Y1S k Solenoid valve oil accumulator Y2S l Solenoid valve oil1 Y3S m Solenoid valve inject...
Page 152: ...s 2 Do not operate the unit by short circuiting protection device S1PH 3 For connection of indoor outdoor F1 F2 transmission wiring and outdoor outdoor F1 F2 transmission wiring refer to the service m...
Page 153: ...ker Q1RP A1P Phase reversal detect circuit R A3P Resistor R T Thermistor R V A2P Varistor S1NPH High pressure sensor S1NPL Low pressure sensor S1PH High pressure switch discharge S1S Air control switc...
Page 154: ...roduct or application explaining how to install configure and maintain it Operation manual Instruction manual specified for a certain product or application explaining how to operate it Maintenance in...
Page 155: ......
Page 156: ...4P543427 1A 2020 10 Copyright 2018 Daikin Verantwortung f r Energie und Umwelt...