IM 777-18 • SKYLINE OUTDOOR AIR HANDLER 38 www.DaikinApplied.com
o
peraTIon
G
uIdelInes
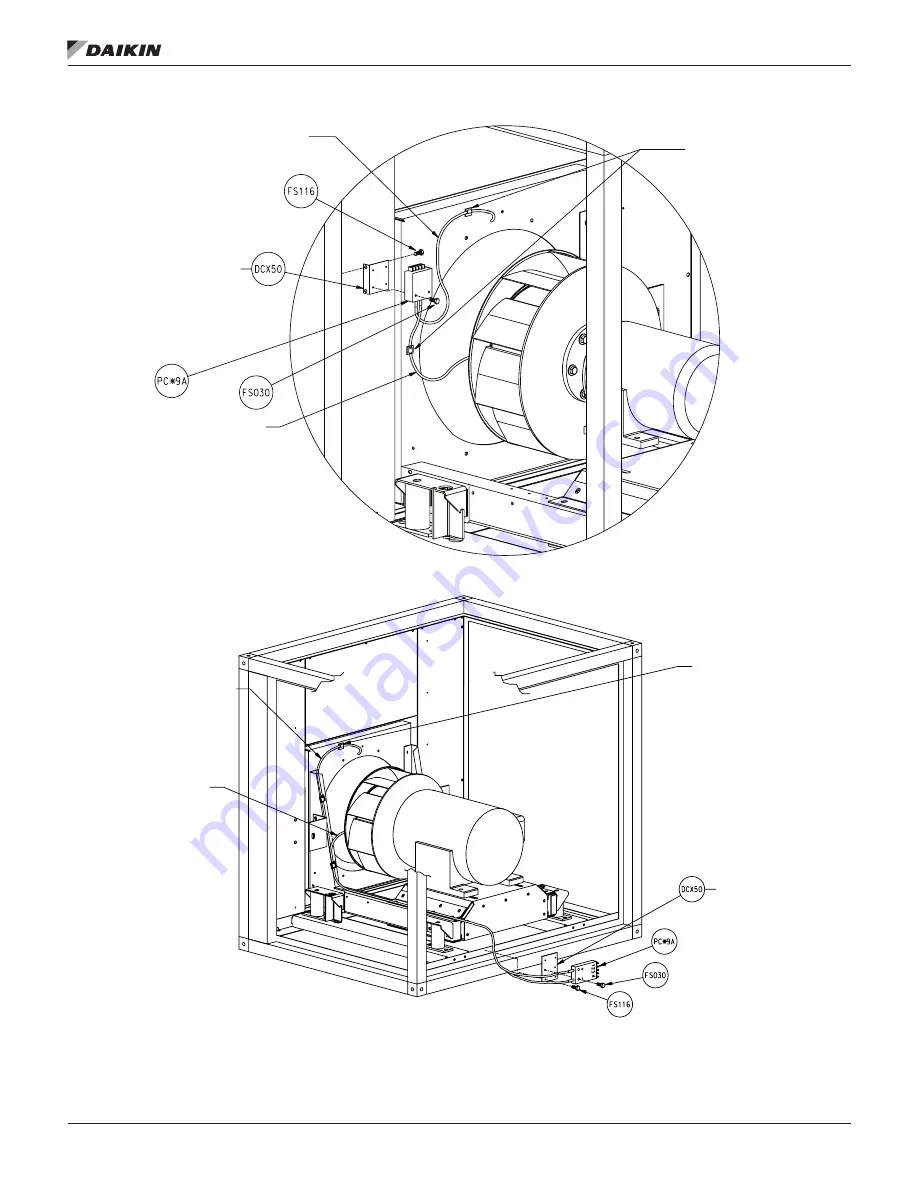
Figure 66: Direct-drive Plenum Fan Installation
Figure 67: Fan Array Installation
Route tube (DCX56) from the high pressure tap
of the transmitter to the outer face of the funnel
or the inlet panel.
Location may vary depending on fan size.
Position mounting angle as close to the
unit drive side access door as possible
without interfering with the door hardware
and at eye level. Or equal to half of the
cabinet door height.
Screw to liner or bulkhead with FS116.
Route tube (DCX56) from the low pressure tap
of the transmitter to the Piezo Ring located on
the throat of the funnel.
Secure tubing to the fan assembly
using cable-tie mount (DCX52) and
Cable-tie (DCX54) as needed.
Make sure any tubing does not
interfere with the fan wheel.
NOTE:
Never drill or screw through
the inlet funnel.
Secure tubing to the fan assembly
using cable-tie mount (DCX52) and
Cable-tie (DCX54) as needed.
Make sure any tubing does not
interfere with the fan wheel.
Position the mounting plate on the
fan support angle in a location that
allows maximum access for field wiring.
Fasten the plate to the fan support angle
using two screws (FS116).
Route tube (DCX56) from the high pressure tap
of the transmitter to the outer face of the funnel
or the inlet panel.
Location may vary depending on fan size.
Route tube (DCX56) from the low pressure tap
of the transmitter to the Piezo Ring located on
the throat of the funnel.
NOTE:
Never drill or screw through
the inlet funnel.


