OM 1085-6 • MICROTECH III CONTROLLER 38 www.DaikinApplied.com
Troubleshooting Guide and FAQ
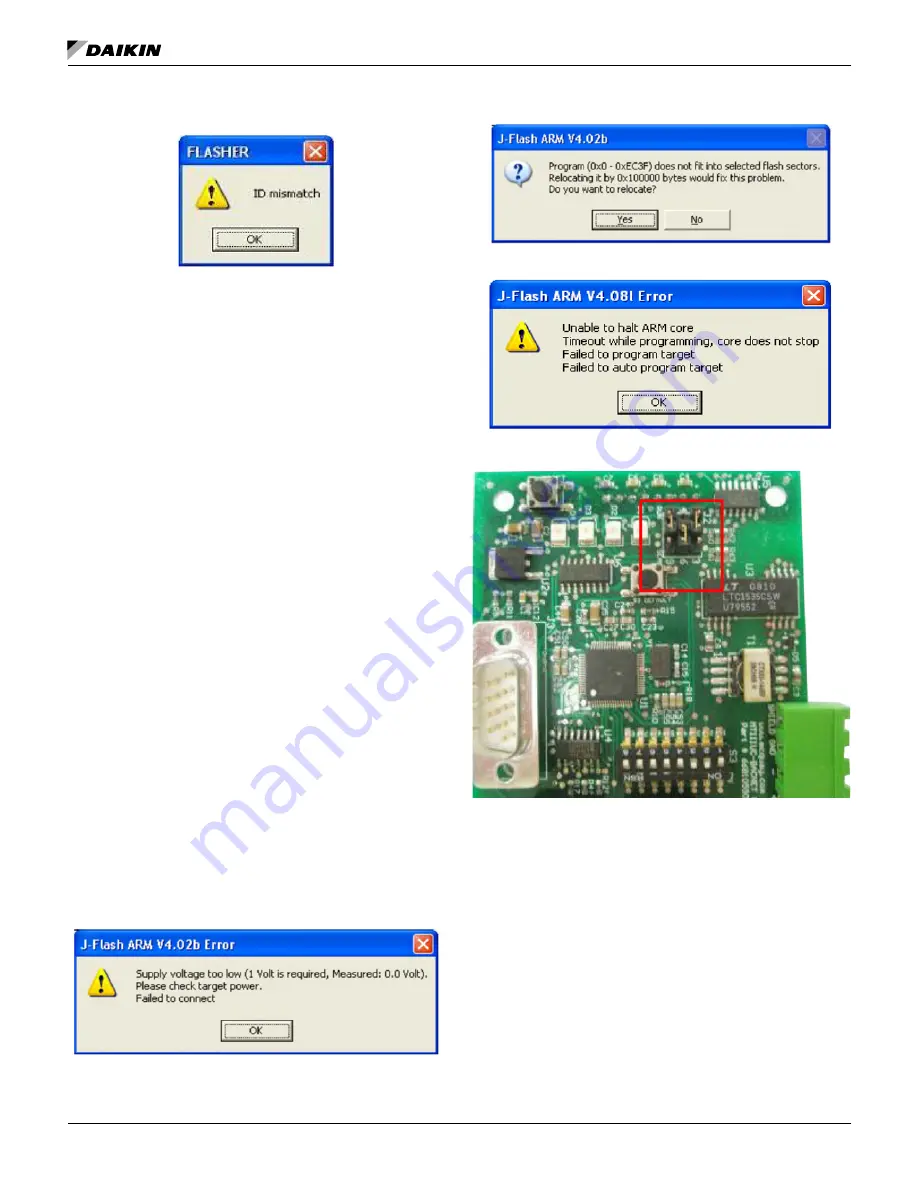
Figure 68:
Download Error Message
Segger J-Link/J-Flash ARM
The following section summarizes common issues with J-Link
tools and the corresponding solutions.
Q:
“Failed to connect” error message appears
A:
If the message shown in
steps:
1. Verify that the unit controller has power.
2. Select Auto from the J-Flash Target tab.
3. Click Yes if the message shown in
4. If the message shown in
communication module flash memory must be manually
erased by continuing to Step 5 below. If this message
does not appear, proceed to the Download BACnet
Communication Module Software section.
5. Remove the jumper from pin 4 and pin 5 on J2 of the
BACnet communication module, if connected (
.
6. With power applied to the unit controller, connect the
jumper between pin 5 and pin 6 on J2 of the BACnet
communication module as shown in
.
7. Remove power from the unit controller.
8. Remove the jumper from pin 5 and 6 on J2 of the
BACnet communication module, replacing the jumper on
pin 4 and pin 5 of the BACnet communication module, if
previously connected.
9.
Apply power to the unit controller. The flash memory has
now been completely erased, so all configured settings
return to default values.
10. Proceed to the Download BACnet Communication
Module Software section.
Figure 69: Failed to Connect Error Message
Figure 70: Relocate Message
Figure 71: Locked Program Error Message
Figure 72:
Manual Erase Jumpers
Summary of Contents for MicroTech III
Page 39: ......


