background image

1

 | 

General safety precautions

Installer reference guide

5

FNA25~60A2VEB(9)
Split system air conditioners
4P550955-3C – 2020.12

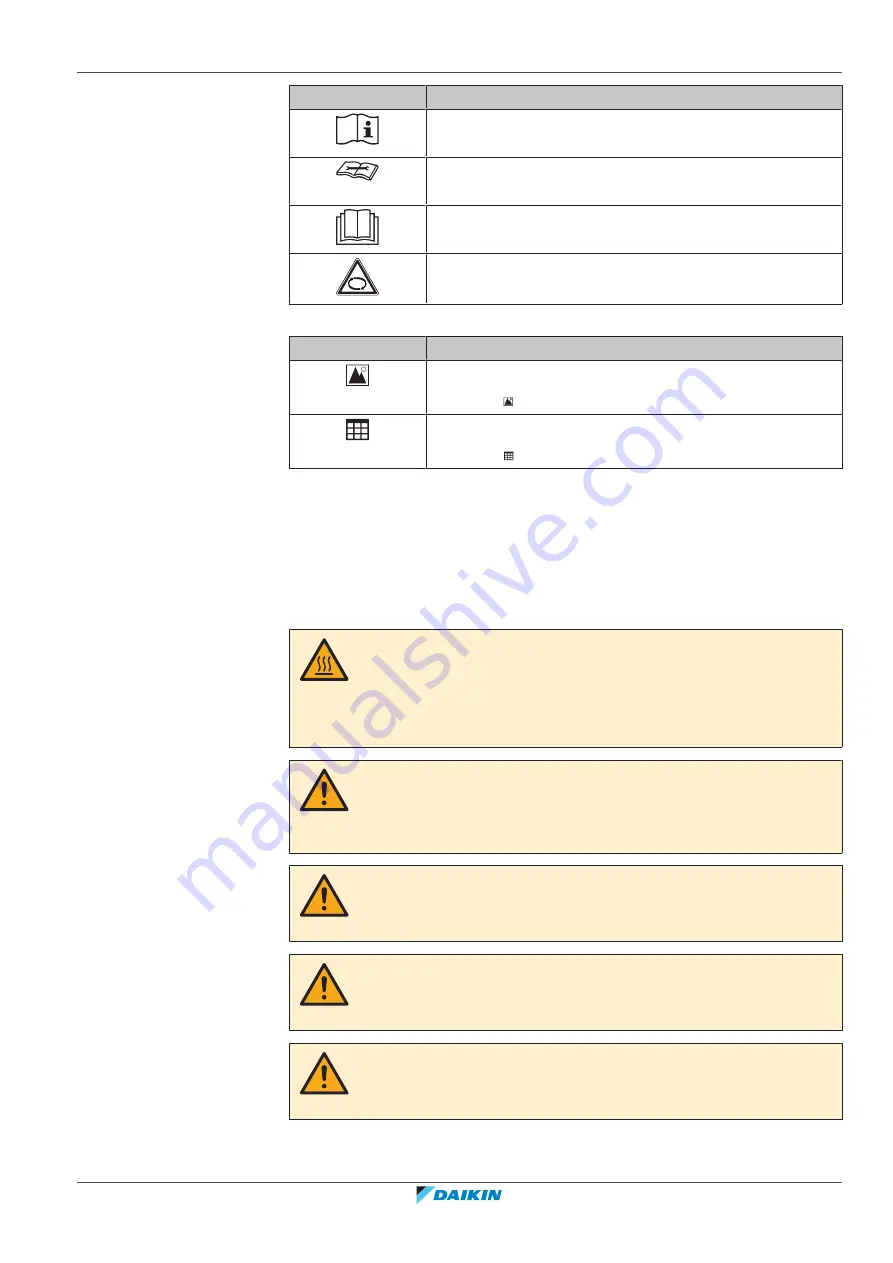
Symbol

Explanation

Before installation, read the installation and operation
manual, and the wiring instruction sheet.

Before performing maintenance and service tasks, read the
service manual.

For more information, see the installer and user reference
guide.

The unit contains rotating parts. Be careful when servicing or
inspecting the unit.

Symbols used in the documentation:

Symbol

Explanation

Indicates a figure title or a reference to it.

Example: 

"  1–3 Figure title" means "Figure 3 in chapter 1".

Indicates a table title or a reference to it.

Example: 

"  1–3 Table title" means "Table 3 in chapter 1".

1.2 For the installer

1.2.1 General

If you are NOT sure how to install or operate the unit, contact your dealer.

DANGER: RISK OF BURNING/SCALDING

Do  NOT  touch  the  refrigerant  piping,  water  piping  or  internal  parts  during  and
immediately after operation. It could be too hot or too cold. Give it time to return
to normal temperature. If you must touch it, wear protective gloves.

Do NOT touch any accidental leaking refrigerant.

WARNING

Improper  installation  or  attachment  of  equipment  or  accessories  could  result  in
electrical shock, short-circuit, leaks, fire or other damage to the equipment. Only use
accessories, optional equipment and spare parts made or approved by Daikin.

WARNING

Make  sure  installation,  testing  and  applied  materials  comply  with  applicable
legislation (on top of the instructions described in the Daikin documentation).

CAUTION

Wear  adequate  personal  protective  equipment  (protective  gloves,  safety  glasses,…)
when installing, maintaining or servicing the system.

WARNING

Tear  apart  and  throw  away  plastic  packaging  bags  so  that  nobody,  especially
children, can play with them. Possible risk: suffocation.

Summary of Contents for FNA25A2VEB

Page 1: ...Installer reference guide Split system air conditioners FNA25A2VEB FNA35A2VEB FNA50A2VEB FNA60A2VEB FNA25A2VEB9 FNA35A2VEB9 FNA50A2VEB9 FNA60A2VEB9 ...

Page 2: ...ation 23 5 4 Preparing electrical wiring 23 5 4 1 About preparing electrical wiring 23 6 Installation 25 6 1 Overview Installation 25 6 2 Mounting the indoor unit 25 6 2 1 Precautions when mounting the indoor unit 25 6 2 2 Guidelines when installing the indoor unit 25 6 2 3 Guidelines when installing the ducting 30 6 2 4 Guidelines when installing the drain piping 32 6 3 Connecting the refrigerant...

Page 3: ...e of contents Installer reference guide 3 FNA25 60A2VEB 9 Split system air conditioners 4P550955 3C 2020 12 10 Technical data 47 10 1 Wiring diagram 47 10 1 1 Unified wiring diagram legend 47 11 Glossary 50 ...

Page 4: ...ning of warnings and symbols DANGER Indicates a situation that results in death or serious injury DANGER RISK OF ELECTROCUTION Indicates a situation that could result in electrocution DANGER RISK OF BURNING SCALDING Indicates a situation that could result in burning scalding because of extreme hot or cold temperatures DANGER RISK OF EXPLOSION Indicates a situation that could result in explosion WA...

Page 5: ...ct your dealer DANGER RISK OF BURNING SCALDING Do NOT touch the refrigerant piping water piping or internal parts during and immediately after operation It could be too hot or too cold Give it time to return to normal temperature If you must touch it wear protective gloves Do NOT touch any accidental leaking refrigerant WARNING Improper installation or attachment of equipment or accessories could ...

Page 6: ...product Instructions for shutting down the system in case of an emergency Name and address of fire department police and hospital Name address and day and night telephone numbers for obtaining service In Europe EN378 provides the necessary guidance for this logbook 1 2 2 Installation site Provide sufficient space around the unit for servicing and air circulation Make sure the installation site wit...

Page 7: ...iance or an operating electric heater in case the floor area is less than the minimum floor area A m no auxiliary devices which may be a potential ignition source are installed in the duct work example hot surfaces with a temperature exceeding 700 C and electric switching device only auxiliary devices approved by the manufacturer are used in the duct work air inlet AND outlet are connected directl...

Page 8: ... the installation manual Outdoor units installed or stored indoors e g winter garden garage machinery room NOTICE Pipework shall be protected from physical damage Installation of pipework shall be kept to a minimum To determine the minimum floor area 1 Determine the total refrigerant charge in the system factory refrigerant charge additional refrigerant amount charged Contains fluorinated greenhou...

Page 9: ...7 6 36 6 4 0 136 7 6 492 4 2 11 2 7 8 38 5 4 2 150 7 8 518 4 4 12 3 4 4 165 m kg Amin m2 4 6 20 0 4 8 21 8 5 0 23 6 1 842 5 2 25 6 1 843 4 45 5 4 27 6 2 0 4 83 5 6 29 7 2 2 5 31 5 8 31 8 2 4 5 79 6 0 34 0 2 6 6 39 6 2 36 4 2 8 7 41 6 4 38 7 3 0 8 51 6 6 41 2 3 2 9 68 6 8 43 7 3 4 10 9 7 0 46 3 3 6 12 3 7 2 49 0 3 8 13 7 7 4 51 8 4 0 15 1 7 6 54 6 4 2 16 7 7 8 57 5 4 4 18 3 8 40 5 8 2 42 6 8 4 44 7...

Page 10: ...elease them directly into the environment Use a vacuum pump to evacuate the installation NOTICE After all the piping has been connected make sure there is no gas leak Use nitrogen to perform a gas leak detection NOTICE To avoid compressor breakdown do NOT charge more than the specified amount of refrigerant When the refrigerant system is to be opened refrigerant MUST be treated according to the ap...

Page 11: ...ossible consequence Incorrect refrigerant amount 1 2 4 Electrical DANGER RISK OF ELECTROCUTION Turn OFF all power supply before removing the switch box cover connecting electrical wiring or touching electrical parts Disconnect the power supply for more than 10 minutes and measure the voltage at the terminals of main circuit capacitors or electrical components before servicing The voltage MUST be l...

Page 12: ...CAUTION When connecting the power supply connect the earth cable first before making the current carrying connections When disconnecting the power supply disconnect the current carrying cables first before separating the earth connection The length of the conductors between the power supply stress relief and the terminal block itself must be as such that the current carrying wires are tautened bef...

Page 13: ... the power supply is three phase and the compressor has an ON OFF starting method If there exists the possibility of reversed phase after a momentary black out and the power goes on and off while the product is operating attach a reversed phase protection circuit locally Running the product in reversed phase can break the compressor and other parts ...

Page 14: ...unit installation manual Installation instructions Format Paper in the box of the indoor unit Installer reference guide Preparation of the installation good practices reference data Format Digital files on http www daikineurope com support and manuals product information Latest revisions of the supplied documentation may be available on the regional Daikin website or via your dealer The original d...

Page 15: ...units and options System layout Combining units and options Preparation What to do and know before going on site Installation What to do and know to install the system Commissioning What to do and know to commission the system after it is configured Hand over to the user What to give and explain to the user Disposal How to dispose of the system Technical data Specifications of the system Glossary ...

Page 16: ...nce 3 2 Indoor unit WARNING FLAMMABLE MATERIAL The R32 refrigerant if applicable in this unit is mildly flammable Refer to the outdoor unit specifications for the type of refrigerant to be used 3 2 1 To unpack and handle the unit Use a sling of soft material or protective plates together with a rope when lifting the unit This to avoid damage or scratches to the unit 1 Lift the unit by holding on t...

Page 17: ...2VEB 9 Split system air conditioners 4P550955 3C 2020 12 g Sealing pads small and large h Drain hose i Sealing material j Insulation piece Small liquid pipe k Insulation piece Large gas pipe l Tie wraps m Washer fixing plate n Air filter o Levelling screws ...

Page 18: ...or paint near the unit It may cause a fire NOTICE Do NOT wipe the controller operation panel with benzine thinner chemical dust cloth etc The panel may get discoloured or the coating peeled off If it is heavily dirty soak a cloth in water diluted neutral detergent squeeze it well and wipe the panel clean Wipe it with another dry cloth 4 2 System layout INFORMATION The following illustration is an ...

Page 19: ...ollowing mandatory options User interface Wired or wireless Select a user interface in accordance with the customer s request Refer to the table below to select a suitable user interface User interface Wired user interface BRC1D52 BRC1E53A7 BRC1E53B7 BRC1E53C7 Always use one of the following mandatory user interfaces for units using R32 refrigerant 1 BRC1H52K BRC1H52S BRC1H52W Wireless user interf...

Page 20: ...normality 1 CAUTION Do NOT install or use in highly airtight spaces e g soundproof chambers or rooms with sealed doors 1 CAUTION This unit is equipped with electrically powered safety measures such as a refrigerant leak detector In order to be effective the unit must be electrically powered at all times after installation except for short service periods 1 WARNING Do NOT install the air conditione...

Page 21: ...ion noise or the hot cold air discharged from the unit will not disturb anyone WARNING Do NOT place objects below the indoor and or outdoor unit that may get wet Otherwise condensation on the main unit or refrigerant pipes air filter dirt or drain blockage may cause dripping and objects under the unit may get dirty or damaged Air flow Make sure nothing blocks the air flow Drainage Make sure conden...

Page 22: ...l In case of installation under a window sill make sure that there is no short circuit of air 5 3 Preparing refrigerant piping 5 3 1 Refrigerant piping requirements INFORMATION Also read the precautions and requirements in the 1 General safety precautions 44 NOTICE The piping and other pressure containing parts shall be suitable for refrigerant Use phosphoric acid deoxidised seamless copper for re...

Page 23: ...tion Use polyethylene foam as insulation material with a heat transfer rate between 0 041 and 0 052 W mK 0 035 and 0 045 kcal mh C with a heat resistance of at least 120 C Insulation thickness Pipe outer diameter Øp Insulation inner diameter Øi Insulation thickness t 6 4 mm 1 4 8 10 mm 10 mm 9 5 mm 3 8 12 15 mm 13 mm 12 7 mm 1 2 14 16 mm 13 mm Øi Øi t Øp Øp If the temperature is higher than 30 C a...

Page 24: ... or piping particularly on the high pressure side Do NOT use taped wires stranded conductor wires extension cords or connections from a star system They can cause overheating electrical shock or fire Do NOT install a phase advancing capacitor because this unit is equipped with an inverter A phase advancing capacitor will reduce performance and may cause accidents WARNING All wiring MUST be perform...

Page 25: ...ORMATION Also read the precautions and requirements in the following chapters General safety precautions Preparation 6 2 2 Guidelines when installing the indoor unit INFORMATION Optional equipment When installing optional equipment also read the installation manual of the optional equipment Depending on the field conditions it might be easier to install the optional equipment first Wall or floor s...

Page 26: ...in the system m the minimum floor area is Amin INFORMATION If the required exact value for the total refrigerant charge in the system m is not listed below use the closest higher value In case the total refrigerant charge in the system is 3 9 kg refer to To determine the minimum floor area in the General safety precaution FNA25 35 FNA50 60 m kg Amin m2 1 842 No requirements 1 843 6 2 5 5 1 9 6 4 5...

Page 27: ... 5 6 7 8 9 10 11 12 13 14 2 2 1 1 9 1 8 2 2 2 3 2 5 2 7 2 9 3 1 3 3 3 5 2 4 2 6 2 8 3 3 2 3 4 3 6 3 8 3 9 3 7 m kg A min m 2 FNA25 35 5 6 7 8 9 10 11 12 13 1 8 1 843 2 2 1 1 9 2 2 2 3 2 5 2 7 2 9 3 1 3 3 3 5 2 4 2 6 2 8 3 3 2 3 4 3 6 3 8 3 9 3 7 m kg FNA50 60 A min m 2 1 843 Amin Minimum floor area m Refrigerant charge amount in the system Floor standing installation B A a a c b 100 760 A Maintena...

Page 28: ...Maintenance area width B Air inlet grille width a Air outlet direction b Air inlet grille height c Air inlet direction Class A mm B mm 25 35 1350 660 50 60 1750 1060 External static pressure Refer to technical documentation to ensure that the unit s external static pressure is not exceeded Removing the legs If it is necessary to remove the legs follow these instructions b a 2 1 b A B A Bottom view...

Page 29: ...grille and the suction cover from the front side 7 c b d d a a c b A B A Removing the suction cover B Reattaching the suction cover a Suction cover b Protective grille c Air inlet d Air outlet 7 Remove one leg on the opposite side of the electronic component box 8 Reattach the removed suction cover to the bottom side 9 Attach the protective grille to the front side 10 Reattach the leg if necessary...

Page 30: ...floor fasteners field supply 2 6 2 3 Guidelines when installing the ducting WARNING If one or more rooms are connected to the unit using a duct system make sure there are no operating ignition sources example open flames an operating gas appliance or an operating electric heater in case the floor area is less than Amin specified in the General safety precautions no auxiliary devices which may be a...

Page 31: ...efer to the installation manual of the used user interface The ducting is to be field supplied Air inlet side Attach the duct and intake side flange field supply For connecting the flange use 7 accessory screws a b b a e e d d c a Connection screw accessory b Flange field supply c Main unit d Insulation field supply e Aluminium tape field supply Fixing screws When installing an air inlet duct sele...

Page 32: ...ot allowed Condensation Take measures against condensation Insulate the complete drain piping in the building Rising piping If necessary to make the slope possible you can install rising piping Drain hose inclination 0 75 mm to avoid stress on the piping and to avoid air bubbles Rising piping 300 mm from the unit 625 mm perpendicular to the unit Combining drain pipes You can combine drain pipes Ma...

Page 33: ...y d Large sealing pad accessory e Drain piping field supply NOTICE Do NOT remove the drain pipe plug Water might leak out Use the drain outlet only to discharge the water if the drain pump is not used or before maintenance Insert and remove the drain plug gently Excessive force may deform the drain socket of the drain pan Pull out the plug Do NOT wiggle the plug up and down a Push in the plug Set ...

Page 34: ...ping involves Connecting the refrigerant piping to the outdoor unit Connecting the refrigerant piping to the indoor unit Insulating the refrigerant piping Keeping in mind the guidelines for Pipe bending Flaring pipe ends Brazing Using the stop valves 6 3 2 Precautions when connecting the refrigerant piping INFORMATION Also read the precautions and requirements in the following chapters General saf...

Page 35: ...dirt liquid or dust from entering the piping Use caution when passing copper tubes through walls see figure below Unit Installation period Protection method Outdoor unit 1 month Pinch the pipe 1 month Pinch or tape the pipe Indoor unit Regardless of the period INFORMATION Do NOT open the refrigerant stop valve before checking the refrigerant piping When you need to charge additional refrigerant it...

Page 36: ...gas leakage Use flare nuts that are included with the unit Using different flare nuts may cause refrigerant gas leakage 1 Cut the pipe end with a pipe cutter 2 Remove burrs with the cut surface facing down so that the chips do NOT enter the pipe a b a Cut exactly at right angles b Remove burrs 3 Remove the flare nut from the stop valve and put the flare nut on the pipe 4 Flare the pipe Set exactly...

Page 37: ...ections Connect refrigerant piping to the unit using flare connections Insulation Insulate the refrigerant piping on the indoor unit as follows A B a d c e f b b a d c e f b b 2 4 3 g 1 2 3 4 g A B 1 A Gas piping B Liquid piping a Insulation material field supply b Tie wrap accessory c Insulation pieces Large gas pipe small liquid pipe accessories d Flare nut attached to the unit e Refrigerant pip...

Page 38: ...the bubble test solution to all connections 3 Discharge all nitrogen gas 6 4 Connecting the electrical wiring 6 4 1 About connecting the electrical wiring Typical workflow Connecting the electrical wiring typically consists of the following stages 1 Making sure the power supply system complies with the electrical specifications of the units 2 Connecting the electrical wiring to the outdoor unit 3 ...

Page 39: ...ropriate tool b a a Stranded conductor wire b Round crimp style terminal Use the following methods for installing wires Wire type Installation method Single core wire c b c a a A AA A a Curled single core wire b Screw c Flat washer Stranded conductor wire with round crimp style terminal c b b a c a B B a Terminal b Screw c Flat washer Allowed NOT allowed Tightening torques Wiring Screw size Tighte...

Page 40: ... wirings should ALWAYS be at least 50 mm NOTICE Be sure to keep the power line and transmission line apart from each other Transmission wiring and power supply wiring may cross but may NOT run parallel 1 Remove the service cover a c b d g g e f e A B A Outside the unit B Inside the unit a Control box cover b Connection of interconnection cable including earth c Wiring diagram d Connection of user ...

Page 41: ...rovide adequate measures to prevent that the unit can be used as a shelter by small animals Small animals that make contact with electrical parts can cause malfunctions smoke or fire A c b c a A Indoor PCB assembly a Power supply and earth wiring b Transmission and user interface wiring c Clamps X Not allowed O Allowed 5 Reattach the service cover 1 50 Hz 220 240 V b a e c d a Interconnection cabl...

Page 42: ...ion panel with infrared receiver is installed The outdoor unit is properly mounted There are NO missing phases or reversed phases The system is properly earthed and the earth terminals are tightened The fuses or locally installed protection devices are installed according to this document and have NOT been bypassed The power supply voltage matches the voltage on the identification label of the uni...

Page 43: ...ice cover to prevent electric shocks 3 Turn ON power for at least 6 hours before starting operation to protect the compressor 4 On the user interface set the unit to cooling operation mode 2 Start the test run Action Result 1 Go to the home menu Cool Set to 28 C 2 Press at least 4 seconds The Service Settings menu is displayed 3 Select Test Operation Return Setting Service Settings 1 3 Test Operat...

Page 44: ...ected or there is a wiring error between power supply and outdoor unit between outdoor unit and indoor units between indoor unit and user interface The fuse on the outdoor or indoor unit PCB has blown A0 Refrigerant leak detected 1 CH Abnormality of refrigerant leakage sensor 1 E3 E4 or L8 The stop valves are closed The air inlet or air outlet is blocked E7 There is a missing phase in case of thre...

Page 45: ...y please make sure the following is clear for the user Make sure that the user has the printed documentation and ask him her to keep it for future reference Inform the user that he can find the complete documentation at the URL mentioned earlier in this manual Explain the user how to properly operate the system and what to do in case of problems Show the user what to do for the maintenance of the ...

Page 46: ...4P550955 3C 2020 12 9 Disposal NOTICE Do NOT try to dismantle the system yourself dismantling of the system treatment of the refrigerant oil and other parts MUST comply with applicable legislation Units MUST be treated at a specialised treatment facility for reuse recycling and recovery ...

Page 47: ... unit Part numbering is by Arabic numbers in ascending order for each part and is represented in the overview below by in the part code Symbol Meaning Symbol Meaning Circuit breaker Protective earth Connection Protective earth screw Connector A Rectifier Earth Relay connector Field wiring Short circuit connector Fuse Terminal INDOOR Indoor unit Terminal strip OUTDOOR Outdoor unit Wire clamp Residu...

Page 48: ... HAP Light emitting diode service monitor green HIGH VOLTAGE High voltage IES Intelligent eye sensor IPM Intelligent power module K R KCR KFR KHuR K M Magnetic relay L Live L Coil L R Reactor M Stepper motor M C Compressor motor M F Fan motor M P Drain pump motor M S Swing motor MR MRCW MRM MRN Magnetic relay N Neutral n N Number of passes through ferrite core PAM Pulse amplitude modulation PCB Pr...

Page 49: ...nsor low S PH HPS Pressure switch high S PL Pressure switch low S T Thermostat S RH Humidity sensor S W SW Operation switch SA F1S Surge arrester SR WLU Signal receiver SS Selector switch SHEET METAL Terminal strip fixed plate T R Transformer TC TRC Transmitter V R V Varistor V R Diode bridge Insulated gate bipolar transistor IGBT power module WRC Wireless remote controller X Terminal X M Terminal...

Page 50: ...or application explaining how to install configure and maintain it Operation manual Instruction manual specified for a certain product or application explaining how to operate it Maintenance instructions Instruction manual specified for a certain product or application which explains if relevant how to install configure operate and or maintain the product or application Accessories Labels manuals ...

Page 51: ......

Page 52: ...4P550955 3C 2020 12 Copyright 2017 Daikin Verantwortung für Energie und Umwelt ...

Reviews: