Installer reference guide
Daikin Altherma – Low temperature split
English
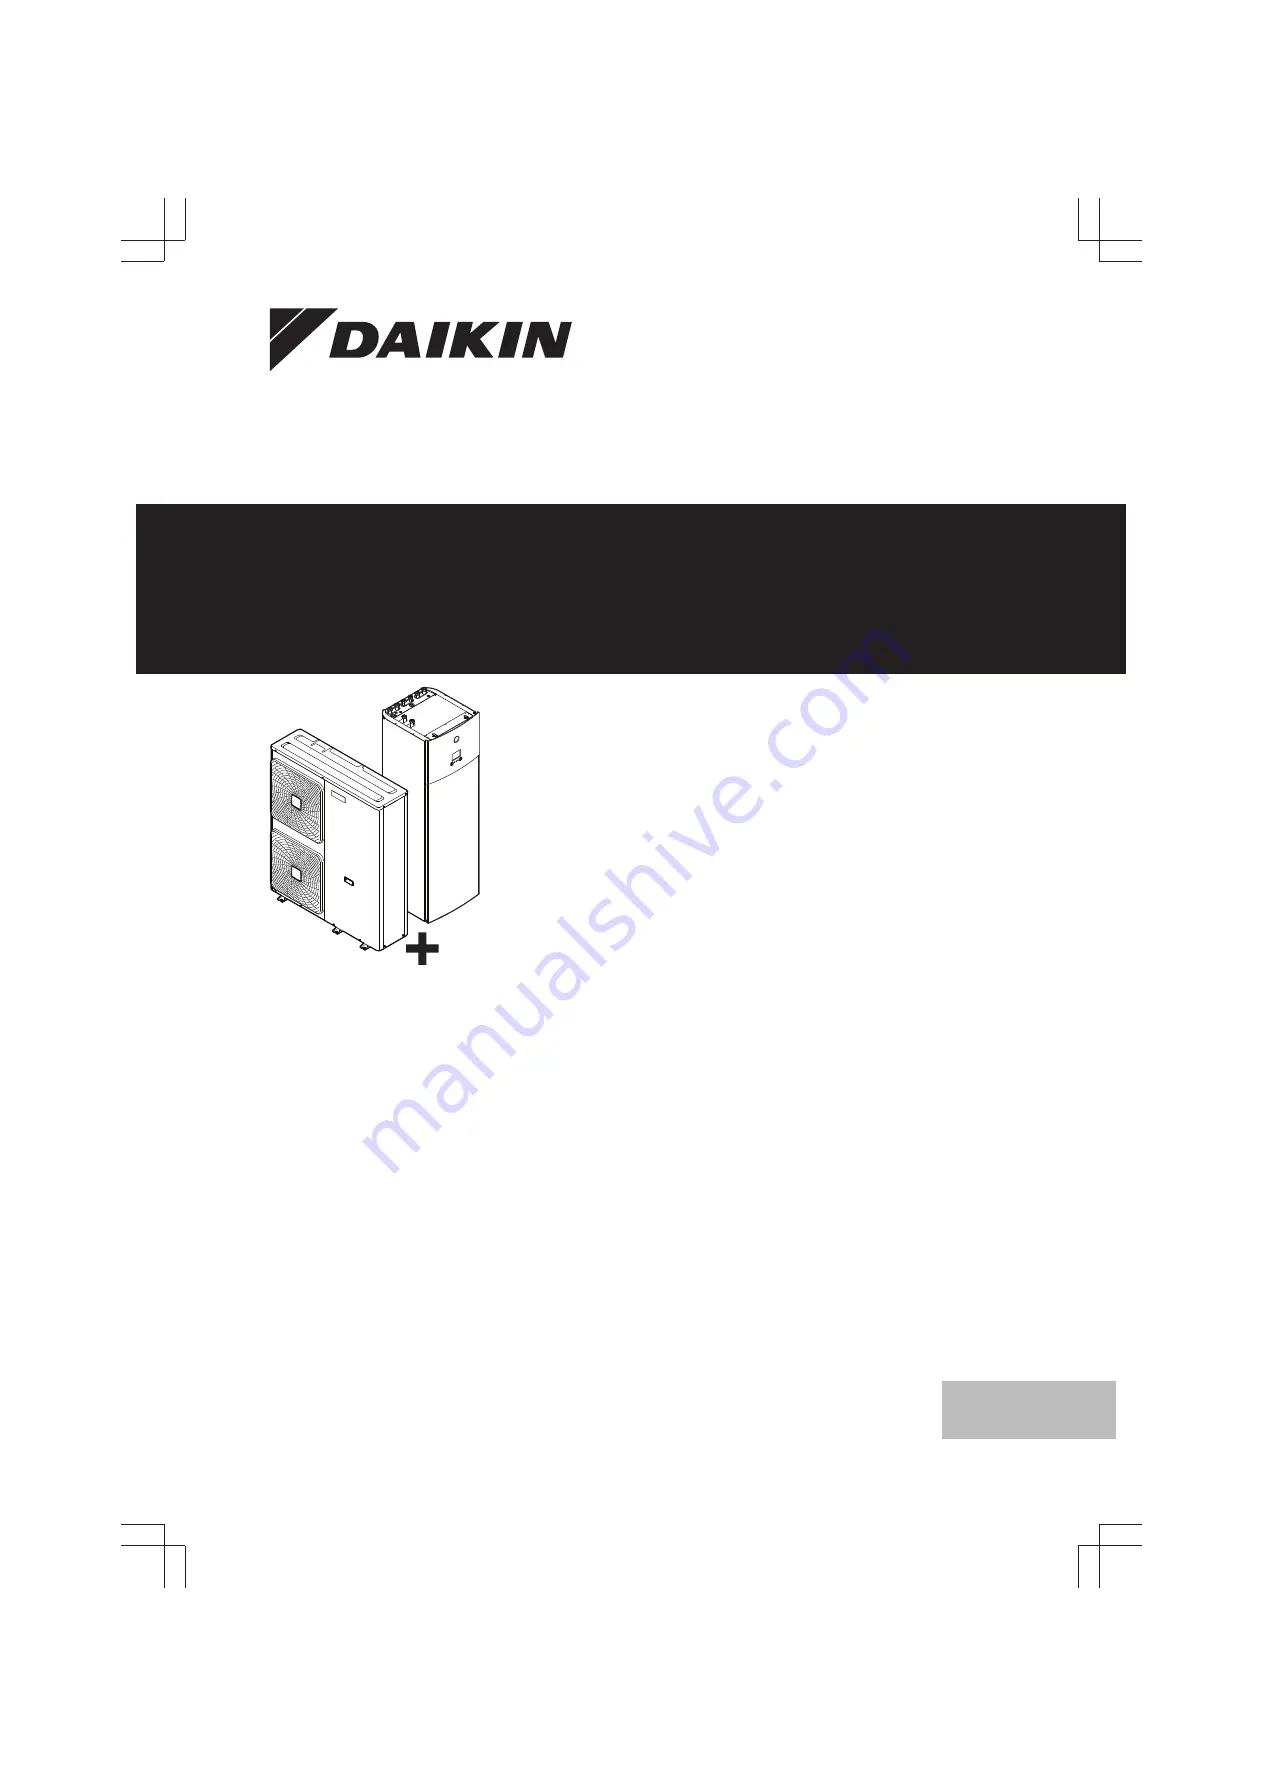
EPGA11DAV3EPGA14DAV3EPGA16DAV3
EAVZ16S18DA6VEAVZ16S23DA6VEAVZ16S18DA9WEAVZ16S23DA9W
Page 1: ...eference guide Daikin Altherma Low temperature split English Installer reference guide Daikin Altherma Low temperature split EPGA11DAV3 EPGA14DAV3 EPGA16DAV3 EAVZ16S18DA6V EAVZ16S23DA6V EAVZ16S18DA9W EAVZ16S23DA9W ...
Page 2: ...Changing the pre pressure of the expansion vessel 21 6 3 5 To check the water volume Examples 21 6 4 Preparing electrical wiring 21 6 4 1 About preparing electrical wiring 21 6 4 2 About preferential kWh rate power supply 22 6 4 3 Overview of electrical connections except external actuators 22 6 4 4 Overview of electrical connections for external and internal actuators 22 7 Installation 23 7 1 Ove...
Page 3: ...4 Symptom The system is making gurgling noises after commissioning 73 12 3 5 Symptom The pump is making noise cavitation 73 12 3 6 Symptom The pressure relief valve opens 73 12 3 7 Symptom The water pressure relief valve leaks 74 12 3 8 Symptom The space is NOT sufficiently heated at low outdoor temperatures 74 12 3 9 Symptom The pressure at the tapping point is temporarily unusually high 74 12 3 ...
Page 4: ...door unit are best done under dry weather conditions to avoid water ingress In accordance with the applicable legislation it might be necessary to provide a logbook with the product containing at least information on maintenance repair work results of tests stand by periods Also at least following information MUST be provided at an accessible place at the product Instructions for shutting down the...
Page 5: ...pside down Open refrigerant cylinders slowly Charge the refrigerant in liquid form Adding it in gas form may prevent normal operation CAUTION When the refrigerant charging procedure is done or when pausing close the valve of the refrigerant tank immediately If the valve is NOT closed immediately remaining pressure might charge additional refrigerant Possible consequence Incorrect refrigerant amoun...
Page 6: ...terminal screws A screwdriver with a small head will damage the head and make proper tightening impossible Over tightening the terminal screws may break them Install power cables at least 1 metre away from televisions or radios to prevent interference Depending on the radio waves a distance of 1 metre may not be sufficient WARNING After finishing the electrical work confirm that each electrical co...
Page 7: ...and service How to maintain and service the units Troubleshooting What to do in case of problems Disposal How to dispose of the system Technical data Specifications of the system Glossary Definition of terms Field settings table Table to be filled in by the installer and kept for future reference Note There is also an installer settings table in the user reference guide This table has to be filled...
Page 8: ...sor leg in order to protect the unit during transport Proceed as shown in the figure and procedure below 1 Remove the nut a of the compressor mounting bolt 2 Remove and discard the transportation stay b 3 Re install the nut a of the compressor mounting bolt and tighten to 10 1 N m of torque 10 1 N m a 1 3 2 b 3 3 Indoor unit 3 3 1 To unpack the indoor unit 1 2 8 3 3 2 To remove the accessories fro...
Page 9: ... 1 Possible options for the outdoor unit Bottom plate heater EKBPH140L7 Prevents freeze up of the bottom plate Recommended in areas with low ambient temperature and high humidity For installation instructions see the installation manual of the bottom plate heater 4 3 2 Possible options for the indoor unit User interface used as room thermostat BRC1HHDA The user interface used as room thermostat ca...
Page 10: ...install this LAN adapter to Control the system via a smartphone app Use the system in various Smart Grid applications For installation instructions see the installation manual of the LAN adapter LAN adapter for smartphone control BRP069A62 You can install this LAN adapter to control the system via a smartphone app For installation instructions see the installation manual of the LAN adapter Univers...
Page 11: ...via the external thermostat and the thermostatic valves of the radiators in each room The heating demand signal from the external thermostat is connected to the digital input on the indoor unit X2M 35a and X2M 30 The indoor unit will only supply the desired additional leaving water temperature when there is an actual demand Configuration Setting Value Unit temperature control 2 9 Code C 07 2 Room ...
Page 12: ...iliary contact can be An outdoor temperature thermostat An electricity tariff contact A manually operated contact Setup Connect the following field wiring L N H Com A K2A K1A X2M BTI K2A K1A Indoor Auto Boiler 35 30 X Y Indoor BTI Boiler thermostat input A Auxiliary contact normal closed H Heating demand room thermostat optional K1A Auxiliary relay for activation of indoor unit field supply K2A Au...
Page 13: ... itself can produce domestic hot water of maximum 55 C 50 C if outdoor temperature is low The electrical resistance integrated in the heat pump can increase this temperature However this consumes more energy Daikin recommends to set the desired DHW tank temperature below 55 C to avoid using the backup heater The higher the outdoor temperature the better the performance of the heat pump If energy p...
Page 14: ...nd configuration No additional equipment needed 5 5 2 Consumed energy You can use the following methods to determine the consumed energy Calculating Measuring INFORMATION You cannot combine calculating the consumed energy example for backup heater and measuring the consumed energy example for outdoor unit If you do so the energy data will be invalid Calculating the consumed energy The consumed ene...
Page 15: ...pply of the outdoor unit Power meter 2 Use a single phase power meter 5 6 Setting up the power consumption control The power consumption control Allows you to limit the power consumption of the entire system sum of outdoor unit indoor unit and backup heater Configuration Set the power limitation level and how it has to be achieved via the user interface The power limitation level can be expressed ...
Page 16: ... has better efficiency than the electrical heater Therefore the electrical heater is limited and turned OFF first The system limits power consumption in the following order 1 Turns OFF the backup heater 2 Limits the outdoor unit 3 Turns OFF the outdoor unit Example If the configuration is as follows Power limitation level does NOT allow operation of backup heater step 1 Then power consumption is l...
Page 17: ...r unit INFORMATION Also read the precautions and requirements in the General safety precautions chapter Mind the following spacing guidelines see Service space Outdoor unit in the chapter Technical data NOTICE Do NOT stack the units on each other Do NOT hang the unit on a ceiling Strong winds 18 km h blowing against the outdoor unit s air outlet causes short circuit suction of discharge air This m...
Page 18: ...applicable legislation for example national gas regulation and are executed only by authorised persons 6 2 2 Additional installation site requirements of the outdoor unit in cold climates Protect the outdoor unit against direct snowfall and take care that the outdoor unit is NEVER snowed up c a b c d d a Snow cover or shed b Pedestal c Prevailing wind direction d Air outlet In any case provide at ...
Page 19: ...inserting it through a wall to prevent dust and or particles entering the pipe Use a decent thread sealant to seal connections Insulation Insulate up to the base of the heat exchanger Freeze Protect against freezing Closed circuit Use the indoor unit ONLY in a closed water system Using the system in an open water system will lead to excessive corrosion Piping length It is recommended to avoid long...
Page 20: ...ater end point and the recirculation connection of the domestic hot water tank c d a b a Recirculation connection b Hot water connection c Shower d Recirculation pump 6 3 2 Formula to calculate the expansion vessel pre pressure The pre pressure Pg of the vessel depends on the installation height difference H Pg 0 3 H 10 bar 6 3 3 To check the water volume and flow rate The indoor unit has an expan...
Page 21: ...7H NOTICE When circulation in each or certain space heating loops is controlled by remotely controlled valves it is important that the minimum flow rate is guaranteed even if all valves are closed In case the minimum flow rate cannot be reached a flow error 7H will be generated no heating or operation Minimum required flow rate 20 l min See the recommended procedure as described in 9 4 Checklist d...
Page 22: ...he equipment is connected to such preferential kWh rate power supply the electricity company is allowed to interrupt power supply to the equipment for certain periods of time demand that the equipment only consumes a limited amount of electricity during certain periods of time The indoor unit is designed to receive an input signal by which the unit switches into forced off mode At that moment the ...
Page 23: ...inside of the indoor unit Backup heater type Power supply Required number of conductors 6V 1N 230 V 6V 2 GND 3 230 V 6T1 3 GND 9W 3N 400 V 4 GND 7 Installation 7 1 Overview Installation This chapter describes what you have to do and know on site to install the system Typical workflow Installation typically consists of the following stages 1 Mounting the outdoor unit 2 Mounting the indoor unit 3 Co...
Page 24: ...24 7 4 4 To connect the drain hose to the drain on page 26 When you need access to the high voltage switch box 2 T25 7 2 4 To open the switch box cover of the indoor unit 4 T25 4 T25 7 2 5 To lower the switch box on the indoor unit During the installation you will need access to the inside of the indoor unit To have easier front access put the switch box lower on the unit as follows Prerequisite T...
Page 25: ...ion drawing Prepare 6 sets of anchor bolts nuts and washers field supply as follows 150 6 2 0 350 3 4 5 3 5 5 a mm 2 6 1 5 6 M12 a Make sure not to cover the drain holes In any case make sure the unit is positioned at least 100 mm above the maximum expected level of snow 7 3 4 To install the outdoor unit 6 M12 7 3 5 To provide drainage Make sure that condensation water can be evacuated properly In...
Page 26: ...the following illustration field supply 2 Place the 2 cables over the outdoor unit 3 Insert a rubber sheet between the cables and the outdoor unit to prevent the cables from scratching the paint field supply 4 Attach the ends of the cables and tighten them 7 4 Mounting the indoor unit 7 4 1 About mounting the indoor unit Typical workflow Mounting the indoor unit typically consists of the following...
Page 27: ...er piping INFORMATION Also read the precautions and requirements in the following chapters General safety precautions Preparation 7 5 3 To connect the water piping Outdoor unit c b a a d c a Water inlet b Water outlet c Shut off valve d O ring NOTICE About the shut off valve with integrated filter delivered as accessory The installation of the valve at the water inlet is mandatory Mind the flow di...
Page 28: ...umber of zones Single zone NOTICE Install air purge valves at all local high points NOTICE A pressure relief valve field supply with an opening pressure of maximum 10 bar must be installed on the domestic cold water inlet connection in accordance with the applicable legislation NOTICE A drain device and pressure relief device must be installed on the cold water inlet connection of the domestic hot...
Page 29: ...ycol ALWAYS compare the requirements from the table above with the specifications provided by the glycol manufacturer If necessary meet the requirements set by the glycol manufacturer The added concentration of glycol should NEVER exceed 35 If the liquid in the system is frozen the pump will NOT be able to start Mind that if you only prevent the system from bursting the liquid inside might still f...
Page 30: ...E When freeze protection valves are installed do NOT select a minimum cooling setpoint lower than 8 C 8 C default If lower freeze protection valves can open during cooling operation Heater tape field supply 1 Install heater tape to the outdoor field piping 2 Provide external power supply for the heater tape NOTICE For the internal heater tape to operate the power to the unit MUST be ON For this re...
Page 31: ...NG ALWAYS use multicore cable for power supply cables 7 6 4 Guidelines when connecting the electrical wiring Keep the following in mind If stranded conductor wires are used install a round crimp style terminal on the end of the wire Place the round crimp style terminal on the wire up to the covered part and fasten the terminal with the appropriate tool b a a Stranded conductor wire b Round crimp s...
Page 32: ...as piping 6 Install the switch box cover INFORMATION When installing field supply or option cables foresee sufficient cable length This will make it possible to remove reposition the switch box and gain access to other components during service CAUTION Do NOT push or place redundant cable length in the unit 7 6 7 To connect the electrical wiring on the indoor unit 1 To open the indoor unit see 7 2...
Page 33: ...ower supply c Preferential power supply contact 2 Fix the cables with cable ties to the cable tie mountings INFORMATION In case of preferential kWh rate power supply connect X11Y to X11YB The necessity of separate normal kWh rate power supply to indoor unit b X2M 5 6 depends on the type of preferential kWh rate power supply Separate connection to the indoor unit is required if preferential kWh rat...
Page 34: ...operator if necessary that the equipment is connected only to a supply with a system impedance Zsys less than or equal to Zmax c 6V d 6T1 Connect the backup heater power supply as follows X6M F1B Q1DI a b a Factory mounted cable connected to the backup heater contactor inside the switch box K5M b Field wiring see table below Model power supply Connections to backup heater power supply 6V 6V 1N 230...
Page 35: ... illustration below X2M X5M X1M A5P A4P YC Y1 Y2 Y3 Y4 X1M Y1 YC 7 9 a b a Installation of EKRP1HB is required b Prewiring between X2M 7 9 and Q1L thermal protector backup heater Do NOT change 2 Fix the cable with cable ties to the cable tie mountings 7 6 14 To connect the space cooling heating ON OFF output 7 6 15 To connect the changeover to external heat source 1 Connect the changeover to exter...
Page 36: ... unit will ignore the safety thermostat contact INFORMATION The preferential kWh rate power supply contact is connected to the same terminals X5M 9 10 as the safety thermostat for the additional zone It is only possible for the system to have EITHER preferential kWh rate power supply OR a safety thermostat for the additional zone 7 7 Finishing the outdoor unit installation 7 7 1 To finish the outd...
Page 37: ...5678 Additional menu items and installer settings are now available 5678 Installer Advanced user pin code The Advanced user pin code is 1234 Additional menu items for the user are now visible User pin code The User pin code is 0000 To access the installer settings 1 Set the user permission level to Installer 2 Go to 9 Installer settings To modify an overview setting Example Modify 1 01 from 15 to ...
Page 38: ... on page 52 Comfort setpoint 5 2 Eco setpoint 5 3 Reheat setpoint 5 4 8 3 Possible screens 8 3 1 Possible screens Overview The most common screens are as follows a b c c2 c1 a Home screen b Main menu screen c Lower level screens c1 Setpoint screen c2 Detailed screen with values 8 3 2 Home screen Press the button to go back to the home screen You see an overview of the unit configuration and the ro...
Page 39: ... case of a malfunction on page 75 for more information Item Description Room Restriction Only displayed if a room thermostat is connected to the indoor unit Set the room temperature Main zone Shows the applicable symbol for your main zone emitter type Set the leaving water temperature for the main zone Additional zone Restriction Only displayed if there are two leaving water temperature zones Show...
Page 40: ...is screen Go through the temperatures Change the temperature Possible actions on this screen Go to the next temperature Confirm changes and proceed Item Description a Possible weather dependent zones Main zone or additional zone heating Main zone or additional zone cooling only with EKHVCONV2 installed Domestic hot water X X1 X2 Outdoor ambient temperature Y Y1 Y2 Desired tank temperature or leavi...
Page 41: ...defined 1 2 Select Copy Edit Copy Result C is displayed next to the copied day 3 Select Tuesday Mon Sat Wed Fri Thu Tue Sun User defined 1 C 4 Select Paste Copy Paste C Result Mon Sat Wed Fri Thu Tue Sun User defined 1 C 5 Repeat this action for all other weekdays Mon Sat Wed Fri Thu Tue Sun User defined 1 C To program the schedule for Saturday and copy it to Sunday 1 Select Saturday 2 Select Edit...
Page 42: ...Turn ON C 2 Space heating cooling Room thermostat control C 07 2 Allow for the user interface used as room thermostat to take care of room frost protection Choose 1 4 1 1 Room Antifrost Activation Yes Set the room antifrost setpoint 1 4 2 Room Antifrost Room setpoint INFORMATION If a U4 error occurs room frost protection is NOT guaranteed For more detailed information about room frost protection i...
Page 43: ...ngs can be used to compensate for situations where the user interface used as room thermostat or the external room sensor CANNOT be installed on the ideal installation location see 5 7 Setting up an external temperature sensor on page 16 Code Description 1 6 2 0A Room sensor offset user interface used as room thermostat Offset on the actual room temperature measured on the user interface used as r...
Page 44: ... water temperature when the outdoor temperature equals or drops below the low ambient temperature 9 03 C 9 02 C Note This value should be higher than 1 09 as for low outdoor temperatures less cold water is required 1 09 Desired leaving water temperature when the outdoor temperature equals or rises above the high ambient temperature 9 03 C 9 02 C Note This value should be lower than 1 08 as for hig...
Page 45: ...r unit is connected to a high temperature emitter system and simultaneous demand exists on both emitter zones and if the high emitter system leaving water setpoint is chosen bigger than 60 C in the complete operation range there can be an increased power consumption NOTICE When adjusting the leaving water temperature ranges all desired leaving water temperatures are also adjusted to guarantee they...
Page 46: ...T will only be achieved after some operation time when the setpoint is being reached because of the big difference between leaving water temperature setpoint and inlet temperature at startup The target delta T in heating for the main zone depends on the emitter type for the main zone selected above In heating this setting indicates the temperature difference between the leaving water setpoint and ...
Page 47: ...temperature zone can close under these circumstances INFORMATION During defrost operation the shut off valve is ALWAYS opened During thermo If F 0B is enabled the shut off valve closes when there is no heating demand from the main zone Enable this setting to avoid leaving water supply to the heat emitters in the main LWT zone through the mixing valve station when there is request from the addition...
Page 48: ...rature 25 C 43 C 0 05 Desired leaving water temperature when the outdoor temperature equals or drops below the low ambient temperature 9 07 C 9 08 C Note This value should be higher than 0 04 as for low outdoor temperatures less cold water is required 0 04 Desired leaving water temperature when the outdoor temperature equals or rises above the high ambient temperature 9 07 C 9 08 C Note This value...
Page 49: ...ool down a space You do NOT have to tell the system which space operation mode to use To determine if a heating cooling heat pump model is installed 1 Go to 4 Space heating cooling 2 Check if 4 1 Operation mode is listed and editable If so a heating cooling heat pump model is installed To tell the system which space operation to use you can You can Location Check which space operation mode is curr...
Page 50: ...ange 1 C 10 C N A 4 0D Offset Ensures that the active desired room temperature is always reached In heating mode the space operation ONLY changes when the room temperature rises above the desired heating temperature added by the offset value Range 1 C 10 C Number of zones The system can supply leaving water to up to 2 water temperature zones During configuration the number of water zones must be s...
Page 51: ... pump speed limitation for the main zone 9 0E and additional zone 9 0D defines the maximum pump speed In normal conditions the default setting should NOT be modified The pump speed limitation will be overruled when the flow rate is in the range of the minimum flow error 7H Code Description 4 7 9 0D Pump limitation Additional zone 0 No limitation 1 4 General limitation There is limitation in all co...
Page 52: ...room frost protection see 8 4 2 Room on page 42 8 4 6 Tank Tank setpoint screen You can set the domestic hot water temperature using the setpoint screen For more information about how to do this see 8 3 5 Setpoint screen on page 39 Powerful operation You can use powerful operation to immediately start heating up the water to the preset value Storage comfort However this consumes extra energy If po...
Page 53: ...cording to a schedule See the operation manual for more details Disinfection Applies only to installations with a domestic hot water tank The disinfection function disinfects the domestic hot water tank by periodically heating the domestic hot water to a specific temperature CAUTION The disinfection function settings MUST be configured by the installer according to the applicable legislation Code ...
Page 54: ...temperature the tank heats up to the reheat temperature The minimum ON temperature is 20 C even if setpoint hysteresis is smaller than 20 C Code Description 5 9 6 00 Heat pump ON hysteresis 2 C 40 C Reheat hysteresis Applicable when domestic hot water preparation is scheduled reheat When the tank temperature drops below the reheat temperature minus the reheat hysteresis temperature the tank heats ...
Page 55: ... time and date INFORMATION By default daylight savings time is enabled and clock format is set to 24 hours If you want to change these settings you can do this in the menu structure User settings Time date once the unit is initialised Holiday About holiday mode During your holiday you can use the holiday mode to deviate from your normal schedules without having to change them While holiday mode is...
Page 56: ...90 valuta kWh with 2 significant values INFORMATION If no schedule is set the Electricity price for High is taken into account To set the electricity price schedule timer 1 Go to 7 5 4 User settings Electricity price Schedule 2 Program the selection using the scheduling screen You can set the High Medium and Low electricity prices according to your electricity supplier 3 Confirm the changes INFORM...
Page 57: ...E 06 Is a domestic hot water tank installed in the system E 07 What kind of domestic hot water tank is installed DHW pump Code Description 9 2 2 D 02 DHW pump 0 No DHW pump NOT installed 1 Instant hot water Installed for instant hot water when water is tapped The user sets the operation timing of the domestic hot water pump using the schedule Control of this pump is possible with the user interfac...
Page 58: ...uilibrium Is backup heater operation allowed above equilibrium temperature during space heating operation 1 NOT allowed 0 Allowed 9 3 7 5 01 Equilibrium temperature Outdoor temperature below which operation of the backup heater is allowed Range 15 C 35 C INFORMATION Above 10 C ambient temperature the heat pump will operate until 55 C Configuring a higher setpoint with an ambient temperature that i...
Page 59: ...ttom water layer of the tank because the heat exchanger coil is not operational with a warmer top layer Range 0 C 20 C Timers for simultaneous space and domestic hot water operation request 8 02 Anti recycle timer t 1 0 1 0 8 01 8 02 1 Heat pump domestic water heating mode 1 active 0 not active 2 Hot water request for heat pump 1 request 0 no request t Time 8 04 Additional timer at 4 02 F 01 t TA ...
Page 60: ...2 Closed The outdoor unit is connected to a preferential kWh rate power supply When the preferential kWh rate signal is sent by the electricity company the contact will close and the unit will go in forced off mode When the signal is released again the voltage free contact will open and the unit will restart operation Therefore always enable the auto restart function 3 Safety thermostat A safety t...
Page 61: ...r meter in accordance with the power meter specifications It is possible to connect up to 2 power meters with different pulse frequencies If only 1 or no power meter is used select None to indicate the corresponding pulse input is NOT used Code Description 9 A 1 D 08 Electricity meter 1 0 None NOT installed 1 1 10kWh Installed 2 1 kWh Installed 3 10 kWh Installed 4 100 kWh Installed 5 1000 kWh Ins...
Page 62: ...Tcalc Bivalent ON temperature variable Below this temperature the auxiliary boiler will always be ON Tcalc can never go below C 03 or above C 03 C 04 3 C Fixed hysteresis to prevent too much switching between heat pump system and auxiliary boiler a Auxiliary boiler active b Auxiliary boiler inactive If the outdoor temperature Then Space heating by the heat pump system Bivalent signal for the auxil...
Page 63: ...he type that power supply is interrupted always enable the auto restart function Continuous indoor unit control can be guaranteed independent of the preferential kWh rate power supply status by connecting the indoor unit to a normal kWh rate power supply Code Description 9 E C 09 Auto restart 0 Manual 1 Automatic Disable protections INFORMATION The software is equipped with an installer on site mo...
Page 64: ...ime date Holiday Quiet Electricity price Gas price C Operation Room Space heating cooling Tank B User profile 7 3 Holiday Activation From Till 7 4 Quiet Activation Schedule 7 5 Electricity price High Medium Low Schedule 7 2 Time date Hours Minutes Year Month Day Daylight savings time Format 8 1 Energy data Electricity input Produced heat 5 Tank Powerful operation Comfort setpoint Eco setpoint Rehe...
Page 65: ...upply Benefit kWh power supply Allow heater Allow pump 9 2 Domestic hot water Domestic hot water DHW pump DHW pump schedule Solar 9 9 Power consumption control Power consumption control Type Limit Limit 1 Limit 2 Limit 3 Limit 4 Priority heater Electricity meter 2 Electricity meter 1 9 A Energy metering 9 Installer settings Configuration wizard Domestic hot water Backup heater Emergency Balancing ...
Page 66: ...g field wiring has been carried out according to this document and the applicable legislation Between the local supply panel and the outdoor unit Between indoor unit and outdoor unit Between the local supply panel and the indoor unit Between the indoor unit and the valves if applicable Between the indoor unit and the room thermostat if applicable The system is properly earthed and the earth termin...
Page 67: ...f 1 Performing a manual air purge for both zones 2 Performing an automatic air purge for both zones INFORMATION Start by performing a manual air purge When almost all the air is removed perform an automatic air purge If necessary repeat performing the automatic air purge until you are sure that all air is removed from the system During air purge function pump speed limitation 9 0D is NOT applicabl...
Page 68: ...nderfloor heating screed dryout This function is used for drying out the screed of an underfloor heating system very slowly during the construction of a house It allows the installer to program and execute this program Conditions Make sure all operation is disabled Go to the Operation menu and turn off Room Space heating cooling and Tank operation This function can be executed without finishing th...
Page 69: ... dryout When the program is stopped by an error an operation switch off or a power failure the U3 error will be displayed on the user interface To resolve the error codes see 12 4 Solving problems based on error codes on page 75 1 Start in the UFH screed dryout screen 2 Open the menu and select Stop UFH screed dryout 3 Select OK to confirm Result The underfloor heating screed dryout is stopped Whe...
Page 70: ... 6 Screw the drain cap back on 7 Reattach the magnetic sleeve 8 Check the pressure of the water circuit If required add water NOTICE When checking the magnetic filter dirt separator for tightness hold it firmly so as NOT to apply stress to the water piping Do NOT isolate the magnetic filter dirt separator by closing the shut off valves To properly empty the dirt separator sufficient pressure is re...
Page 71: ...he respective circuit breaker Prerequisite Close the cold water supply Prerequisite Open all the hot water tapping points to allow air to enter the system 1 Remove the top panel the user interface panel and the front panel 2 Lower the switch box 3 Remove the stop from the access point to the tank 4 Use a drain hose and a pump to drain the tank via the access point a Access point to the tank 11 5 A...
Page 72: ...clips to fix the water filter to the water circuit pipes 3 Make sure that the air purge valve of the water filter is in the open position 4 Open the valve if equipped of the water circuit towards the expansion vessel CAUTION Make sure to open the valve if equipped towards the expansion vessel otherwise the overpressure will be generated 5 Open the stop valves and add water to the water circuit if ...
Page 73: ... the installer If you purge air from the heat emitters or collectors mind the following WARNING Air purging heat emitters or collectors Before you purge air from heat emitters or collectors check if or is displayed on the home screen of the user interface If not you can purge air immediately If yes make sure that the room where you want to purge air is sufficiently ventilated Reason Refrigerant mi...
Page 74: ...ck and make sure that the space heating priority settings have been configured appropriately Make sure that the space heating priority status has been enabled Go to 9 6 1 Installer settings Balancing Space heating priority 5 02 Increase the space heating priority temperature to activate backup heater operation at a higher outdoor temperature Go to 9 6 3 Installer settings Balancing Offset BSH setp...
Page 75: ...81 04 Leaving water temperature sensor not properly mounted 81 06 Entering water temperature thermistor abnormality indoor unit 89 01 Heat exchanger frozen 89 02 Heat exchanger frozen 89 03 Heat exchanger frozen 8F 00 Abnormal increase outlet water temperature DHW 8H 00 Abnormal increase outlet water temperature Error code Detailed error code Description 8H 01 Overheating mixed water circuit 8H 02...
Page 76: ...de Detailed error code Description U2 00 OU Defect of power supply voltage U3 00 Under floor heating screed dryout function not completed correctly U4 00 Indoor outdoor unit communication problem U5 00 User interface communication problem U6 36 Boiler standby abnormality U7 00 OU Transmission malfunction between main CPU INV CPU U8 01 Connection with LAN adapter lost U8 02 Connection with room the...
Page 77: ... during pump down air will be sucked into the system Compressor breakdown or damage to the system can result due to abnormal pressure in the refrigerant cycle Pump down operation will extract all refrigerant from the system into the outdoor unit 1 Remove the valve lid from the liquid stop valve and the gas stop valve 2 Install a manifold on the gas stop valve 3 After 5 to 10 minutes after only 1 o...
Page 78: ...alve stem c Field piping connection d Stem cap Keep both stop valves open during operation Do NOT apply excessive force to the valve stem Doing so may break the valve body ALWAYS make sure to secure the stop valve with a spanner then loosen or tighten the flare nut with a torque wrench Do NOT place the spanner on the stem cap as this could cause a refrigerant leak a b a Spanner b Torque wrench Whe...
Page 79: ... E 300 300 300 300 300 1000 150 150 150 150 150 150 150 1000 1000 1000 500 HD HU HD HU HB HU HD HU HB HU a b c d e eB eD A B C D E HB HU HD A C Left side and right side obstacles walls baffle plates B Suction side obstacle wall baffle plate D Discharge side obstacle wall baffle plate E Top side obstacle roof a b c d e Minimum service space between the unit and obstacles A B C D and E eB Maximum di...
Page 80: ...er m Accumulator n Economiser heat exchanger o Inverter PCB heat sink p Plate heat exchanger E1H Crankcase heater M1C Compressor M1F Upper fan motor M2F Lower fan motor R1T Thermistor outdoor air R2T Thermistor compressor discharge R3T Thermistor compressor suction R4T Thermistor air heat exchanger liquid pipe R5T Thermistor air heat exchanger middle R6T Thermistor refrigerant liquid R7T Thermisto...
Page 81: ...hot water hot water OUT loose nut 3 4 d1 Gas refrigerant IN heating mode condenser d2 Liquid refrigerant OUT heating mode condenser e Pump main mixed zone f Shut off valve male female 1 if equipped g Expansion vessel h Magnetic filter dirt separator i Safety valve j Air purge k Drain valve l Pump additional direct zone m Check valve n Capillary tube o Backup heater p Water filter main mixed zone q...
Page 82: ...d English Translation Legend Legend Field supply Field supply English Translation Optional Optional Part n Part n Description Description A1P Printed circuit board main A2P Printed circuit board noise filter A3P Printed circuit board leakage current A4P Printed circuit board ACS BS1 BS4 A1P Push button switch C1 C4 A1P A2P Capacitor DS1 A1P Dipswitch E1H Crankcase heater E2H Bottom plate heater op...
Page 83: ...1D V4D A1P Diode V1R A1P IGBT power module V2R A1P Diode module V1T V3T A1P Insulated Gate Bipolar Transistor IGBT X1M Terminal strip Y1E Electronic expansion valve main Y3E Electronic expansion valve injection Y1S Solenoid valve 4 way valve Y2S Solenoid valve hot gas bypass Y3S Solenoid valve injection bypass Z1C Z11C Noise filter ferrite core Z1F Z6F A1P A2P Noise filter ...
Page 84: ...rature On OFF thermostat wired On OFF thermostat wired On OFF thermostat wireless On OFF thermostat wireless Ext thermistor External thermistor Heat pump convector Heat pump convector Position in switch box English Translation Position in switch box Position in switch box Legend A1P Main PCB A2P On OFF thermostat PC power circuit A3P Heat pump convector A4P Digital I O PCB A5P Bizone PCB A6P Curre...
Page 85: ...stat For safety thermostat Inrush Inrush current Max load Maximum load Normally closed Normally closed Normally open Normally open Safety thermostat Safety thermostat English Translation Safety thermostat contact 16 V DC detection voltage supplied by PCB Safety thermostat contact 16 V DC detection voltage supplied by PCB Shut off valve Shut off valve SWB Switch box 7 Option PCBs 7 Option PCBs Alar...
Page 86: ...ETS 2 core 3m included signal A13P P1 P2 LAN adapter A14P P1 P2 user interface communication 2 core communication 2 core 4 core 5 core for C H operation 4 core for H only operation 3 core for C H operation 2 core for H only operation Only for heat pump convector Only for BRC1HH Only for KRTR wireless room thermostat Only for KRTW wired room thermostat Only for KRCS01 1 or EKRSCA1 External room the...
Page 87: ...t User Person who is owner of the product and or operates the product Applicable legislation All international European national and local directives laws regulations and or codes that are relevant and applicable for a certain product or domain Service company Qualified company which can perform or coordinate the required service to the product Installation manual Instruction manual specified for ...
Page 88: ...1 10 Field settings table 8 7 5 8291 Applicable indoor units EAVZ16S18DA6V EAVZ16S23DA6V EAVZ16S18DA9W EAVZ16S23DA9W Notes 1 6V 2 9W 3 EKHVCONV2 4 EAVZ16S18 5 EAVZ16S23 4P556077 1 2018 12 ...
Page 89: ... 50 C 3 5 0 02 R W 10 25 C step 1 C 15 C 3 5 0 03 R W 40 5 C step 1 C 10 C Cooling WD curve 3 6 0 04 R W 9 07 9 08 C step 1 C 8 C 3 3 6 0 05 R W 9 07 9 08 C step 1 C 12 C 3 3 6 0 06 R W 25 43 C step 1 C 35 C 3 3 6 0 07 R W 10 25 C step 1 C 20 C 3 High ambient temp for LWT add zone cooling WD curve Low ambient temp for LWT add zone cooling WD curve During cooling Leaving water value for high ambien...
Page 90: ...n 4 C 2 increase 4 C span 4 C 3 increase 2 C span 8 C 4 increase 4 C span 8 C 4 B 9 04 R W 1 4 C step 1 C 1 C 4 C 2 06 R W 0 Disabled 1 Enabled Tank 5 2 6 0A R W 30 6 0E C step 1 C 60 C 5 3 6 0B R W 30 min 50 6 0E C step 1 C 45 C 5 4 6 0C R W 30 min 50 6 0E C step 1 C 45 C 5 6 6 0D R W 0 Reheat only 1 Reheat sched 2 Scheduled only Disinfection 5 7 1 2 01 R W 0 No 1 Yes 5 7 2 2 00 R W 0 Each day 1 ...
Page 91: ... 02 C step 1 C 22 C 3 9 1 1 09 R W 9 03 9 02 C step 1 C 18 C 3 Additional zone 9 1 2 0D R W 0 Underfloor heating 1 Fancoil unit 2 Radiator 9 1 R W 0 Fixed 1 WD heating fixed cooling 3 2 Weather dependent 9 1 R W 0 No 1 Yes 9 1 0 00 R W 9 05 min 45 9 06 C step 1 C 35 C 9 1 0 01 R W 9 05 9 06 C step 1 C 50 C 9 1 0 02 R W 10 25 C step 1 C 15 C Gas price BUH type Domestic hot water Leaving water value...
Page 92: ...20 C step 1 C 10 C 9 6 4 8 02 R W 0 10 hour step 0 5 hour 0 5 hour 9 6 5 8 00 R O 0 20 min step 1 min 1 min 9 6 6 8 01 R W 5 95 min step 5 min 30 min 9 6 7 8 04 R W 0 95 min step 5 min 95 min Installer settings 9 7 4 04 R O 0 Intermittent Benefit kWh power supply 9 8 1 D 01 R W 0 No 1 Active open 2 Active closed 3 Safety thermostat 9 8 2 D 00 R W 0 None 1 BSH only 2 BUH only 3 All heaters 9 8 3 D ...
Page 93: ... 0E R W 40 5 C step 1 C 10 C 9 I 1 00 R W 40 5 C step 1 C 10 C 9 I 1 01 R W 10 25 C step 1 C 15 C 9 I 1 02 R W 9 01 9 00 step 1 C 35 C 9 I 1 03 R W 9 01 min 45 9 00 C step 1 C 25 C 9 I 1 04 R W 0 Disabled 1 Enabled 9 I 1 05 R W 0 Disabled 1 Enabled 9 I 1 06 R W 10 25 C step 1 C 20 C 3 Limit 3 Limit 2 Limit 4 Priority heater Electricity meter 1 Electricity meter 2 External sensor Limit 3 Limit 4 Li...
Page 94: ... the maximum allowed current over the heatpump What is the desired delta T in heating for the additional zone What is the maximum desired room temperature in heating What is the averaging time for the outdoor temp Which electric heater has priority Which power limitation mode is required on the system Which power limitation type is required Emergency Operation permission of the booster heater Belo...
Page 95: ... 1 C 55 C 9 I 9 01 R W 15 37 C step 1 C 25 C 9 I 9 02 R W 18 22 C step 1 C 22 C 3 The temperature difference determining the heat pump ON temperature The temperature difference determining the heat pump OFF temperature What is the capacity of the booster heater What is the capacity of the backup heater step 1 What is the capacity of the backup heater step 2 What is the requested limit for DI3 What...
Page 96: ... R O 3 6V 1 4 9W 2 9 I E 04 R O 0 No 1 Yes 9 I E 05 R O 0 No 1 Yes 9 I E 06 R O 0 No 1 Yes 9 I E 07 R O 1 Integrated 9 I E 08 R O 0 disabled 1 Enabled 9 I E 09 1 Room temperature hysteresis Pump speed limitation add zone Pump speed limitation main zone Domestic heating water priority Leaving water temperature overshoot temperature What is the mimimum desired LWT for add zone in heating Is an exter...
Page 97: ... 9 I F 05 0 9 I F 09 R W 0 Disabled 1 Enabled 9 I F 0A 0 9 I F 0B R W 0 No 1 Yes 9 I F 0C R W 0 No 1 Yes 9 I F 0D R W 0 Continuous 1 Sample 2 Request Close shut off valve during cooling Pump operation allowed outside range Is the system filled with glycol What is the pump operation mode Pump operation during flow abnormality Close shut off valve during thermo OFF Is a bi zone kit installed 4P55607...
Page 98: ......
Page 99: ......
Page 100: ...4P556075 1 2019 02 Copyright 2018 Daikin ...