


237
h) Click backup button, system begins burning. At the same time, the backup button becomes stop
button. You can view the remaining time and process bar at the left bottom.
Note
During backup process, you can click ESC to exit current interface for other operation (For
some series product only). The system will not terminate backup process.
The file name format usually is: Channel Record type+Time. In the file name, the
YDM format is Y+M+D+H+M+S. File extension name is .dav.
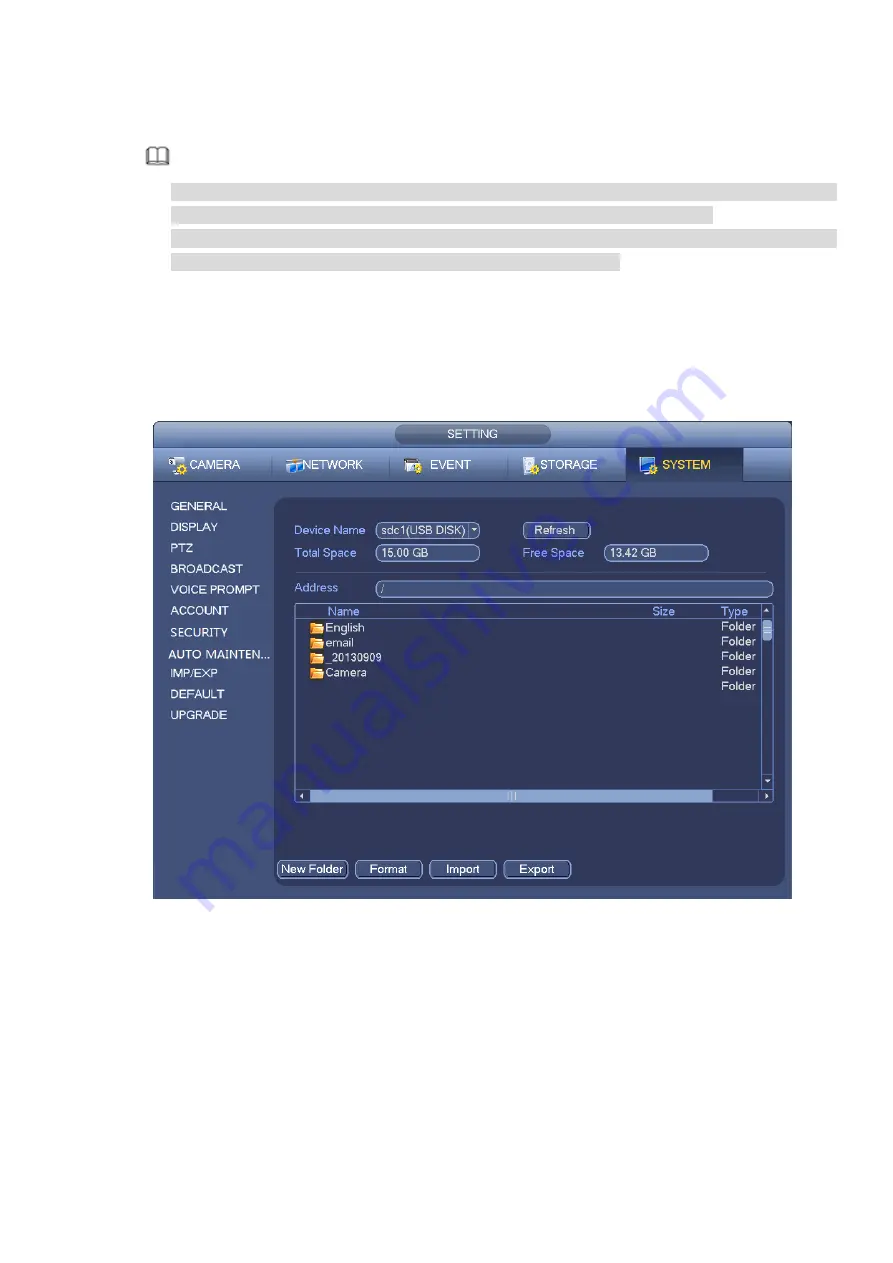
3.13.9.2 Import/Export
This function allows you to copy current system configuration to other devices. It also supports import,
create new folder, and delete folder and etc function.
From Main menu->Setting->System->Import/Export, you can see the configuration file backup interface is
shown as below. See Figure 3-236.
Figure 3-236
Export: Please connect the peripheral device first and then go to the following interface. Click
Export button, you can see there is a corresponding “Config_Time” folder. Double click the folder,
you can view some backup files.
Import: Here you can import the configuration files from the peripheral device to current device. You
need to select a folder first. You can see a dialogue box asking you to select a folder if you are
selecting a file. System pops up a dialogue box if there is no configuration file under current folder.
After successfully import, system needs to reboot to activate new setup.
Format: Click Format button, system pops up a dialogue box for you to confirm current operation.
System begins format process after you click the OK button.
Summary of Contents for NVR608-32-4KS2
Page 1: ...I Network Video Recorder User s Manual V6 0 0 ZHEJIANG DAHUA VISION TECHNOLOGY CO LTD...
Page 121: ...105 Figure 3 92 Figure 3 93...
Page 144: ...128 Figure 3 111 Figure 3 112 Figure 3 113...
Page 157: ...141 Figure 3 126 Figure 3 127...
Page 159: ...143 Figure 3 129 Click draw button to draw the zone See Figure 3 130 Figure 3 130...
Page 162: ...146 Figure 3 133 Click Draw button to draw a zone See Figure 3 134 Figure 3 134...
Page 167: ...151 Figure 3 139 Click draw button to draw the zone See Figure 3 140...
Page 185: ...169 Figure 3 157 Figure 3 158...
Page 186: ...170 Figure 3 159 Figure 3 160...
Page 189: ...173 Figure 3 164 Figure 3 165...
Page 224: ...208 Figure 3 199...
Page 311: ...295 Figure 4 56 Figure 4 57...
Page 317: ...301 Figure 4 62 Figure 4 63...
Page 318: ...302 Figure 4 64 Figure 4 65...
Page 343: ...327 Figure 4 101 Figure 4 102...
Page 352: ...336 Figure 4 115 Figure 4 116...
Page 372: ...356 Figure 4 144 Note For admin you can change the email information See Figure 4 145...


