background image


Dahua HD Mobile Network Camera Quick Start Guide 


10 

3 Network Configuration  

The IP address of all the cameras is the same when leaving factory (default IP 

192.168.1.108). To make the camera access to the network smoothly, please plan the 

available IP segment reasonably according to the actual network environment.  

3.1 

 Modify IP Address  

The cameras which are accessed via wired network can acquire and modify the IP 
address through “Quick Configuration Tool”. This section introduces the approach of 
modifying IP address via “Quick Configuration Tool”. You can also modify the IP address 
in the network parameters of the WEB interface. Please refer to the document 

WEB 

Operation Manual 

in the disk for more details.  

Note 

You can search out all the cameras within the LAN 

via “Quick Configuration Tool”. The 

camera can be configured only when the IP addresses of the camera and the computer 

are in the same network segment. 

To modify IP address, do the following: 

Step 1  Double-

click “ConfigTool.exe” to open the “Quick Configuration Tool”.  

Step 2  Click

 to enter the interface where you can modify IP address, and then 

click 

Search setting

.  

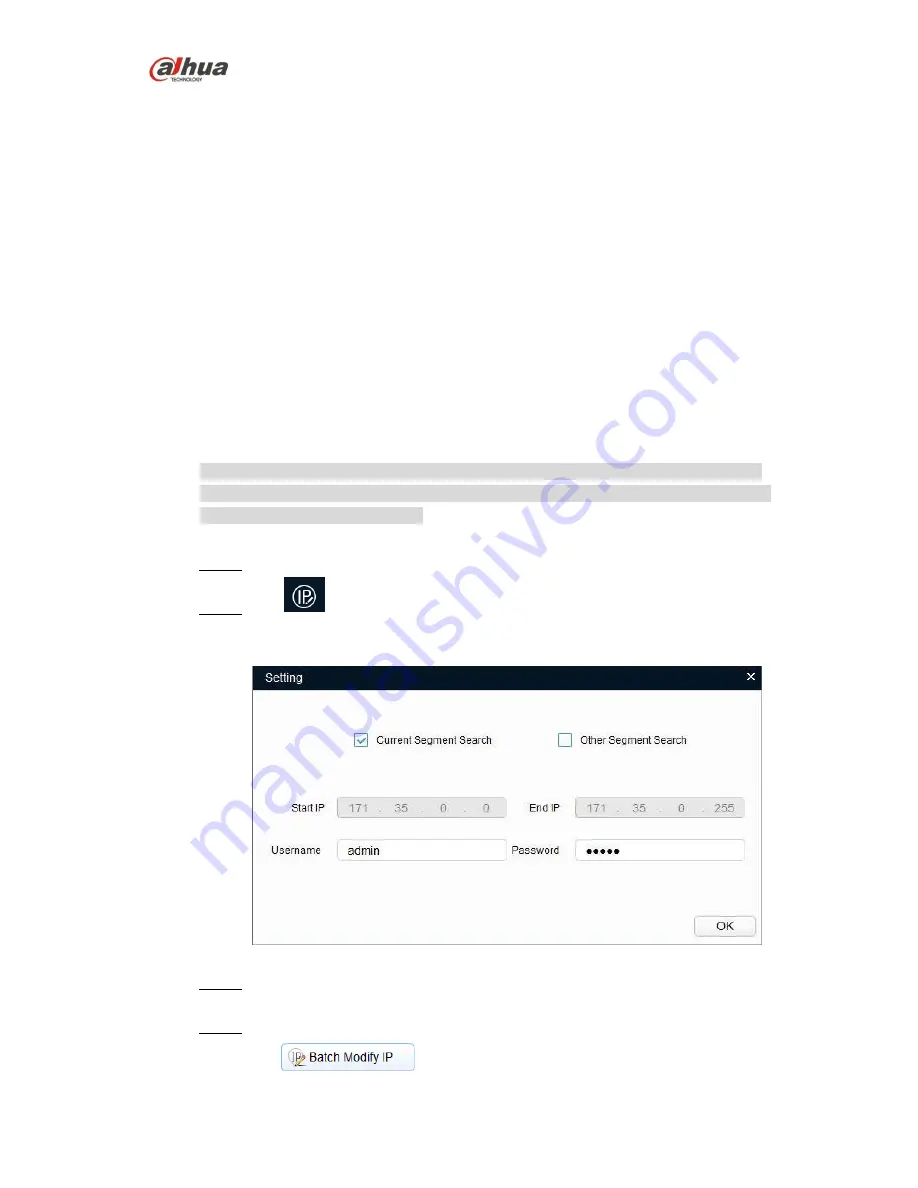
The system pops up the 

Setting

 dialog box, see Figure 3-1. 


Figure 3-1  

Step 3  Set the device network segment, login user name and password, and then click 

OK

. The system will display the searched devices after searching completes.  

Step 4  Select the devices which IP addresses need to be modified, and then 

click

.  

The system will pop up the 

Modify IP


Address

 dialog box, see Figure 3-2.  

Summary of Contents for IPC-MBW4231-AS/M12

Page 1: ...Dahua HD Mobile Network Camera Quick Start Guide Dahua HD Mobile Network Camera Quick Start Guide Version 1 0 0 ZHEJIANG DAHUA VISION TECHNOLOGY CO LTD ...

Page 2: ... extruded from the device We assume no liability or responsibility for all the fires or electrical shock caused by improper handling or installation Environment Do not aim the device at strong light to focus such as lamp light and sun light otherwise it might cause over brightness or light marks which are not the device malfunction and affect the longevity of Charge Coupled Device CCD or Complemen...

Page 3: ...h to gently wipe the water drop or oil and wait till it is dry and then use oil free cotton cloth or lens cleaning paper soaked with alcohol or detergent to wipe from the lens center outward till it is clean We are not liable for any problems caused by unauthorized modification or attempted repair Warnings Please modify the default password after login to avoid being stolen Use the standard compon...

Page 4: ...n accordance with the instruction manual may cause harmful interference to radio communication However there is no guarantee that interference will not occur in a particular installation If this equipment does cause harmful interference to radio or television reception which can be determined by turning the equipment off and on the user is encouraged to try to correct the interference by one or mo...

Page 5: ...ra Quick Start Guide iv Table of Contents 1 Device Framework 1 1 1 Structure and dimension 1 1 2 Dimension 2 1 3 Alarm Setup 3 2 Device Installation 6 3 Network Configuration 10 3 1 Modify IP Address 10 3 2 Login WEB Interface 11 ...

Page 6: ...purchased Figure 1 1 Figure 1 2 The following tables show more information about port function No Port name Function description 1 AUDIO OUT Output audio signal to the speakers and other devices 2 AUDIO IN Input audio signal receive analog audio signal from pickup and other devices 3 M12 Network port for mobile device support PoE power supply Note Interface type is D Coded 4 Network port Connect t...

Page 7: ...o device label Table 1 1 Port name Cable color Cable port name Function description I O port Blue ALARM_IN1 Alarm input port 1 receive on off signal from external alarm source Brown ALARM_OUT1 Alarm output port 1 output alarm signal to alarm device Green ALARM_OUT_GND1 GND 1 White ALARM_IN2 Alarm input port 2 receive on off signal from external alarm source Red ALARM_OUT2 Alarm output port 2 outpu...

Page 8: ...ut port of I O cable Step 2 Connect alarm output device to the alarm output port of I O cable Alarm output is open collector output which needs the alarm device to pull up 10K resistance to 3V 5V Step 3 Open the WEB and make corresponding settings for alarm input and output in Alarm Setup Alarm input on WEB corresponds to the Alarm input of I O cable Because the alarm input device will generate hi...

Page 9: ...it is idle the device collects the logic 1 When the input signal is grounded the device collects the logic 0 Refer to Figure 1 7 and Figure 1 8 for alarm output Figure 1 7 Figure 1 8 Mode A Level application The alarm outputs high and low level and alarm output is OC It needs to increase pull up resistance externally to work normally The Max external pull up level is 5V Max port current is 5mA Aft...

Page 10: ...e Network Camera Quick Start Guide 5 Mode B Switch application Alarm output is used to drive external circuit The Max current is 30mA and Max voltage is 5V and it is advised to add a relay when it is beyond the value ...

Page 11: ...off the power before installing Micro SD card Figure 2 1 Step 1 Take out the camera from the packing box open the upper cover component Step 2 Optional Install Micro SD card which is shown in Figure 2 2 Note It needs to implement this step when the device is equipped with Micro SD card slot and it needs to use it Find SD sign inside the device adjust the Micro SD card direction according to the pr...

Page 12: ...tion surface take out the silica gel from the accessory bag and place it on the corresponding location of mounting pedestal then align the pedestal fixing holes with the three expansion bolt fixing holes on the installation surface tighten three self tapping screws into the three plastic expansion bolts and lock them firmly fix the pedestal on the installation surface Note It needs to remove the s...

Page 13: ... firmly fixed to make the device waterproof Step 6 Optional Install waterproof connector for network port which is shown in Figure 2 4 Note It needs to implement this step if the device is equipped with network port waterproof connector and it is used outdoors Figure 2 4 1 Keep the convex groove outward and install the rubber ring into the network port and keep the smaller hole of the rubber ring ...

Page 14: ... the network cable 3 Put the main body of waterproof connector on the network port and rotate it clockwise to lock the network port and waterproof connector firmly 4 Put the waterproof fastening cover on the main body of waterproof connector and rotate it clockwise to lock the waterproof connector and waterproof fastening cover firmly ...

Page 15: ... document WEB Operation Manual in the disk for more details Note You can search out all the cameras within the LAN via Quick Configuration Tool The camera can be configured only when the IP addresses of the camera and the computer are in the same network segment To modify IP address do the following Step 1 Double click ConfigTool exe to open the Quick Configuration Tool Step 2 Click to enter the i...

Page 16: ... 2 Login WEB Interface Note Different devices might have different WEB interfaces the figures in this document are just for reference please refer to the document WEB Operation Manual in the disk and the actual interface for more details To login WEB interface do the following Step 1 Open IE browser and input the modified camera IP address in the address bar and then press Enter key The login inte...

Page 17: ...ou successfully logged in Step 3 Click Here to Download Plug in and then install controls according to the system prompt See Figure 3 4 for the WEB main interface Figure 3 4 ZHEJIANG DAHUA VISION TECHNOLOGY CO LTD Address No 1199 Bin an Road Binjiang District Hangzhou P R China Postcode 310053 Tel 86 571 87688883 Fax 86 571 87688815 Email overseas dahuatech com Website www dahuasecurity com ...

Reviews: