143
Note
You can see this interface after you set IP channel in chapter 4.11.1.3.5. System supports ONVIF
standard protocol.
4.11.1.1.1 Remote Device
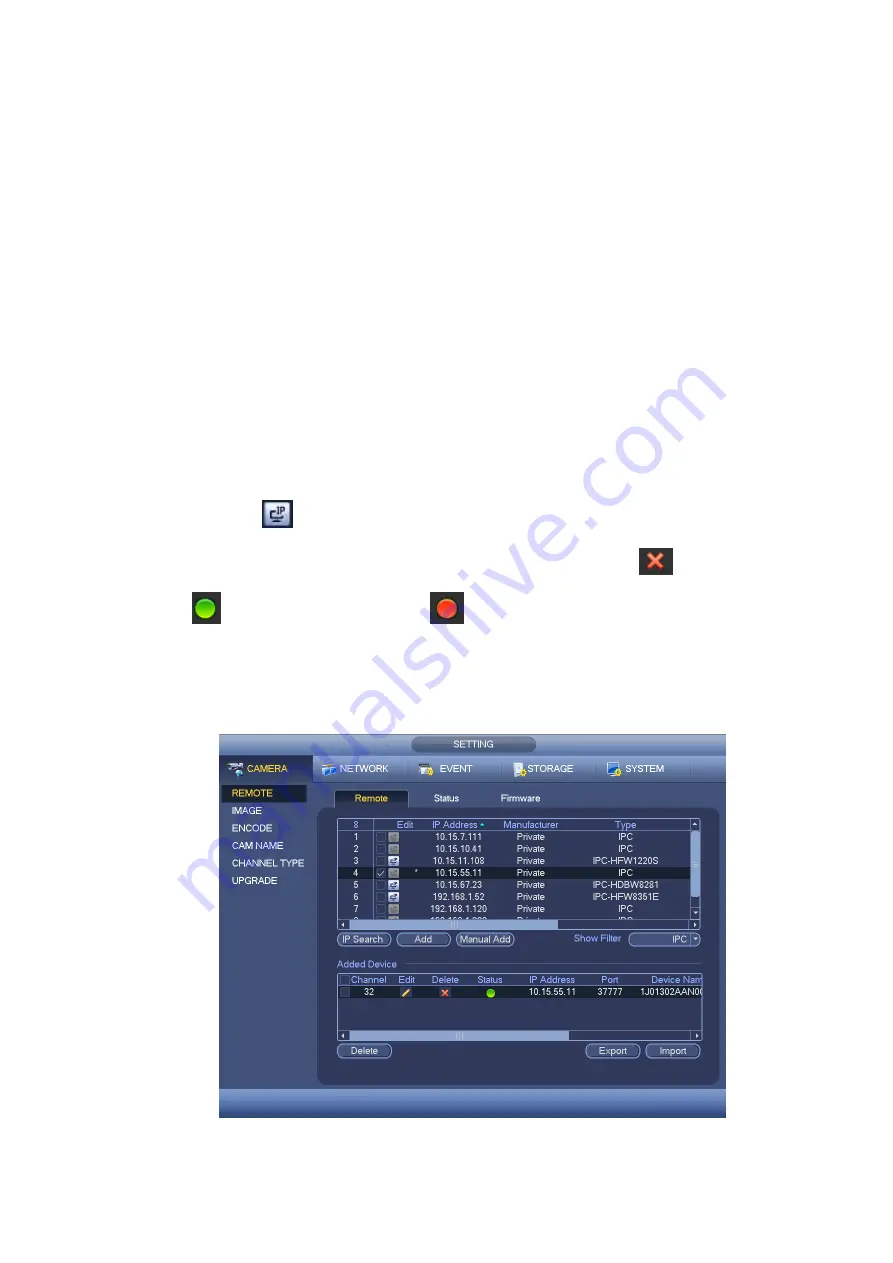
In the main menu, from Camera ->Remote, you can go to an interface shown as in Figure 4-64. Here
you can add/delete remote device and view its corresponding information.
IP search: Click it to search IP address. It includes device IP address, port, device name,
manufacturer, type. Use your mouse to click the item name, you can refresh display order. Click IP
address, system displays IP address from small to large. Click IP address again, you can see icon,
system displays IP address from large to small. You can click other items to view information
conveniently. For the network device already added to the device, you can see there is a small icon
“*” after the SN in case there is repeatedly add operation.
Add: Click it to connect to the selected device and add it to the Added device list. Support Batch add.
You can see the corresponding dialogue box if all digital-channel has connected to the front-end.
System can not add new device if the device you want to add has the same IP and TCP port as
the device in the list.
Show filter: You can use it to display the specified devices from the added device.
Edit: Click button
or double click a device in the list, you can change channel setup.
Delete: Please select one device in the Added device list and then click
to remove.
Status:
means connection is OK and
means connection failed.
Delete
;
Select a device on the Added device list, click Delete button, system disconnect device first
and then remove its name from the list.
Manual add: Click it to add the IPC manually. The port number is 37777. The default user name is
admin and password is admin.
Figure 4-64
Summary of Contents for HCVR7416L
Page 1: ...HDCVI Series DVR User s Manual Version 1 5 1 ...
Page 62: ...52 ...
Page 186: ...176 Figure 4 104 Figure 4 105 Figure 4 106 ...
Page 202: ...192 Figure 4 124 Figure 4 125 ...
Page 203: ...193 Figure 4 126 Figure 4 127 ...
Page 204: ...194 Figure 4 128 Figure 4 129 Figure 4 130 ...
Page 206: ...196 Figure 4 132 Figure 4 133 ...
Page 226: ...216 Figure 4 162 Figure 4 163 Figure 4 164 ...
Page 240: ...230 Figure 4 182 ...
Page 272: ...262 Figure 5 52 Figure 5 53 ...
Page 326: ...316 Maxtor DiamondMax 20 STM3320820AS 320G SATA Maxtor DiamondMax 20 STM3250820AS 250G SATA ...


