background image


2


Basic Operation  


2.1


Login  

Press the Power button on the right side of the device (see Figure 1-2), you can boot up, shut 

down the device, or let it sleep.  

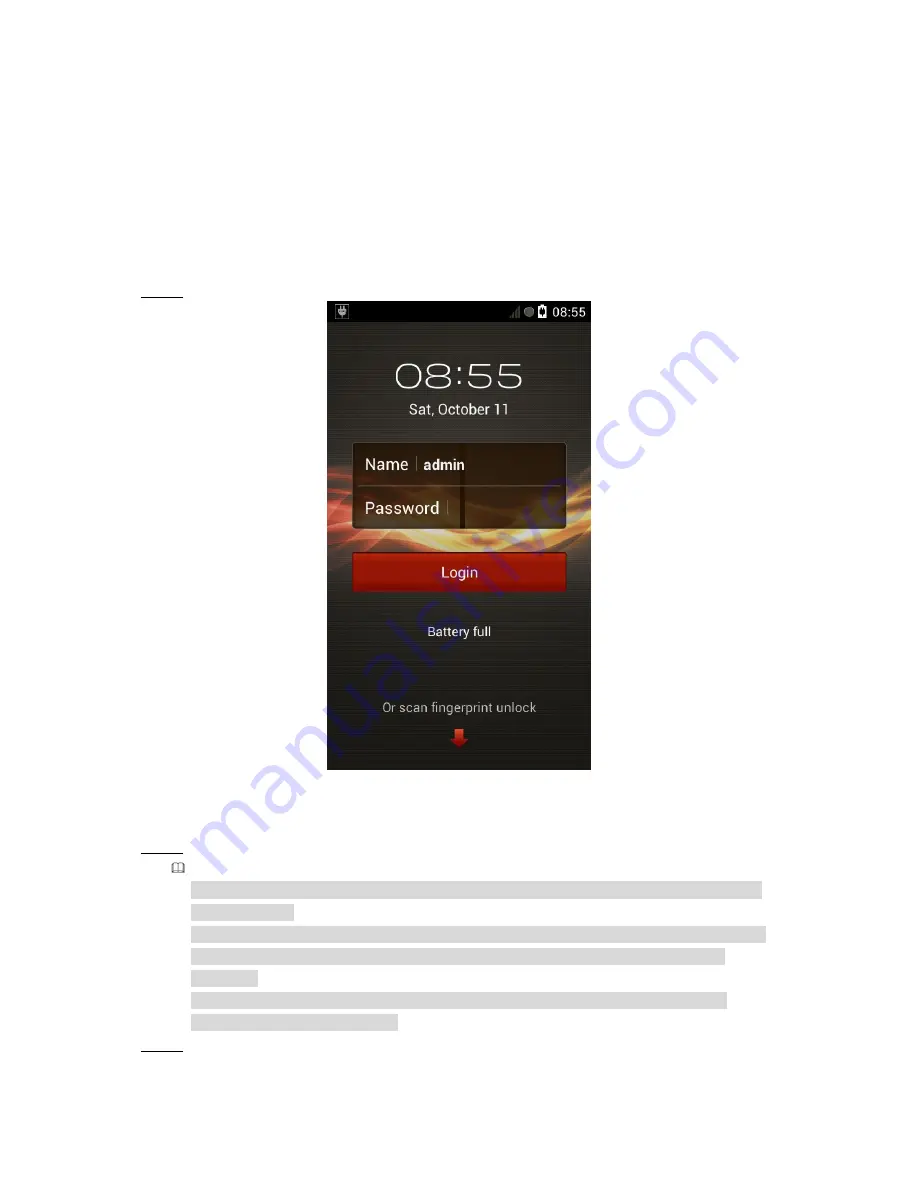
After device boots up, it goes to login interface by default.  

Please follow the steps listed below.  

Step 1  Boot up the device, device goes to login interface. See Figure 2-1. 


Figure 2-1 

Step 2  Input user name and password.  


Note 


Device default user name is 

admin

. If it is your first time to use the device, please set a 

login password.  


You can set three security questions in case you forgot password. Tap Forgot password 

in Figure 2-1, you can reset login password after you properly answer the security 

questions.  


Please change the password regularly to guarantee device safety. Refer to

 User

’s 

manual 

for detailed information.  

Step 3  Tap Login to go to the main interface. Refer to chapter 2.2 Main Interface for main 

interface information.  

Summary of Contents for DHI-MPT310

Page 1: ...Mobile Portable Terminal Quick Start Guide Version 1 0 1...

Page 2: ...ucture 1 2 Basic Operation 4 2 1 Login 4 2 2 Main Interface 5 2 3 Snapshot Record Video 5 2 4 Record Audio 7 2 5 Files 8 2 6 Settings 8 2 6 1 Network 8 2 6 2 Device 9 2 6 3 System 10 2 7 Account 11 2...

Page 3: ...stress violent vibration or water splash are not allowed during transportation storage and installation 3 Installation Keep upwards Handle with care Do not apply power to the mobile portable terminal...

Page 4: ...admin if it is your first time to use the device Change the password regularly to enhance device data safety Note that the security and other related issues caused by the unchanged password shall be r...

Page 5: ...ensation Sensor Self adaptive screen brightness Touch Screen Module 4 0 inch capacitance touch screen multiple point touch screen Memory 2GB RAM 32GB Flash extendable storage Max supports 128GB Micro...

Page 6: ...2 Figure 1 1 Figure 1 2...

Page 7: ...3 Figure 1 3...

Page 8: ...Input user name and password Note Device default user name is admin If it is your first time to use the device please set a login password You can set three security questions in case you forgot passw...

Page 9: ...5 2 2 Main Interface After you logged in the main interface is shown as below See Figure 2 2 Figure 2 2 2 3 Snapshot Record Video Tap system goes to the snapshot record interface See Figure 2 3...

Page 10: ...go to camera settings interface Here you can set video quality frame rate bitrate bitrate type Note When platform is playing the device realtime video you cannot set parameters The left pane is shown...

Page 11: ...ke sure you have connected the peripheral camera or the HDMI signal 5 Tap to snapshot Note In record video mode tap to begin record video During the recording process tap to snapshot 6 Tap the icon to...

Page 12: ...ideo file or audio file Tap you can go to the file manager interface Here you can view photo audio video file See Figure 2 5 Figure 2 5 2 6 Settings 2 6 1 Network Here you can set Wi Fi Bluetooth loca...

Page 13: ...mera basic parameters register device to the platform set storage parameters add SMS whitelist and set audio talk function From Settings Device you can go to the following interface Here you can set c...

Page 14: ...card in case you may lose the data SMS Wakeup Settings When connect the device to the platform the device goes to hibernation mode and disconnect with the platform if there is no operation for a long...

Page 15: ...RY DEFAULT SETUP IS GOING TO CLEAR ALL DATA ON THE DEVICE BUILT IN STORAGE SPACE BE CAREFUL Figure 2 8 2 7 Account Here you can manage user basic information Tap you can go to the following interface...

Page 16: ...nfo Here you can search user information modify rights modify password add delete fingerprint and etc Fingerprint module It is to manage fingerprint module storage space format corresponding user fing...

Page 17: ...I signal device 2 Put the camera facing the plate number and then tap the icon device can display recognition results window Tap OK button device auto snapshot and display the recognition result at th...

Page 18: ...tep 1 Set platform connection parameters Step 2 On the device from Settings Device Platform you can go to the following interface to input parameters See Figure 3 1 Figure 3 1 Step 3 Please refer to t...

Page 19: ...OK 3 2 Platform Settings Please follow the steps listed below to login the platform Step 1 Login DSS manager end and then from General Device Device Encoder and then Tap Add button you can see the fo...

Page 20: ...ideo channel The value is 1 Alarm input channel The value is 1 Step 3 Click OK button to complete the add process Note For detailed operation introduction please refer to our resource CD included in y...

Reviews: