SmartPSS Config 12
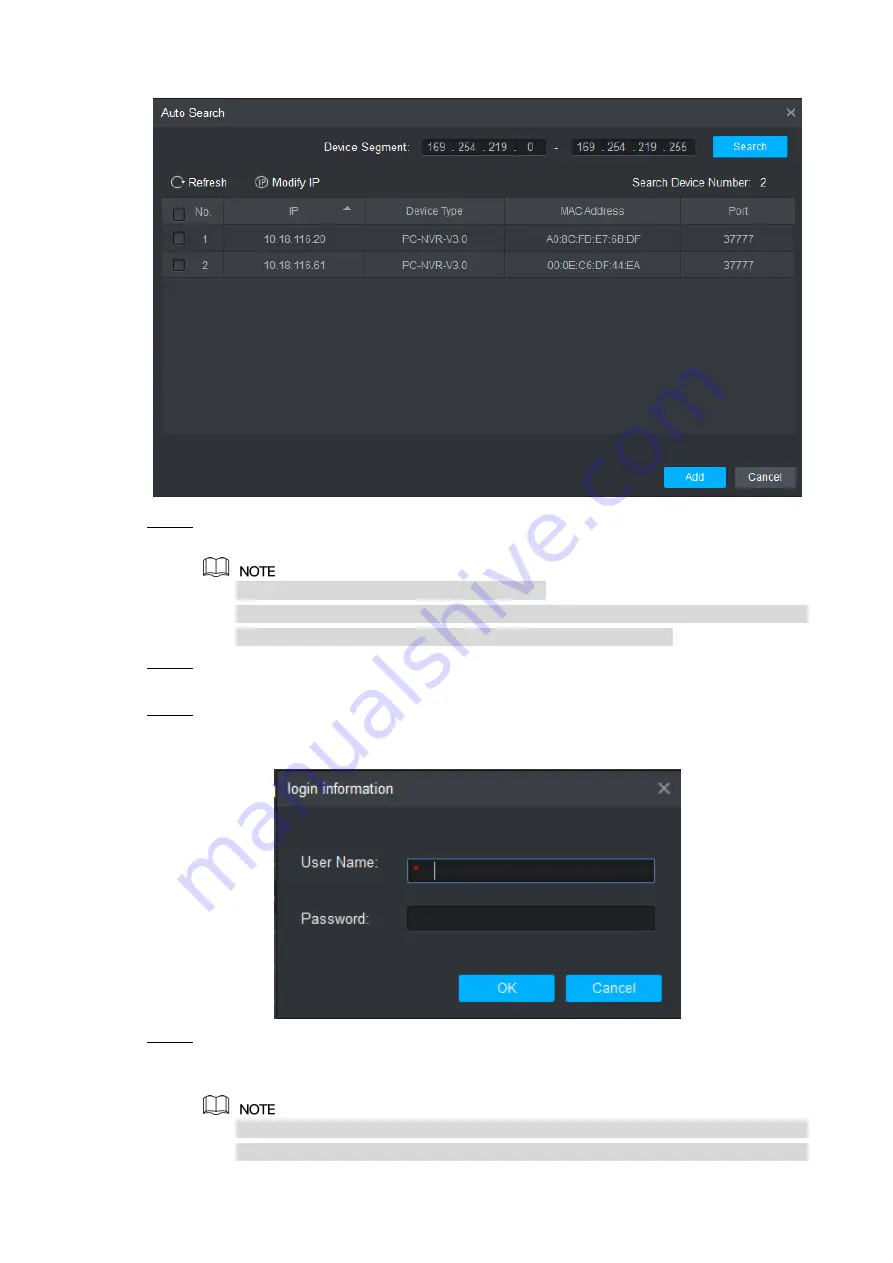
Figure 3-2
Input device segment and click “Search”.
Step 2
The system displays search results.
Click “Refresh” to update device information.
Select a device, click “Modify IP” to modify IP address of the device. For specific
operations, please refer to User’s Manual of Smart PSS Client.
Select the device that needs to be added, and click “Add”.
Step 3
The system pops up “Prompt”.
Click “OK”.
Step 4
The system displays “Login Information” dialogue box, as shown in Figure 3-3.
Figure 3-3
Input “User Name” and “Password” to log in the device, and click “OK”.
Step 5
The system displays the added device list, as shown in Figure 3-4. Please refer to
Table 3-1 for details.
After completing adding, the system cont
inues to stay at “Auto Search” interface.
You can continue to add more devices, or click “Cancel” to exit “Auto Search”


