


2
3
Main Menu
To activate, press the menu button on the bottom left of the bezel. The sub-menus of the main menu
are: Picture menu, Image Menu, Color Temp menu, OSD Setting menu, Reset menu and Misc menu.
Press the menu button to select the sub-menu item. The selected menu item will show a bordered
wireframe. Press the
▲▼
button to move among the secondary menu items of the sub-menu.
7 key
5 key
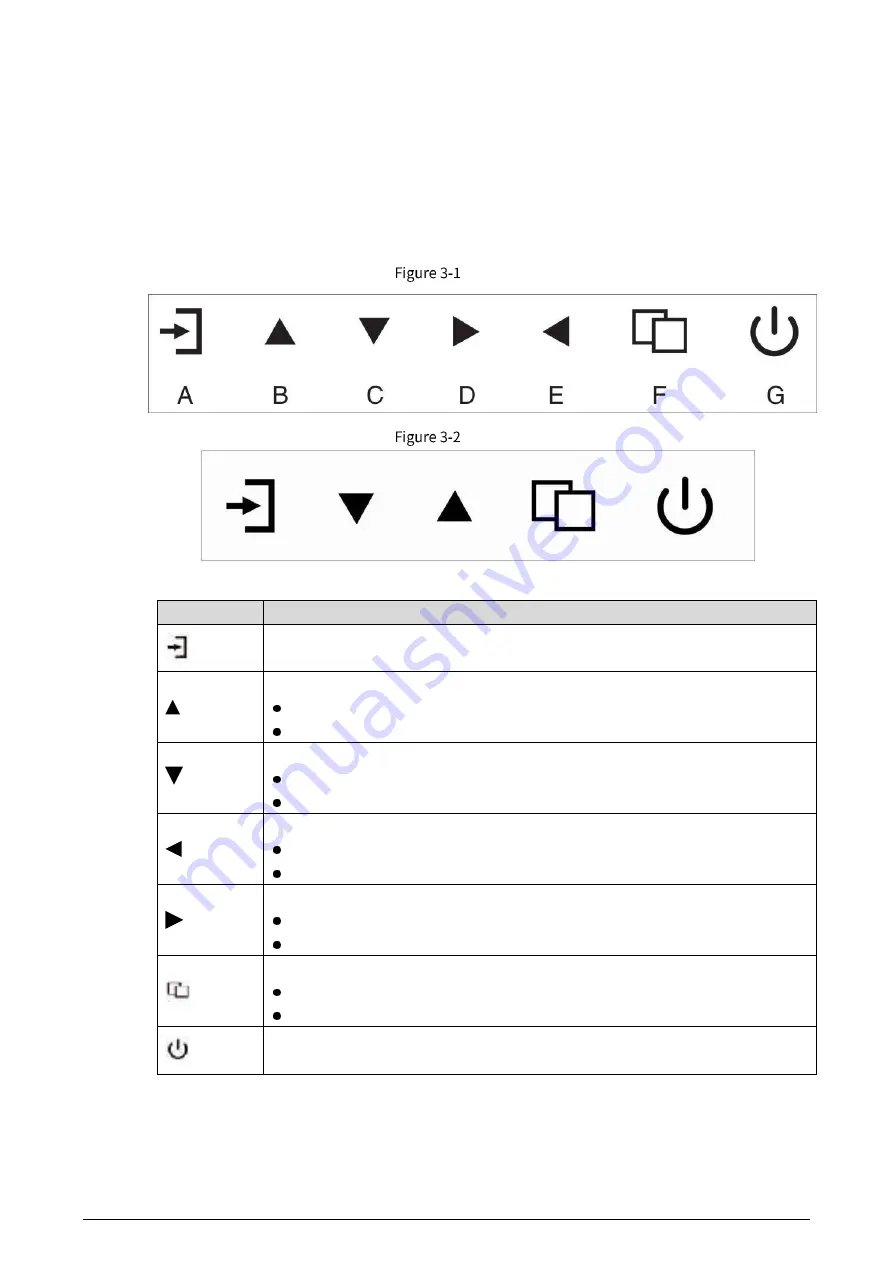
Table 3-1
Icon description
Icon
Description
Source button.
Press the button to display all the signal channel menus.
Upward button.
Press the button to move the cursor to the needed function.
Press the button to change the selected function in OSD menu item.
Downward button
.
Press the button to move the cursor to the needed function.
Press the button to change the selected function in OSD menu item.
Leftward button.
Press the button to move the cursor to the needed function.
Press the button to change the selected function in OSD menu item.
Rightward button.
Press the button to move the cursor to the needed function.
Press the button to change the selected function in OSD menu item.
Menu button.
Press the button to display the OSD main menu.
Press the button to Exit the OSD menu or menu item.
Power button.
Press the button to turn on or turn off the display.


