background image

1

Important safeguards

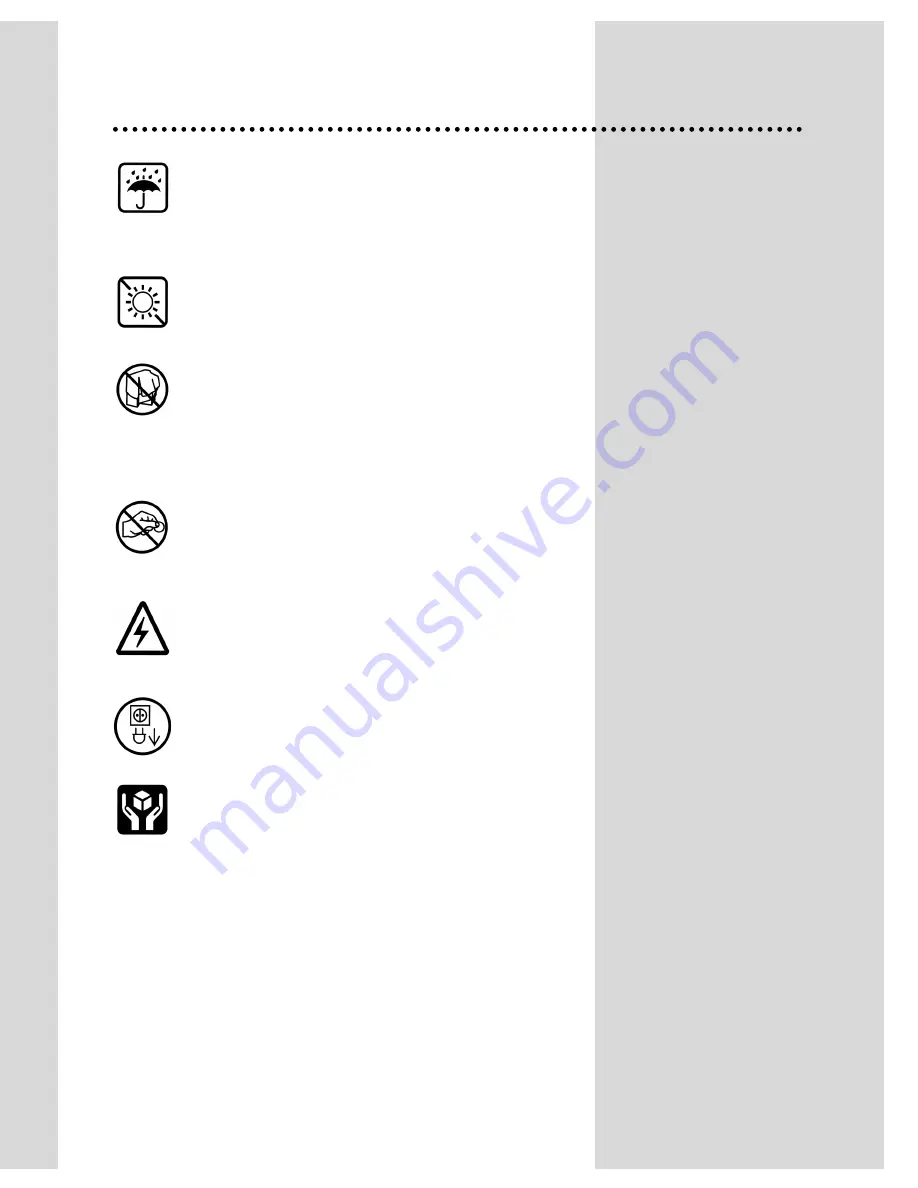
WATER AND MOISTURE

Never install the set in the following places : In a wet
basement, bathroom. Do not place any container with
liquid on the set.

HEAT

Never place the set near heat sources.

VENTILATION

Do not cover the ventilation openings in the cabinet and
never place the set in a confined space such as a
bookcase or built-in unless proper ventilation is provided.
Leave a minimum 10cm gap all around the unit.

OBJECT ENTRY

Do not insert foreign objects, such as needles and coins,
in the ventilation openings.

LIGHTNING STRIKING

You should disconnect the set from the mains and the
aerial system during thunderstorms.

CLEANING

Unplug the set from the mains during cleaning.

AFTER MOVING THE SET

If the set is moved in a different direction, the MAIN
POWER button must be switched off for at least 15
minutes in order to take out a colour strain on the screen.

Summary of Contents for S14C4NT

Page 1: ...MODEL No S14C4NT S20C4NT S21C6NT INSTRUCTION MANUAL COLOUR TELEVISION...

Page 2: ...Contents Important safeguards 1 Before Operation 2 Connecting external equipment 3 Identification of Controls 5 Daily use 6 Menus 8 Teletext 14 Specifications 16...

Page 3: ...r built in unless proper ventilation is provided Leave a minimum 10cm gap all around the unit OBJECT ENTRY Do not insert foreign objects such as needles and coins in the ventilation openings LIGHTNING...

Page 4: ...the set by means of 75 ohm SWITCHING ON AND OFF Switching on Switch the set on with the MAIN POWER button ON OFF and then CH UP or DOWN button on the front of the set Or button or the CH UP DOWN butto...

Page 5: ...essed the on screen display will be changed as shown AV S VHS TV This is used to connect a VCR a Camcorder a S VHS VCR a PERI TV decoder or a video game console In most cases the set changes automatic...

Page 6: ...eo socket with an appropriate cable to the corresponding socket of the external equipment Select AV mode by pressing the TV AV button Press the TV AV button to return to the TV mode HEADPHONE JACK Ins...

Page 7: ...OLD 10 MUTE 11 REVEAL 12 SIZE 13 CANCEAL 14 GREEN KEY 15 RED KEY 16 TV TEXT 17 YELLO KEY 18 CYAN KEY TV MODE 1 POWER 2 NUMBER 0 9 3 NORMAL 4 AV 5 PR CUROSR UP 6 VOLUME UP CURSOR RIGHT 7 MENU 8 PR CURS...

Page 8: ...E Volume adjustment Use VOLUME UP DOWN buttons of the remote control unit or on the front of the set Mute Get sound off by pressing the remote control MUTE button Then logo is displayed Sound returns...

Page 9: ...nter one of the following settings OFF 30 min 60 min 90 min 120 min OFF The remaining time before TV turn off is displayed on programme status Accessed by the Remote Control RECALL button Programme nu...

Page 10: ...If you want to cancel immediately main menu press MENU button once more To select one of the sub menus use remote control CURSOR buttons UP DOWN LEFT RIGHT To enter the selected sub menu press remote...

Page 11: ...lighted child lock is operating The set can only be switched ON with the remote control unit CLOCK TV clock setting Note that if you turn off the set with the MAIN POWER button the clock setting is l...

Page 12: ...ction CHANNEL Channel number FREQ Channel Frequency NAME Channel name PROGRAM Programme number STORE TO Programme storage number 10 PR Programme number NAME Station name CH Channel number Skip program...

Page 13: ...deleting Select the programme to delete using remote control CURSOR UP DOWN buttons Press the remote control DELETE button The deleted programme is moved to the programme number 99 with skip The exis...

Page 14: ...want to start manual tuning Then the channel number the frequency the name and the programme number of this programme are displayed in the install menu TV system selection If necessary you can modify...

Page 15: ...name Select NAME function Use the CURSOR RIGHT LEFT buttons to select the character letter you want to modify To modify this letter press the CURSOR UP DOWN buttons until the desired letter is display...

Page 16: ...the programme preview with TOP text or the overview page of the station you are currently viewing by pressing the INDEX button PAGE HOLD Several sub pages can be combined under a page number and are...

Page 17: ...RACTER SIZE Repeatedly pressing the SIZE button doubles the character size in the following order Upper half of the page Lower half of the page Return to normal size VOLUME BRIGHTNESS CONTRAST CONTROL...

Page 18: ...230V 50Hz Power Consumption 14 39W approx 20 42W approx 21 45W approx Sound Output Power 2 5W 60 MOD at 1KHz THD 10 Dimensions WxHxD 14 366 x 338 x 376mm 9 5Kg Weight 20 496 x 446 x 464mm 18 0Kg 21 5...

Reviews: