24
TROUBLE SHOOTING FLOW CHART
1. POWER CIRCUIT
When changing the parts which are broken first, remove the power plug from the socket and then discharge the voltage
across the terminals of C806. (Use an external K
Ω
resistance)
When check the primary circuit , use the oscilloscope isolated properly (Use the isolated transformer) and connect
GND to the primary GND, however it is not necessary to isolate the oscilloscope when check the secondary circuit.
A. CHECKING THE PRIMARY CIRCUIT
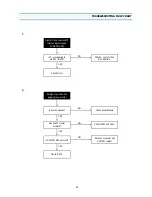
No output Voltage.
NO
NO
Prepare the oscilloscope
connected the isolated
Transformer.
Check L801.
Check M801 Power Module,
D801
YES
YES
YES
YES
YES
Check F801 Fuse.
Is voltage applied to D801?
Is voltage applied to the
terminals of C806?
Check the Secondary circuit
Summary of Contents for DV-K580NZ-T
Page 51: ...50 1 CONNECTION DIAGRAM CIRCUIT DIAGRAM...
Page 52: ...51 CIRCUIT DIAGRAM 2 POWER CIRCUIT DIAGRAM...
Page 53: ...52 CIRCUIT DIAGRAM 3 SYSCON CIRCUIT DIAGRAM...
Page 54: ...53 CIRCUIT DIAGRAM 4 VIDEO CIRCUIT DIAGRAM...
Page 55: ...54 CIRCUIT DIAGRAM 5 HEADAMP CIRCUIT DIAGRAM...
Page 56: ...55 CIRCUIT DIAGRAM 6 OSD CIRCUIT DIAGRAM...
Page 57: ...56 CIRCUIT DIAGRAM 7 Y C SEPARATION CIRCUIT DIAGRAM...
Page 58: ...57 CIRCUIT DIAGRAM 8 AUDIO CIRCUIT DIAGRAM...
Page 59: ...58 CIRCUIT DIAGRAM 9 LOGIC CIRCUIT DIAGRAM...
Page 60: ...59 CIRCUIT DIAGRAM 10 TERMINAL CIRCUIT DIAGRAM...
Page 61: ...60 COMPONENTS LOCATION GUIDE ON PCB BOTTOM VIEW 1 PCB MAIN...
Page 62: ...61 COMPONENTS LOCATION GUIDE ON PCB BOTTOM VIEW 2 PCB UNION...
Page 63: ...62 DISASSEMBLY 1 PANEL FRONT ASS Y...
Page 64: ...63 DISASSEMBLY 2 SET TOTAL ASS Y...
Page 65: ...64 DISASSEMBLY 3 PACKING ASS Y...


