background image

163

Engine oil

Oil level check
Check oil level and replenish if
required. Pull out the oil level gauge
rod(dipstick) at the bottom side of the
engine and wipe it clean, insert the
gauge fully into guide tube and
remove it carefully, then check the
level of oil between the high and low
level marks. Also check the oil sam-
pled with the gauge rod for deterio-
ration.
After checking oil level, insert the
level gauge into guide tube properly
and tighten the oil filler cap firmly.

Type oil

1. D1146/Ti, DE12/T/Ti ENGINE.
• Frigid an area :

API CF–4 or SAE 15W30

Except Frigid an area :

API CF–4 or SAE 15W40

2.  DE08TiS, DE12TiS  ENGINE.
• API CH–4(SAE 15W40) or ACEA

E2/E3

ſ

Refer to “Lubrication list” at page
214.

Changing engine oil
Change engine oil at specified inter-
vals or when found to be fouled con-
siderably. To drain, remove the drain
plug from oil pan, when changing oil
warm up the engine sufficiently to
remove moisture contained in oil.
Thoroughly remove metal chips stuck
to drain plug.

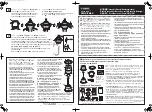
MIN

MAX

Drain plug

PERIODIC INSPECTION AND MAINTENANCE

Engine oil level should be
checked with the vehicle parked
on a level ground and with
the engine stationary. If the
engine has been operated, allow
20 minutes for oil to settle down
before checking the oil level.

NOTE

Summary of Contents for BM090

Page 1: ...ilter Change at end of first 1 000km and every 24 000km there after 182 Page IMPORTANT SERVICE ACTIVITIES Any failure resulting from a lack of normal maintenance as the maintenance service chart in th...

Page 2: ...best and is interested in your complete satisfaction We would like to take this opportunity to thank you for choosing a DAEWOO product and assure you of our continuing interest in your motoring pleasu...

Page 3: ...G ON AND OFF DRIVER S SEAT AND BELT 6 4 INSTRUMENT SWITCHES AND CONTROLS 14 5 DRIVING 135 6 INSPECTION AND MAINTENANCE 162 7 LUBRICATION 213 8 SCHEDULED MAINTENANCE SERVICE 221 9 TROUBLESHOOTING 225 1...

Page 4: ...late V I N Vehicle identification Number plate is attached to the inner panel above the front door Type A Applicable for vehicles in all countries except GCC members V I N plate V I N Vehicle identifi...

Page 5: ...e engine doors OPTION Battery inspection door OPTION Fuel tank inspection door OPTION Fuel inlet flap door OPTION The keys are not interchangeable but door lock keys are interchangeable The code numbe...

Page 6: ...over loading the vehicle dur ing and after the break in period Over loading Over loading not only shortens the service life of your vehicle but also create serious potential safety haz ards The weigh...

Page 7: ...tachometer as you drive to prevent engine over running After the break in period increase the engine speed gradually to complete running in of the vital parts Engine Model Change Interval D1146 At end...

Page 8: ...king Applicable for vehicles in all entrance door except mechanical key When opening the front door to get in operate the entrance key on the right side of the froot middle panel When closing the fron...

Page 9: ...be opened and closed by hands Type B Push Pull or rotary type OPTION As setting the Auto Manual change knobs are installed two types One of the types installed inner upper panel the entrance door oper...

Page 10: ...le and lean backwards and foreward until desired angle is achieved 2 Slide adjustment To move the seat forward and backward Pull No 2 lever forward and slide the seat 3 Height Tilting adjustment Desir...

Page 11: ...9 How to use non suspension seat Semi suspension seat can be infinitly adjusted to suit the weight of the driver Height Adjustment Back Angle Slide Adjustment...

Page 12: ...can be achieved by pulling No 3 lever 4 Upper lumbar support air cushion adjustment 4 Lower button is for inflation upper button is for defl 4 ation 5 Lower lumbar support air cushion adjustment Push...

Page 13: ...spension seat Air suspension seat can be infinitly adjusted to suit the weight of the driver Height Adjustment Tilt Adjustment RR Tilt Adjustment FRT Back Angle Lumbar Support Lower Lumbar Support Upp...

Page 14: ...tor and guide it across the body making certain that it is not twisted The seatback should not be in a reclining position anymore than needed for comfort 2 Insert the metal latch plate into the buckle...

Page 15: ...nder your shoulder 6 If you replace your seat belts incorrectly you may by injured by hardware of the belts at sudden stops 7 Do not wear your seat belts with hard or breakable objects such as glasses...

Page 16: ...14 INSTRUMENTS SWITCHES AND CONTROLS 11 18 20 22 23 24 27 26 30 29 25 5 6 7 9 8 21 13 17 10 1 2 3 4 14 19 15 32 12 31 28...

Page 17: ...lot lamps 7 Engine RPM gauge 8 Lower pilot lamps 9 Tachograph OPTION Speedometer OPTION 10 Door opening switch FRT 11 Door opening switch MID OPT 12 Microphone stand 13 Radio Cassette player 14 Switch...

Page 18: ...el adjustment Type A Tilt Telescopic BH115E BH120E BM090 BS090 BS106 OPTION Adjust the steering wheel to the desired position after pulling lock lever Adjusting angle 8 Travel 40mm Type B Fixed BM090...

Page 19: ...ture becomes 25 C or up to 6 minutes This improves the engine condition Turn signal switch Move this combination switch lever in the desired direction so that the cor responding turn signal lamp opera...

Page 20: ...se plate lamp instrument panel lamp clearance lamp 2nd stage tail lamp license plate lamp instrument panel lamp clearance lamp head lamp cornering lamp simultaneously with turn signal lamp ON Windshie...

Page 21: ...st pipe when the engine brake is applied resulting in assisting brake action When the switch lever is pushed downward and clutch and accelerator pedals are released the indicator lamp comes on showing...

Page 22: ...ature Always drive with the knob turned back home Idle control valve For MT643 auto T M Valve position FAST IDLE UP 900 1000rpm IDLE DOWN 550 650rpm Battery switch It controls the entire electrical ci...

Page 23: ...when the switch is placed at manual position the doors are not operated by the door opening switch and can be opened or closed by the hands Air parking brake switch When the switch is pushed the park...

Page 24: ...stem It needs for a car mechanics but not used for a driver usually push the button about 3 seconds self diagno sis started and the ABS ASR warning lamp blinker on instrument panel ABS ARS ABS ABS ARS...

Page 25: ...Engine check switch Blue color 2 Engine clear switch Black color 2 After repairing defects according to the engine maintenance manual press the engine clear switch for 5seconds to remove the errors o...

Page 26: ...substituted to blank cover 7 Tachograph BH115E BH120E BM090 BS106 OPT Speedometer BM090 BS106 8 Bulb check switch 9 Cover 10 Turn signal hazard warning indicator 11 Upper pilot indicator lamps 12 Low...

Page 27: ...ature is normal If the needle stands in H overheat ing stop the vehicle and run the engine at a moderately fast idle speed or put the gear in lower posi tion to reduce engine load If the vehicle is op...

Page 28: ...5 3 8 2kg cm2 Be habitual of watching the gauge while driving to make sure the gauge needle indicates the normal condi tions Engine tachometer The tachometer indicates the engine speed in revolutions...

Page 29: ...d in a single chart The speed meter indicates the vehicle speed in kilometer per hour km h The odome ter indicates individual trip distances The odometer records the total dis tance in km The unit of...

Page 30: ...ndicator lamp When the turn signal switch or haz ard warning flasher switch is turned on the turn signal indicator lamp flashes to indicate the operation of the external turn signal lamps or haz ard w...

Page 31: ...level low OPT AOH Brake 4 Seat belt Unfastened 5 Parking lamp on 6 Engine oil pressure low 7 Battery charging 8 Engine door open 9 Emergency door open OPTION 10 Mirror defroster on OPTION 11 Air drye...

Page 32: ...Air tank pressure low Rear EMER 5 Brake oil level low OPT AOH Brake 6 Engine oil pressure low 7 Battery charging 8 Engine preheat on 9 Seat belt Unfastened 10 Engine door open 11 Air dryer operation...

Page 33: ...4 Air tank pressure low Rear EMER 5 Brake oil level low OPT AOH Brake 6 Engine oil pressure low 7 Battery charging 8 Engine room fire warning OPT 9 Seat belt Unfastened 10 Engine door open 11 Air drye...

Page 34: ...Brake 4 Seat belt Unfastened 5 Parking lamp on 6 Engine oil pressure low 7 Battery charging 8 Engine door open 9 Emergency door warning open OPTION 10 Mirror defroster on OPTION 11 Air dryer operation...

Page 35: ...Air tank pressure low Rear EMER 5 Brake oil level low OPT AOH Brake 6 Engine oil pressure low 7 Battery charging 8 Engine room fire warning OPT 9 Seat belt Unfastened 10 Engine door open 11 Air dryer...

Page 36: ...brakes could cause tem porary lowering of air pressure In such an instance keep the engine running as fast idle until the indicator lamp goes out Seat belt Unfastened The seat belt warning lamp comes...

Page 37: ...en the bat tery main switch is operated and goes out as the engine is started and alternator cir cuit is brought into normal function The indicator lamp comes on while the engine is running it indicat...

Page 38: ...t comes on when starter switch is positioned ON while it goes out when the preheating is completed High beam on The high beam indicator lamp comes on when head lamps with high beam are in use Transmis...

Page 39: ...OPTION The indicator lamp comes on when the engien room is fired Retarder system warning OPTION At the case that additional retarding system is applied while the retarder is operating the indicator l...

Page 40: ...arning OPTION 4 Exhaust brake operation 5 Speed 3 indication OPTION 6 Electronically controlled air Suspension operation OPTION 7 Air condition warning OPTION 8 MIL 9 Brake pad wear warning 10 ABS sys...

Page 41: ...ng OPTION 4 Exhaust brake operation 5 Speed 3 indication OPTION 6 Electronically controlled air Suspension operation OPTION 7 Transmission temperature 8 Do not shift 10 ABS system warning OPTION 11 AS...

Page 42: ...aust brake operation 5 Battery main S W operation 6 Retarder operation OPTION 7 T M temperature warning 8 Air condition warning OPTION 9 Over speed warning OPTION 10 ABS system warning OPTION 11 ASR s...

Page 43: ...on 3 Front door opened 4 Middle door opened OPTION 5 Rear door opened OPTION 6 Front emergency valve operation OPT 7 Middle emergency valve operation OPT 8 Rear emergency valve operation OPT 10 ABS sy...

Page 44: ...eration 3 Front door opened 4 Middle door opened OPTION 5 Rear door opened OPTION 6 Front emergency valve operation OPT 7 Middle emergency valve operation OPT 8 Rear emergency valve operation OPT 9 MI...

Page 45: ...ration 3 Front door opened 4 Middle door opened OPTION 5 Rear door opened OPTION 6 Front emergency valve operation OPT 7 Middle emergency valve operation OPT 8 Rear emergency valve operation OPT 10 AB...

Page 46: ...Speed 3 indication OPTION 5 Speed 2 indication OPTION 6 Parking lamp ON 7 Mirror heater OPTION 8 Air condition warning OPTION 9 Emergency door OPEN OPTION 10 ABS system warning OPTION 11 ASR system w...

Page 47: ...ystem operation OPTION 3 Retarder system warning OPTION 4 Exhaust brake operation 5 Speed 3 indication OPTION 6 T M temperature warning 7 ABS system warning OPTION 8 ASR system warning OPTION 9 Auto g...

Page 48: ...oor opened 4 Middle door opened OPTION 5 Rear door opened OPTION 6 Front emergency valve operation OPT 7 Middle emergency valve operation OPT 8 Rear emergency valve operation OPT 9 Auto greaser operat...

Page 49: ...arning 4 Exhaust brake operation 5 Battery main S W operation 6 Retarder operation OPTION 7 T M temperature warning 8 Do not shift 9 Over speed warning OPTION 10 ABS system warning OPTION 11 ASR syste...

Page 50: ...er system warning OPTION Type A H Type B At the case that additional retarding system is applied while the retarder is operating the indicator lamp comes on Exhaust brake operation The indicator lamp...

Page 51: ...lamp on the roof at the front of the vehicle lights on Speed 2 indication OPTION Type A B G Type H At the vehicle speed in 80km H the lamp comes on also the middle red marker lamp on the roof at the...

Page 52: ...system is operating or the main pressure of the system drops below 25kg mm2 Speed limiter operation OPTION The lamp comes on while the speed limiter system is operating Air conditioner warning OPTION...

Page 53: ...round Empty state Red line indicator lamp come on Battery main S W operating The indicator lamp comes on when the bat tery relay switch is operated and goes out as the engine is started and alternator...

Page 54: ...amp does not indicate the action of the parking brake Make sure to pull the park ing brake lever fully when parking the vehicle Before moving the vehicle be sure to check that the park ing brake indic...

Page 55: ...ing OPTION The indicator lamp comes on when the engien room is fired Mirror defroster ON OPTION Pressing the side mirror defroster switch the indicator lamp ON and the defrosting coil in the mirror st...

Page 56: ...54 SWITCHES The quantities or locations of switches could be different from the figure because the switches could be added or omitted and locations could be changed by the requirement of customers...

Page 57: ...Front Room lamp switch Floor 2 Apply for vehicles with lamp rack Push the switch light come on the all room lamp incandescent but except first room lamp at the entrance door Front Mood lamp switch 1 O...

Page 58: ...rack Pressing the switch to light on the mood lamp in order even Room lamp switch Bulb Push the switch to light on the fluo rescent room lamps at the passen ger s compartment Driver lamp switch Pressi...

Page 59: ...s come on The switch operates when the light switch is on Reading lamp switch OPTION Pressing the switch reading lamps below the air conditioner grill come on Fog lamp switch Front Pressing the switch...

Page 60: ...switch the fog lamps come on to improve your Backward vision in fog or snow Battery main switch Pressing the switch to light on the battery lamp come on Parking lamp switch OPTION Pressing the switch...

Page 61: ...h front ent door lamps upper the front door come on Mid ent door switch OPTION Pushing the switch Mid ent door lamps come on When Mid door opened Rear ent door switch OPTION Pressubg the switch rear e...

Page 62: ...electric power to TV VCR is supplied Electric fan switch OPTION Pressing the switch electric fan power supplied for driver s and pas sengeeer s fan Step lamp switch OPTION Push the switch to light on...

Page 63: ...itch OPT Push the switch to light on the des tination boards front and rear Door rack lamp switch OPTION Pressing the switch door rack lamps come on 3 Heater mirror switch OPTION Pressing the switch p...

Page 64: ...by pressing the upper button and other is outer watching Select the Auto Manual switch Auto Rear situation is displayed the monitor with operation on camera in state of shift ed reward gear of vehicle...

Page 65: ...side end the blower is inhaled from outer for cir culation Heating and defrosting of driver s compartment When the lower control lever is placed at the left and the air comes by two directions one is...

Page 66: ...rator switch Before press the units controller but ton must be operated power switch and push the button for unit selector Select the unit No by pressing the buttons are ordinary order from unit No 1...

Page 67: ...of fan speed switch 4 5 6 While the cooling operator switch is not pressed room air only cirrculates Cooling operator switch 3 Before press the button must be operated power switch 1 Press the switch...

Page 68: ...adequate room tempera ture by blowing in the fresh and cool outdoor air At this time the compressor and condenser fan do not operate but the blowers in the evaporator oper ate Stop Normal stopping Fir...

Page 69: ...r low ventilation in ventilation opera tion and high or low cooling in cool ing operation could be selected This switch enhances the performance of temperature control As the time goes by about 10 min...

Page 70: ...son off Keep the air conditioner under installation during season off Keeping refrigerant is helpful for protection of rust and oil consump tion for long service life 2 Season off Operate once in a mo...

Page 71: ...l Check with leak tester Check through sight glass Check Wash clean or replace Check or replace Clean with com pressed air or water Check Replace desiccant Check Check Check Replace Check and replace...

Page 72: ...leak of connected position with leak tester and retighten 1 Check for operation when turning on the main switch after starting engine 2 Check for operation of vent cooling and unloading by using the...

Page 73: ...gas leak and damages Check for operation Check for operation Replace desiccant and filters Check for operation 1 Check for clamping of connected parts 2 Check for gas leak of connected parts 3 Check f...

Page 74: ...rge valve of compressor 4 Clogged inlet strainer of compressor 1 Liqued refrigerant enters compressor 2 The expansion valve worn out 3 Broken suction or discharge valve of compressor 4 Too much refrig...

Page 75: ...expansion valve 8 Frosted liquid refrigerant in refrigerating cycle 9 The expansion valve worn out Measures 1 Disconnect them and check 2 Check leaking part then charge refrigerant up that the no bub...

Page 76: ...1 11 3 3 I Comp 1 Compressor 2 Discharge shut off valve 3 Condenser 4 Receiver tank 5 Service shut off valve 6 Dryer 7 Sight glass 8 Expansion valve 9 Distributor 10 Evaporator 11 Suction shut off va...

Page 77: ...eiver tank 4 Dryer 5 Motor DC24V 6 Fan 7 Motor mount 8 High pressurized gas line hose 9 High pressurized liqued pipe left 10 High pressurized liqued pipe right 11 High pressurized liqued line hose 12...

Page 78: ...pressurized gas pipe 10 Low pressurized gas pipe 11 Pressure equalizing pipe 12 Air filter 13 Drainage prevention filter 14 Operating panel 15 Temperature sensor 16 Wiring 17 Drain hose 18 Panel suppo...

Page 79: ...use it for more than 10 sec At pre heater for more than 3 sec at operating 2 Blower air control switch The switch is used at air control of AIR CON blow er engine stop as 5 stages 1 OFF at AIR CON sto...

Page 80: ...per ation At this time E G would be automatically stopped with buzzer 7 Battery charging lamp The lamp would be on at the charging failure of battery due to over currency after E G operation alternato...

Page 81: ...or main engine The fuel consumption of power pack system is about 4 7l H at 1950rpm on operation 2 Check fulfill of cooling water It is an enough if the engine coolant is in full up to below of coolan...

Page 82: ...the exhaust gas is colorless but in case of white or black please contact to service sta tion Daily regular check 1 Important check repair 1 Engine part refer to separate service manual of engine 1 A...

Page 83: ...erant properly No problem in case that can see the bubbles intermittently Please decide it seeing sight glass during 3 5 minutes Normal On the switch bubbles be seen sometime and then be clear later I...

Page 84: ...n Replace ageing 4 Fan belt Check Wound Replace Ageing 1 season Tension 5 Cooling system Cleaning Dirty 6 Oil supply to Check water pump 7 Oil supply to Check 200hrs main pulley 8 Engine oil Check At...

Page 85: ...s hrs season season 10 Air cleaner Cleaning Dirty 1 season element Replace 11 Air cleaner Check Breakage hose 12 Air cleaner Jointing Looseness hose clamp 13 Oil tube rubber Check Leakage 1 season hos...

Page 86: ...ening oil pressure 4 Water temp lamp Confirmation Lightening 5 Refrigerant high Confirmation Lightening low press lamp 6 An earth Check Rust fixing bolt looseness 7 Connection part Check Looseness of...

Page 87: ...season ageing 15 Joint part of Check Interval refrigerant pipe 16 Gas leakage Check Sight check 17 Gas leakage Check 18 Expansion V A Check Operation 3 season 19 Oil amount Check Sight 2 season Replac...

Page 88: ...in Cleaning Dirty 26 Fixing part of Jointing Looseness evaporator fan 27 Operation of Check Noise 1500hr evaporator fan 28 Fan belt Check Wound replace aging 2 seasons tension 29 Unit fixing bolt Join...

Page 89: ...ng Standard everyday every every every every Replace Remarks or at any 100 200 1 2 period time hrs hrs season season 33 Air capacity Check 34 Cooling effect Check Difference between in out door temp 7...

Page 90: ...16 17 18 19 20 21 22 23 24 25 26 27 28 29 30 31 32 33 Badness of cooling air duct Lose belt for cooler High pressure side is closed Low pressure side is closed Half opened of discharge control V A Clo...

Page 91: ...r evaporized press subject to strange Dirty conderser fin Outdoor temp is high Bad compression Breakage of comp 0 ring Exp V A is so opened Liquid hammering Bad connection of temp sensor box broken in...

Page 92: ...kage form temp sensor body of expan sion valve Clogged dryer No power supply Injuried fan Serious vibration Some gap between motor fan Remedy Repair Repair thd gas leaking part Fullfil the gas to prop...

Page 93: ...h dusts on cooler fan Duct leakage Heat load in low inside of room Same as symptom Remedy Repair Dischage the refrigerant properly If clogged so often chage it Turn the adjust nut of exp V A one or tw...

Page 94: ...Seal breakage of comp Be opened window or ventillation fan Poor connection of suction duct Too many passengers Remedy Repair Drain the refrigerant until 50 of over cooling Check insulator and whether...

Page 95: ...ngine after Running the starter motor for 20 seconds try to restart the sub engine by doing the above mentioned process 1 to 4 after one minutes 5 Release your hand from the key switch after starting...

Page 96: ...ditioning system pro vides the safety functions to stop automatical ly its operation under the following emergent conditions a When the refrigerant pressure of the bus air conditioner system may devia...

Page 97: ...erts the refrigerant into liquid at high pressure and high temperature by cooling Use of expansion valve cause the liquid refriger ant to be decompressed to enter the cooler again and to evaporate to...

Page 98: ...5 Sub engine driving system Condenser fan is driven by V belt and evaporator fan by driving shaft 7 6 5 1 3 2 4 1 Crank pulley 2 Fan pulley 3 Idler 4 Coupling Comp 5 Bearing ass y 6 Drive shaft 7 Blow...

Page 99: ...97 6 Cooling air circulating system Cooler blows off cooled air through the blow off grilles on the ceilling 1 Cooler unit 2 Underfloor duct 3 Vertical duct 4 Ceiling duct 5 Grille...

Page 100: ...and intake the out door air to the compartment Push the exhaust switch 3 5 to open the shutter and extract the air in the compartment to outdoor POWER 1 2 3 AUTOVENTILATOR 1 2 3 4 5 POWER AUTOVENTILAT...

Page 101: ...itch and push the button for served the cold water through the nozzle If water is not enough the cool Operated the water cooler switch by pushing the button then the water is refrigerating 4 2 3 1 1 N...

Page 102: ...the same time electric discharge starts between the electrodes by high current Then the injected fuel is ignited and combustion starts The indicating lamp combustion comes on 4 After ignition flame de...

Page 103: ...is clogged 3 Fuel feeding pipe and fittings 4 Hot water circulation valve in the engine side is open 5 Suction and exhaust pipe are clean 6 Coolant level of the engine Maintenance 1 Periodically clean...

Page 104: ...ine 1 Lack of fuel 2 Fuel filter blocked or frozen by water 3 Leakage of fuel piping 4 Solenoid valve under quality 1 Electrode under quality 2 Ignition unit under quality 3 Lack or excess of combusti...

Page 105: ...anger water valve shut off 2 Air in water line or body 3 Big resistance in water flow 4 Lack of water flow by old water pump 5 Bad adjustment of overheat sensor set ting 1 Overheat by blocking in wate...

Page 106: ...mbustion air fan 6 Solenoid valve 7 Electrode plug 8 9 Water pipes 10 Ignition electrodes 11 Fuel nozzle 12 Control thermostat 13 Preheat coil 14 Overheat thermostat 15 Heat exchanger 16 Combustion ch...

Page 107: ...mode Openning cutoff valve To push OPEN position Shutting cutoff valve To push CLOSE position 3 Feces tank warning lamp When full at the tank the lamp turn on 4 Feces tank cutoff valve switch Douse th...

Page 108: ...10 Fast rewind progress button 11 Fast forward progress button 12 Tune Button 13 Preset buttons 14 Power switch 15 Radio Mic change switch 16 MIC volume knob 17 MIC jack 18 MIC tone knob 19 Monitor s...

Page 109: ...ht speak ers Press loud button 18 to enhance the low and high sound When the receiving condition is not good because of high impedance magnetic interference of etc push power switch 14 then receiving...

Page 110: ...ton 7 Band button 8 Loud button 9 Tape slot 10 Fast rewind progress button 11 Fast forward progress button 12 Tune Button 13 Preset buttons 14 Power switch 15 Radio Mic change switch 16 MIC volume kno...

Page 111: ...he strength of high sound Turn th balance knob 4 to balance the sounds of left and right speak ers Press loud button 18 to enhance the low and high sound When the receiving condition is not good becau...

Page 112: ...t forward button 7 Fast rewind button 8 Seek knob 9 Band 10 AS PS button 11 MIC Power switch 12 MIC Radio fader 13 Monitor fader 14 MIC tone knob 15 MIC volume knob 16 MIC jack VOL PUSH SEEK PL ON MIC...

Page 113: ...ot 4 then tape play starts auto matically Press the button 6 7 to rewind or forward the tape fastly and inverted direction of playing the tape Direction of play displayed the indica tor 2 press the ej...

Page 114: ...er 6 Echo interval controller 7 MIC volume 8 MIC jack 9 Tone 10 Eject 11 Boardcasting remember button 12 Tape slot 13 LCD display 14 Fast REWIND FORWARD button 15 Band 16 AS PS button 17 Push seeking...

Page 115: ...e this button stop the searching Each remembered the boardcasting in button 11 18th boardcasting is remembered on AM1 FM1 FM2 each button Controlled the high volume by turning the knob 9 Turn on the p...

Page 116: ...ne of RADIO TAPE TV MIC In using MIC Press the echo knob 6 then echo controlled effectivity and must stick in the MIC jack 8 certainly con trolled the tone by up down the MIC lever 7 Passenger could b...

Page 117: ...ts 3 Keep speakers tapes and radio not to be wet when cleaning the vehicle and be careful not to be exposed to moisture to protect electrical shock 4 Cassettes are negative ground type and the power s...

Page 118: ...dirt 7 Clean the head of tape player carefully with a cotton applicator soaked in alcohol If the tape play er is used for more than one hour every day the head should be cleaned once or twice a month...

Page 119: ...t forward Green 11 Pause 12 Record indicator Red 13 Cassette indicator Green 14 Repeat play indicator Green 15 Normal speed indicator Green 16 Remote control receive 17 Tape slot 18 STOP button 19 Slo...

Page 120: ...tape playing Scene dis played slowly and see to detail scene to move the striped during slowly playing with controller button of scene by pressing to stripes moved up down Press the pause button 11 sc...

Page 121: ...itch 6 VTR tape eject button 7 VTR playing stop button 8 Fast rewind button 9 VTR playing start button 10 Fast forward button 11 Guide broadcasting power switch 12 Stop broadcasting button 13 Pass by...

Page 122: ...120 EARPHONE OPTION 1 Volume controllor 2 Select the media Tape 1 Tape 2 Radio TV VTR 3 Earphone jack 3 2 1...

Page 123: ...tomatically Connect the your earphone to jack 3 and put the earphone into your ear Select the wanted Media by pushing the selector 2 that order Tape1 Tape 2 Radio TV VTR from top side to bottom and co...

Page 124: ...lows ooooo 3 After selecting the route with the oper ating panel press the button The route is appeared repeatedly with out special operation on vehicle ser vice 4 If you want to change the route pres...

Page 125: ...106 0 80 0 0 0 0 0 0 km h 60 40 20 160 140 120 100 2 1 1 Speedometer needle 2 Odometer distance Speed Recording and indicating ranges of 160km h are available Distance Calibrateable odometer 7 digit c...

Page 126: ...ons 4 Speedometer needle 5 Clock check window 6 Odometer 7 Screen paper mark TACHOGRAPH BH115E BH120E BM090 BS090 BS106 OPT Type A Mechanical type W O RPM SEPUNG electric type W O RPM SEPUNG YAZAKI 7...

Page 127: ...ed between 40 and 60 of the maximum speed is reached 100km h General 120km h GCC members 90km h SAUDI HAjj Distance Calibrateable odometer without zero setting Time Time display with time correct rota...

Page 128: ...or light 3 Minute hand 4 Speedometer needle 5 Odometer 6 Clock graduations 7 Hour hand 8 RPM needle Type B electric type W RPM VDO KIENZLE 100 120 140 160 Km Km h ARCO 20 40 60 10 15 20 25 30 33 0 80...

Page 129: ...ached 100km h General 120km h GCC members 90km h SAUDI HAjj Engine speed Additional feature to certain tachograph models measuring range depending on model type 160km h 3300rpm Distance Calibrateable...

Page 130: ...128 1 Key hole 2 Speed graduations 3 Speedometer needle 4 Clock check window 5 Odometer 6 Speed warning lamp Type C electric type W O RPM VDO KIENZLE 2 1 6 3 4 5...

Page 131: ...e maximum speed is reached 100km h General 120km h GCC members 90km h SAUDI HAjj Time Time display with time correct rotation of the chart controlled by a high quality quartz clock Illumination The ta...

Page 132: ...ing the recording chart paper in position fill out necessary items on the recording chart paper exercise carefully not to scratch the paper 3 Setting of clock Set the time by turning the time setting...

Page 133: ...eed OPTION Tachograph for 7 day recordings A chart bundle is placed in to these special tachographs once a week and for weekly this is of particular advantage for vehicles which are being used regular...

Page 134: ...al To avoid unnecessary increase in fuel consumption the accelerator pedal should be operated smoothly and rea sonably Make sure that injection pump lever reaches maximum speed stopper when pressing a...

Page 135: ...press the clutch pedal when changing gears Do not rest your foot on the pedal when the clutch is not in use Premature wear of the clutch will result Service life of the clutch could be reduced when ke...

Page 136: ...the stop button ENGINE STARTING IN ENGINE COMPARTMENT When the engine starter switch in steering column is located in OFF position by setting the tog gle switch to ON only the starter switch operates...

Page 137: ...l level gauge oil dip stick to check if the oil tank has been filled up to the specified level b When the oil level is low add the same brand oil according to RECOM MENDED LUBRICANTS and wait a while...

Page 138: ...coolant within 40mm from the end of filling neck Never open the cap when the engine is hot to avoid damages from the hot steam blowing out Operate the service when the engine is cooled sufficiently an...

Page 139: ...al means that the element is fouled then clean or change the element after inspection After service push the botton at the top of indicator then the signal returns to yellow Extract out the dust by pr...

Page 140: ...ntamination If the level of clutch oil in the reservoir is too low replenish up to the MAX mark Windshield washer fluid level Check fluid level in the reservoir and replenish as necessary Check items...

Page 141: ...t corrosion Battery PT PTC OPTION a This PT PTC battery for intense cold needs periodic maintenance every 5 000km on driving b Must check the electiolyte in not enough properiety and slip of bat tery...

Page 142: ...xpected and possible battery discharge may occur if the fol lowing precautions are not taken While the engine is not running It may give rise to battery discharge if leave the vehi cle switched ON of...

Page 143: ...ng at t C t Temperature of electrolyte when checked 2 When lowering of electrolyte level is due to spillage replenish with dilute sulfuric acid of the same specific gravity 3 When replacing the batter...

Page 144: ...tank to drain off condensates pro duced in it When opening the drain cock pull it forward as shown Normal inflation Tire size pressure in kg cm2 PSI 11 00R20 16PR Tube radial Front 8 4kg cm2 11R22 5 1...

Page 145: ...spring Except air suspension Check chassis springs for damage and tightening condition of U blot If any damaged or separatd spring leaf from normal position is found stop the vehicle operation and ha...

Page 146: ...Turn the starter key to ON Starting the engine 1 Turn the starter key to START position Avoid excessive starter cranking in excess of 10 seconds to prevent any possible damage to starter motor or batt...

Page 147: ...lamp will light up showing the engine is pre heated automatically After pre heating is completed the indicator lamp will go out 2 After pre heating is completed press the clutch pedal and accel erato...

Page 148: ...vere operations like full load or ascending a slope causes overflow of coolant In this case idle the engine for 5 or 10 minutes before stopping it Diesel engine is apt to keep running even after the b...

Page 149: ...iphery of the wheel when checked with the front wheels positioned straight ahead Air parking brake switch In air parking brake switch applied vehicle be sure to release parking brake before driving al...

Page 150: ...pedal free play if the free play deviates from 40 50mm adjustment is necessary Brake pedal Check the brake pedal free play if the free play deviates from about 15mm adjust the screw fitted at the bot...

Page 151: ...or unnecessary lights are come on and recheck the park indicating lamp gone out surely Let the engine idle until it is fully warmed up and coolant temperature increases beyond 60 c between C and the...

Page 152: ...heck to locate the cause of trouble If the cause of trouble was not located check at your nearest Daewoo dealer If unusual sound or smell becomes noticeable while driving stop the engine and check to...

Page 153: ...removing the pressure cap from a hot radiator Wait until the engine temperature goes down and use rags to remove the cap for check up and refilling operations Avoid engine racing unnecessary sudden ac...

Page 154: ...Frequent use of foot brakes while descending a long slope will cause brake drum overheating and consequential malfunction of the brake Special care should be taken when descending a slope particularly...

Page 155: ...gine Also push the battery main off before parking Diesel engine is apt to keep running even after the battery switch off while the engine continues running never push the battery switch off after che...

Page 156: ...ol lowing points 1 Re check the troubles found dur ing the previous operation and take necessary corrective actions For such troubles difficult to cor rect contact your nearest Daewoo dealer 2 Check f...

Page 157: ...read ings in instrument panel Driving on highway Driving on highway is more danger ous than the urban road you should be more alert and have a stable preparations 1 Speed perception On highway driver...

Page 158: ...ast 10km h more than the speed of the vehicle ahead Before preparing to pass be sure to check the traffic behind you and then pull out into the left lane in case of RHD the right lane promptly with tu...

Page 159: ...es in combination Reckless steering may cause danger not only to your own vehicle but also oncoming vehi cles In the event that a tire was punctured during driving hold the steering wheel firmly and e...

Page 160: ...eze to coolant Precautions when using antifreeze 1 Wash off the inside of the cooling system including the radiator before using anti freeze 2 Replace any damaged rubber hoses If there is just a hair...

Page 161: ...isable that chains or snow tires be used when traveling on an icy or snowcovered road If you apply the brake hard on a slippy road your vehicle is apt to lose its traction resulting in losing the cont...

Page 162: ...stopping pull up the vehicle to the roadside as early as possi ble Set the parking brake and turn on the emergency warning lamp to prevent possible safety hazard Emergency starting Avoid starting the...

Page 163: ...161 Battery jumping In the case that the battery has been dead refer to BATTERY CARE in this manual and make an emergency start as illustrated 2 4 3 1...

Page 164: ...mage or severe wear of wheels and tires and tire inflation pressure Damage of spring and tightening state of U bolts and nuts 1 Engine starting 2 Abnormal sound and vibration 3 Leakage of fuel lubrica...

Page 165: ...rea API CF 4 or SAE 15W30 Except Frigid an area API CF 4 or SAE 15W40 2 DE08TiS DE12TiS ENGINE API CH 4 SAE 15W40 or ACEA E2 E3 Refer to Lubrication list at page 214 Changing engine oil Change engine...

Page 166: ...lter element should be changed together with engine oil at the same time DE engine is mount ed with a cartridge type 1 To drain oil remove the drain plug installed on the lower part of oil fil ter bod...

Page 167: ...level In the case that antifreeze is added to coolant it is advisable to clean the inside of the radiator and engine water jacket 2 times a year in spring and autumn Refer to Lubrication list at page...

Page 168: ...portation of fuel resulting in decrease in engine power Cleaning Primary element Soak the felt element in diesel fuel and remove heavy dust particles by using a brush with soft bristles If the element...

Page 169: ...filter will hinder in smooth transportation of fuel resulting in decrease in engine power Method of replacing 1 Unloosen drain plug 2 Remove old catridge 3 Clean head sealing surface 4 Fill the fuel...

Page 170: ...ing the primer pushed down loosen the bleeder screw of primary fuel filter bleed out the fuel with air bubbles then retight en the bleeder screw quickly 3 Repeat 2 until pure fuel without air bubbles...

Page 171: ...der screw 3 Injection nozzle 4 Fuel return pipe 5 Fuel feed pipe filter pump 6 Overflow valve 7 Injection pipe 8 Fuel feed pipe pump filter 9 Fuel tank 10 Fuel return pipe 11 Fuel suction pipe 12 Fuel...

Page 172: ...r 2 Center bolt 3 Injection nozzle 4 Fuel return pipe 5 Fuel feed pipe filter pump 6 Overflow valve 7 Injection pipe 8 Fuel feed pipe pump filter 9 Fuel tank 10 Fuel return pipe 11 Fuel suction pipe 1...

Page 173: ...hen adjust the clearance with the adjusting screw When the correct adjustment is obtained fully tighten the lock nut As same manner adjust the clearances of the other valves Turn the crank shaft 360 t...

Page 174: ...rger is very precise item and rotates by high rpm periodical and frequent check should be held Abnormal symptoms If any abnormal symptoms as follow ings are checked have promt inspec tion and proper r...

Page 175: ...m Oil contamination Delay lack of oil supplying Foreign substances in intake air Sudden engine stop after full load operation Description Be sure to use genuine oil and filter keep periodical oil chan...

Page 176: ...belt for cracks and damage CAUTION When belt replacement becomes necessary belts should be replaced by set TENSION The suitable tension is less than 10mm when pressed with the thumb CRS F D 3 1 4 ALT...

Page 177: ...e thumb CRS W P A C FAN 7 C C ALT 1 3 8 2 1 5 4 6 D1146 Ti DE08TiS ENGINE 1 Idle pulley 2 Idle pulley OPTION Roof on cooler 3 Crank shaft pulley 4 Air compressor pulley 5 Water pump pulley 6 Alternato...

Page 178: ...lace when any damages are found Gaskets and sealings should be replaced together with the element Service of air cleaner 1 Disassembly Loosen the clamping screws and remove the dust pan then the ele m...

Page 179: ...e dust trap installed below the hous ing Clean inside of housing cover and gasket fitting flange if any dam ages are found replace the ele ment Also the element should be replaced if the wall thicknes...

Page 180: ...e transmission oil by removing the drain plug at the bottem of the transmission housing After draining of used oil is complet ed retighten the drain plug then fill new oil through the filler lever plu...

Page 181: ...first 5 000km and every 20 000km driving Oil replacement should be done while the rear axle oil is hot First drain the rear axle oil by remov ing the drain plug at the bottom of the rear axle housing...

Page 182: ...lip while servicing 2 Loosen the two tube fittings cou pled at the upper side of steering unit and turn the steering wheel slowly in both directions 3 After discharging of used fluid retighten the tub...

Page 183: ...right hand direction to lock then loosen the bleeder screw to discharge the fluid mixed with air bubbles Soon after the fluid with air bub bles are forced out retighten the bleeder screw 4 Turn the st...

Page 184: ...ent at every 24 000km thereafter To change drain the oil in the reser voir and turn the cap of reservoir counter clockwise Pull out the oil filter element and change to new one Cleaning fluid strainer...

Page 185: ...ake valve that air discharging sound is heard when the brake pedal is released this check should be performed when the pres sure of air tank is about 7 0kg cm2 Adjustment of brake lining clear ance Ch...

Page 186: ...reverse direction until the clearance becomes to the standard value The standard clearance is 0 3mm check the clearance by inserting the thickness gage between the brake lining and drum 5 After ajust...

Page 187: ...g inspection hole 2 Check the condition and amount of brake lining wear by the eyes If the brake lining weared out to the stepped line also any cracks severely burnt sports or abnormal conditions are...

Page 188: ...en check the free stroke before the point of resistance is reached Adjustment procedure 1 Disconnect the return spring on the mainpack then remove the bellows at the minipack side 2 Loosen the minipac...

Page 189: ...h hydraulic circuit should be perfomed with the air tank emptied 2 Check the level of clutch fluid in the reservoir and replenish as nec essary 3 Remove the rubber cap from the bleeder screw on the cl...

Page 190: ...nation is required with air compressors having delivery 700 min of free air to provide for a relief of the unloader unit by means of division of the air flow Charging position Legend 8 Inlet 1 Outlet...

Page 191: ...upon cut out piston 2 and it is also communicated via port 23 to the con trol device of relief valve 15 Cut out piston 2 is moved down wards thereby opening outlet 1 so that air continuously supplied...

Page 192: ...control line from port 23 of the unloader valve to port 4 of the relief valve use either a pressure tem perature resistant hose with an inside diameter of 6mm with fitting to suit dimensions as shown...

Page 193: ...y trained specialists Technical features Type Dimen Graphic Max Min Safety no sional symbol cut out cut in valve drawing see overleaf pressure pressure opening pressure bar bar bar DR 3218 I 1 7 35 0...

Page 194: ...I 15 6 170 60 16 5 49 3 2 A F 6 18 23 30 60 bar 108 63 70 35 4 A 3 21 M22X1 5 M22X1 5 min13 221 2 min13 1 9 24 94 Legend Not bored Ports 1 Energy inlet 21 Energy outlet to reservior 23 Energy outlet t...

Page 195: ...5 37 3 2 A F 6 18 30 60 bar M12 X 1 5 M22 X 1 5 23 108 63 70 35 4 A B 3 21 M22 X 1 5 6 min13 221 2 min13 1 9 94 24 Legend Not bored Safety valve Ports 1 Energy inlet 21 Energy outlet to reservior 23...

Page 196: ...unscrew the pipe con nection If the vehicle is operated without trailer the pump must be actuated one or several times before sitting off the number of strokes being dependent on the temperature and h...

Page 197: ...ser voir 2 is interrupted When plunger rod 1 and piston 4 are released they are moved back to their original positions due to the action of return spring 3 Compression spring 8 clos es check valve 7 a...

Page 198: ...the antifreeze flows immediately and at all events into the brake system The antifreeze pump is fastened by means of two M8 bolts Maintenance After winter operation the antifreeze pump must be cleane...

Page 199: ...ed in the condensation accelerates rust ing action to shorten the lives of relat ed devices or equipment In cold weather this condensation can be frozen and immobilize various devices and equipment Th...

Page 200: ...peration Disassemble air dryer and change dessicant oil filter cloth filter and whole rubber parts Check air tubing and wiring con nections In the case that temperature drop in air tank exceeds 16 C a...

Page 201: ...eliminary dewatering chamber 10 Non return valve 11 Nozzle 12 Ring filter 13 Desiccant 14 Regeneration air tank 15 Bypass valve 16 Adjusting screw 17 Adjusting screw 18 Vent bore Connections 1 Energy...

Page 202: ...operation of purge valve due to the entry of foreign substances into drain valve Correction Check and drain the main tank until the desiccant is dried up Increase pressure for governor to 6kg cm2 or...

Page 203: ...eration with compressor in unload cycle air can be leaked through the main tank drain Correction Correct the position of dryer body or install a wind screen 1 Use a tester to check the heater for shor...

Page 204: ...the com pressed air from the air compressor The vapor molecules are condensat ed while they pass out the 12 5 holes in the closed plate of water trap and they can be drained through the drain cock at...

Page 205: ...BH120E OPT With anti freeze pump OPT With air dryer BH090 BS106 BH115E BH120E BM090 BS090 OPTION 1 3 4 2 1 Pressure Regulator 2 Anti freeze pump 3 Hose 4 Water trap 2 3 1 1 Air dryer 2 Hose 3 Regener...

Page 206: ...id unbalanced wear of your tires and to prolong their lives rotate tires periodically every 5 000km nor mally Proper inflation Underinflation Overinflation Normal inflation Tire size pressure in kg cm...

Page 207: ...on the left side wheels have left hand threads 2 Clean the wheel pins and nuts and apply oil to the threads 3 Place hydraulic jack shown L L R R Nut loosening directions 2 7 5 3 1 8 6 4 Wheel nuts ti...

Page 208: ...headlamp tester The headlamp testers include focus type and screen type To aim head lamps proceed as follows Park the vehicle on a level floor and check tire inflation pressure and adjust as nec essa...

Page 209: ...trument on the lens 2 Look into the eyepiece of the aim ing instrument and adjust the left and right adjust screws so that the standard line seen in the instru ment is correctly overlapped on the whit...

Page 210: ...amp 10 25W 25W Rear 25 10W combination 25W lamp Destination 12W 10W lamp OPT 12W Side turn signal OPTION 12W Back up lamp 21W 25W DISTINCTION High Low Fog Cornering Parking turning Position Parking OP...

Page 211: ...0W Front marker lamp 12W Rear marker lamp 12W Step lamp OPTION 12W Search lamp OPTION 12W Luggage lamp OPTION 12W Reading lamp OPTION 12W Pilot lamp 1 2W Side lamp OPTION 12W Warning lamp OPTION 70W H...

Page 212: ...ld be changed by the requirement of custmers 1 12 23 24 25 26 27 28 29 30 31 32 33 13 14 15 16 17 18 19 20 21 22 2 3 4 5 6 7 8 9 10 11 HEAD LAMP HIGH ROOM LAMP 2 WIPER MOTOR RH SPARE FUSE 5A 20A 15A 1...

Page 213: ...ION 12 5A Room lamp 1 13 10A Room lamp 2 14 10A Room lamp 3 OPTION 15 10A Room lamp 4 OPTION 16 5A Luggage Public phone OPTION 17 15A Defroster 18 10A Reading lamp 19 5A Exhaust brake Water level rela...

Page 214: ...212 1 Cover RR fuse box 2 Bracket Rr fuse box 3 Regulator Assembly 4 18P Fuse box Rear fuse box 1 3 4 2...

Page 215: ...e following table VISCOSITY CHART Engine oil Gear oil SAE 20 20W SAE 30 SAE 10W SAE 10W 30 SAE 10W 40 SAE 15W 40 15W 50 20W 40 20W 50 SAE 5W 20 SAE 40 50 Ambient Temperature 30 C 20 F 15 C 10 F 0 C 32...

Page 216: ...BS106 BH115E BH120E 44 49 58 62 DE12 58 62 DE12T 62 68 DE12Ti TiS 63 68 73 77 7T377 Lubricant Engine oil Engine coolant Lubrication List Capacity Oil change period Engine Radiator Specification CF Gra...

Page 217: ...l list of G607 every 60 000km When use oil list of G1363 every 100 000km Lubricant Gear oil Lubrication List Capacity Oil change period Manual transmission Auto transmission Specification GL 4 Grade 8...

Page 218: ...ease Lubricant Gear oil Power steering Brake oil Grease Lubrication List Capacity Oil change period Auto transmission Rear axle Power steering Brake and clutch Wheel bearings Grease fittings Specifica...

Page 219: ...217 Moving parts every 4 000km King pin 4 points Link arm 1 point Tie rod end 2 points Drag link FRT 2 point Propeller shaft 3 points Steering shaft 1 point...

Page 220: ...218 Drag link RR 2 points For leaf spring Spring and shackle pin 12 points...

Page 221: ...dition Operation In main switch ON the operation and rest time repeat periodically When main switch OFF time recording stops and is memoried to the unit Main switch ON again time recording continues a...

Page 222: ...ity of metering nipple Inadequate time set of control unit Inadequate capacity of metering nipple REMEDY Replenish grease Inspect fitting and correct leakage part Change damaged part and correct wirin...

Page 223: ...filter cartridge change Refer periodic inspection and maintenance 0 5 4 8 12 16 20 24 28 32 36 40 44 48 D INSPECTION POINTS PERIOD 1000 Km ENGINE Check easiness of engine starting and abnormal noise...

Page 224: ...splines for excessive wear Check for looseness in bearing and related parts Grease the universal joints and spline FRONT AXLE REAR AXLE Check front wheel bearing looseness Check rear wheel bearing lo...

Page 225: ...r mount Grease spring pin and shackle pin WHEELS Check for presence of foreign matters nails stones etc Retighten wheel nuts as necessary Check wheel discs for damage STEERING Check for looseness in m...

Page 226: ...and pipes for leakage damage Change brake oil PARKING BRAKE Check function of parking brake ELECTRICAL EQUIPMENT Check charge state of battery Check function of starter Check function of generator reg...

Page 227: ...part of battery teminal with chiesel retighten connector and apply grease Be sure to connect the wiring Change oil with proper viscosity CAUSE Empty fuel tank None sufficient preheating Air mixed in...

Page 228: ...n or change Clean or change Check cylinder pressure and repair CAUSE Radiator curtain covered or Radiator contaimination Lack of coolant Fan belt loosened Rust or scale in coolant Malfunction of therm...

Page 229: ...arance or change clutch disc CAUSE Lack of engine oil Oil leakage Improper oil viscosity REPAIR Replenish to specified level Check lubrication line and retighten loosened fitting Change oil with prope...

Page 230: ...th proper specification CAUSE Loosened bolts and nuts of propeller shaft and peripheral parts Unbalanced propeller shaft REPAIR Check and retighten Modify propeller shaft or change CAUSE Lack of front...

Page 231: ...hange Adjust steering wheel clearance Change to new one Change shim or adjust CAUSE Excessive tire inflation Leakage of brake line Excessive lining clearance Excessive tire wear REPAIR Charge to speci...

Page 232: ...CAUSE Damaged or mislocated spring Tire inflation or puncture REPAIR Check the spring and repair Check tire and correct CAUSE Radius rod cut Improper location axle REPAIR Change radius rod Adjust the...

Page 233: ...part of battery terminal with chiesel retighten connector and apply grease Change Check belt tension adjust or change Be sure to turn OFF switch Check alternator charging condition and repair CAUSE La...

Page 234: ...damaged poor sealing Poor nozzle assembly Incorrect injection timing Incorrect timer angle adjustment DESCRIPTION Excessive fuel injection Poor nozzle injection Compression pressure down Incorrect ti...

Page 235: ...ality poor Water mixed fuel Fuel filter contamination DESCRIPTION Lack of intake air Excessive exhaust Pressure Overload operation Poor quality of fuel REPAIR Clean air cleaner or change Change to gen...

Page 236: ...4 1015 872 BTDC 10 BTDC 18 ABDC 34 DE12T 847 1064 900 BTDC 9 DE12Ti 280PS 16 1 1 910 BTDC 12 DE12Ti 310PS DE12Ti 340PS 234 MAIN DATA AND SPECIFICATION 1 ENGINE 1 1 D1146 Ti DE12 T Ti ENGINE Type Cylin...

Page 237: ...260 DE12Ti 340PS 250 340 2100 1323 135 1260 Distinction gear type water cooled integral type ENG TOT 15 5 OIL PAN 13 ENG TOT 20 OIL PAN 17 fresh water forced circulation centrifugal type wax pellet ty...

Page 238: ...290ps 123 155 11051 17 0 1 1317 847 1064 910 BTDC 1 BTDC 18 ABDC 32 BBDC 70 ATDC 30 DE12TiS 310ps DE12TiS 340ps 236 Type Cylinder liner type No of piston ring No of cylinder Bore stroke mm Piston disp...

Page 239: ...tinction gear type water cooled integral type ENG TOT 19l OIL PAN 15 5l ENG TOT 22l OIL PAN 19l fresh water forced circulation centrifugal type wax pellet type 237 Oil pump type Oil cooler type Oil ca...

Page 240: ...sions mm Clutch clamping force kg Clutch pedal Clutch minipack start working pressure kg cm2 Master cylinder bore dia mm outside dia inside dia thickness D1146 D1146Ti DE12 DE08TiS 210ps DE08TiS 240ps...

Page 241: ...0 T 10S5B 5 D D 125 6 589 4 002 2 430 1 507 1 000 6 888 250 13 T 13S5B 5 D D 135 6 589 4 002 2 430 1 507 1 000 6 888 250 13 K 1005C 5 D D 115 6 608 3 993 2 423 1 518 1 000 6 937 250 9 7 K 1005P 5 O D...

Page 242: ...3S 1 00 4N 4S 1 00 3S 4 7 4N 4 3 4S 3 8 300 28 D854 2 4 O D 102 3N 6 2 3S 5 9 4N 5 4 4S 5 1 3N 3S 1 43 4N 4S 1 36 3N 3S 1 00 4N 4S 1 00 3N 3S 0 70 4N 4S 0 73 3N 5 2 3S 4 7 4N 4 3 4S 3 8 330 28 D864 4...

Page 243: ...9 91 6 91 6 91 6 Length 535 8 535 8 535 8 Outside dia 101 6 101 6 101 6 Inside dia 91 6 91 6 91 6 Length 560 0 560 0 560 0 Outside dia 101 6 101 6 101 6 Inside dia 91 6 91 6 91 6 Length 367 0 367 6 36...

Page 244: ...3 Inside dia 101 6 101 1 Length Outside dia Inside dia Length 676 0 566 0 569 5 569 5 Outside dia 88 9 88 9 101 6 101 6 Inside dia 80 9 80 9 91 6 91 6 Length 569 5 569 5 Outside dia 101 6 101 6 Inside...

Page 245: ...eel alignment Steering angle outside dia length toe in mm camber caster kingpin inclination inside outside Reverse Elliot I Beam BM090 BS090 2050 6500 50 252 4 6 0 5 30 0 12 30 7 5 10 45 37 BH090 0 2...

Page 246: ...ratio OPTION Oil capacity Iiters Axle load capacity kg 6 REAR AXLE BM090 BS090 Spiral bevel 39 7 39 8 9500 BH090 39 8 39 10 BS106 Hypoid gear 39 7 39 8 BH115E 39 8 39 10 39 11 BH120E 39 10 39 11 39 12...

Page 247: ...eel diameter mm Power steering Length of drop arm mm Oil capacity liters gear ratio sector gear operating angle gear oil capacity BM090 BS090 BH090 500 22 4 1 96 1 5 200 6 BS106 BH115E BH120E 7 Recirc...

Page 248: ...0 BS090 BH090 BS106 BH115E BH120E 410 410 209 155 19 8 209 220 19 8 30 106 5 30 121 5 Drum inside Diameter mm Brake lining mm L W T N Wheel cylinder bore dia mm Anchor pin mm dia lengh front rear fron...

Page 249: ...spring constant kg mm Type FRT rebound FRT compression RR rebound RR compression Semi elliptical alloy steel 1500 90 13 6 13 7 13 8 25 33 33 5 36 42 1660 100 14 4 15 1 15 4 14 11 14 9 43 5 47 9 50 31...

Page 250: ...height mm max out dia mm no of springs stroke of ext spring mm comp type out dia mm base shell dia mm no of S A extension mm compression mm no of levering valve Variable throttle type with stabilizer...

Page 251: ...ube 11 00R20 16PR Tube radial 11R22 5 16PR Tubeless 12R22 5 16PR Tubeless 295 80R22 5 16PR Tubeless 1014 1034 229 7 7kg cm2 109psi 7 0kg cm2 99psi 7 00T 20 1006 1032 8 0kg cm2 113psi 7 3kg cm2 103psi...

Page 252: ...y kcal h 21000 24000 26000 Refrigerant R 12 R 134a OPTION 4PFC 4PFCY OPT 4 Compressor 210 57 560 Condenser AL FIN CU TUBE 0 446 0 762 Condenser PROPELLER FAN 3 PROPELLER FAN 5 fan 4700 7200 5 5A EA ty...

Page 253: ...N CU TUBE 0 346 0 505 Evaporator SIROCCO FAN 8 SIROCCO FAN 12 fan 400 EA 5 5A EA Expansion EXTERNAL EQUALIZING PRESSURE valve 8 Total weight kg 190 218 240 type capacity liters type total area m2 type...

Page 254: ...DC23 or KIA S2 2238 or 2209 Engine 4 1850 1450 1150 ND 6C 500 Compressor 495 Condenser AL FIN CU TUBE Blower capacity m3 min AT 40mmAq 66 7 Expansion valve thermostatic expansion valve Receiver capaci...

Page 255: ...253 BODY DIMENSION BM090 ROOF ON COOLER NON COOLER APPROX APPROX...

Page 256: ...254 BS090...

Page 257: ...255 1853 1853 3225 3225 2490 2490 2050 2050 35 35 1975 1975 4200 4200 8990 8990 2750 2750 30 30 BH090...

Page 258: ...256 ROOF ON COOLER SUB ENG COOLER NON COOLER 2050 2100 70 70 3110 5200 10550 1853 2490 3225 APPROX 3110 APPROX BS106...

Page 259: ...257 ROOF ON COOLER SUB ENG COOLER NON COOLER APPROX APPROX BH115E...

Page 260: ...258 ROOF ON COOLER SUB ENG COOLER APPROX APPROX BH120E...

Page 261: ...BM090 BS090 BH090 BS106 BH115E BH120E OWNER S DRIVER S MANUAL TECHNICAL CENTER 75 11 GUMSA DONG GUMJUNG KU BUSAN KOREA OM BW C1 11C 0306...
Reviews: