background image


Using the Radio with the Mains Adaptor 


Insert the 

Small DC Power Plug

 (22) of the 

Mains Adaptor

 (21) into 

DC Power Socket

 (18) on the rear 

panel of the Radio. 


Insert the 

Mains Adaptor

 (21) into the nearest mains socket. 

NB

 if the mains adaptor is being used rather than batteries, it is recommended that the batteries (if 

fitted) are removed. 


Operating Instructions 

 Using the DAB Radio 

1.


Ensure that the 

Telescopic Aerial

 (14) is fully extended. 

2.


Ensure the radio has batteries inserted or has the 

Mains Adaptor

 (21) connected as described above. 

3.


The Time will automatically update


on the

 LCD Display 

(3). 

4.


Briefly press the 

On/Standby 

button      (1) on the front panel to power the radio up. 

NB

 The radio will automatically scan the airwaves for DAB stations if it is being used for the first time.


The 

LCD Display

 (3) 

will show ‘Scanning’ and a bar 

to indicate the progress of the scan, and the total 

number of stations found so far. Once the scan has finished the radio will play the first 
alphanumerically found station. 

5.


Press the

 station

 button (7) to show the available radio stations on the 

LCD Display

 (3) as below: 


6.


Rotate the 

Volume/Enter/Snooze

 control (10) to scroll through the station list. Once the desired 

station has been found press the 

Volume/Enter/Snooze

 control (10) to select the station. 

7.


Adjust the volume by rotating the 

Volume/Enter/Snooze

 control (10). 

NB

 the radio will exit the station list after a short delay and return to the normal display, pressing the


back

 button (6) will return to the normal display instantly. 


Saving up to 40 DAB radio stations using the save to preset function 

1.


First tune the radio to the desired station as described above. 

2.


Press and hold the 

5+

 button (9) for two seconds to 

enter the ‘Save to Preset’ menu.


3.


Rotate the 

Volume/Enter/Snooze

 control (10) to scroll through the preset list, select the preset 

number you wish to save the station under by pressing the 

Volume/Enter/Snooze

 control (10): 


NB

 if a preset is empty and there is no station saved the preset will show as 

X:

 (

Empty)

’.

 X = preset 

number. However, you can save a station over an existing preset station rather than an empty one. 

4.


Repeat the above steps to save more stations in the presets. 

5.


The preset number of the station (28) is shown at the bottom centre of the DAB main screen on the 

LCD Display

 (3). 

Note: The first four radio station presets can be instantly accessed via the four ‘Favourite’ buttons (11) 

on the front of the radio. 

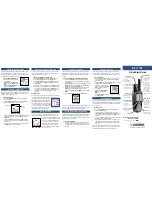
Right: List of available radio 
stations shown after pressing the 

‘station’ button. 


Left: 

The ‘Save to Preset’ menu. 

Right: the LCD Display will show 
confirmation that a station has 
been saved in a preset 

 preset 4 

saved in the example shown here. 
 

Summary of Contents for AVS1403

Page 1: ...1 DAB FM Radio with Colour Screen...

Page 2: ...openings are not covered with items such as newspapers table cloths curtains etc No naked flame sources such as lighted candles should be placed on the Radio Do not position the Radio close to source...

Page 3: ...ser at serious risk Do not operate this appliance with a damaged plug or cord after a malfunction or after being dropped or damaged in any way Regular periodic checks should be carried out on the main...

Page 4: ...station Press to show the radio station list in DAB mode 8 Outer case 9 5 Briefly press to recall up to 80 radio stations 40 DAB and 40 FM Press and hold for 2 seconds to store up to 80 radio station...

Page 5: ...Socket 20 Bass Port 21 Mains Adaptor 22 Small DC Power Plug 14 17 15 16 18 19 21 22 20 23 24 25 26 27 28 29 30 31 32 23 Radio Band DAB 24 Radio Station Name 25 DAB Logo 26 Alarm 1 Set 27 Alarm 2 Set 2...

Page 6: ...are removed from the radio if it is not to be used for a long period of time CAUTION There is a danger of explosion if the batteries are incorrectly fitted Replace only with the same or equivalent bat...

Page 7: ...he Volume Enter Snooze control 10 to select the station 7 Adjust the volume by rotating the Volume Enter Snooze control 10 NB the radio will exit the station list after a short delay and return to the...

Page 8: ...Music Talk Arts Jazz Blues etc Station location Displays the town city or national from where the station is broadcast Frequency Displays the radio station transmission frequency Signal Strength Disp...

Page 9: ...enter the options Rotate the Volume Enter Snooze control 9 to select when the alarm goes off Daily Once Weekends or Weekdays Press to confirm option iii Wakeup time press the Volume Enter Snooze cont...

Page 10: ...n 7 to enable FM tuning the LCD Display 3 will show FM Tuning rotate the Volume Enter Snooze control 10 to tune along the FM band NB the radio tunes in 0 05MHz steps 6 Adjust the volume using the Volu...

Page 11: ...day and date information provided by the broadcaster The Headphone output 18 produces stereo audio FM Radio Menu Whilst listening to the FM radio press and hold the info menu button 5 to enter the FM...

Page 12: ...larm s are set press the On Standby button 1 to turn off the radio Time Date press and rotate the Volume Enter Snooze control 10 to set Time Date Auto Update 12 24hr Date Format Clock Style Backlight...

Page 13: ...40V 50 60Hz Output DC 6V 1A Audio Output Power 1W RMS No of Speaker Units 1 Unpacked Weight Approx 630g Dimensions Approx Approx 210 w x 90 d x 130 h mm Operating Temperature Range 0 C to 40 C FM Freq...

Page 14: ...instructions contained in the User Manual The product must be used solely for domestic purposes The guarantee will berendered invalid if the product is re sold or has been damaged by inexpert repair...

Reviews: