High Performance Quick Tips:
Rack Tom Mounting
—
There are
2 types of tom arms: the L-type
(DW, Tama, Gretsch, Mapex,
etc.) and Horizontal-type (Pearl,
Yamaha). Dynamic range can
be affected by the position of
the tom on the arm. Experiment
by positioning your tom at different
locations along the tom arm rod.
Float the Floor Tom
—
If you use tom legs,
placing a piece of foam under each leg will
increase resonance. Pick up a foam “workout”
mat, cut a piece off, and put it under the legs of the
floor tom.
Refresh your Resonants
—
Even though they’re not hit with a
stick, bottom (resonant) heads will still lose their tone in time due
to constant vibration. Change your bottom heads every third or
fourth time you change your batter heads to maintain a lively and
consistent drum tone.
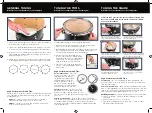
1. Clean off the bearing edges and counter hoop before installation.
Remove any lint or debris from inside the shell.
2. Listen to the head through all steps in the tuning process. Strive
for a clear, focused sound by keeping all lugs in tune at all times.
3. Develop your “key technique” by monitoring the amount you turn
each lug and how it affects pitch. Developing a good “feel” for
tuning will help the process.
4. Always use the Opposite Lug tuning Sequence (OLS) by referring
to the diagram that is relative to the number of lugs for your drum.
1. Finger-tighten all lugs to create equal starting tension.
2. With 1/2 turns from a drum key, use the appropriate tuning
sequence to tune the head until it resonates.
3. While tapping the head with a stick slightly off-center, tune each
lug in small increments (1/4 turns) until the head begins to
resonate and the wrinkles in the head disappear.
4. Fine tune the drum by tapping directly
in front of each tension rod while tuning
around the drum. Strive for equal pitch at
each tension rod. Use this technique to
bring the head up to the desired pitch.
5. Tune the bottom head using this same
process, closely matching the pitch to the
batter head.
Utilize the same general techniques described for tuning toms.
Our recommended pitch for the bottom snare head is A-440.
Snare Wire Installation
High Performance Quick Tips:
The Hoop-Laws — Different counter hoops will affect the sound and
feel of the drum in different ways. Change the sound of your drum
by changing hoops.
Die-Cast
—
reduces overtones and resonance, resulting in
enhanced attack and a dryer, more focused sound.
Flanged
—
increases overtones and resonance, producing a
more open and frequency-rich tone.
2
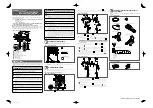
Thread the snare cord or strap through
the end plates and center the snare wire
unit on the bottom head.
4
Center the snare wire unit across the head
(end plates must not touch bearing edge)
and then tighten the butt end clamp.
Using the snare cord or strap, attach one
end of the snare wire to the butt end
clamp (do not tighten clamp).
3
5
Thread the snare cord or strap through
the strainer clamp while in its “off”
position and tighten the clamp.
Turn the strainer on and adjust
the tension knob to your desired
snare response.
1
Remove old snare wires and adjust the
snare tension knob until it’s halfway
between its highest and lowest positions.
High Performance Quick Tips:
Snare Basket
—
Do not over-tighten the snare drum basket. The
pressure exerted on the hoop can knock the head out of range and
limit its dynamic range.
Select your Snare Sound
—
Snare wires have a dramatic effect on the
drum’s sound. Upgrading to a premium snare wire (like Puresound) will
improve the overall sound of the drum. Different models can make a
drum sound drier, darker, brighter, warmer, or more open.
Minimizing Snare Buzz
—
If you’re experiencing out of control snare buzz:
1. Check your tuning — extreme high and low tuning encourages
snare buzz.
2. Check snare wires for bent or loose wires.
3. Try a Puresound Equalizer Series snare wire — it has an offset
wire design that minimizes buzz.
4
GENERAL TUNING
TUNING THE TOMS
TUNING THE SNARE
WATCH IT at evansdrumheads.com/tuningtom
WATCH IT at evansdrumheads.com/tuningintro
WATCH IT at evansdrumheads.com/tuningsnare


