


19
Operating Your Oven
When you dehydrate...
1. wash and remove excess moisture from all fruits and
vegetables before dehydrating.
2. cut fruits and vegetables into uniform pieces.
3.
You can add honey, spices, lime juice, or orange juice
to give the fruit a different flavor.
4. it is best to dehydrate on a baking rack with a pan
underneath to catch any juices. If the fruit is small,
use cheesecloth over the rack. if you use a rack, it
will allow for maximum air circulation around the fruit.
the cheesecloth will prevent the fruit from sticking to
the rack.
5. place the food onto the center of the oven rack.
Solving Discoloration Problems
•
to prevent darkening during dehydration and storage,
you should steam blanch apples, apricots, peaches,
nectarines, pears or foods that will oxidize.
to steam blanch:
1. add 1 inch of water to a 4 quart sauce pot. insert the
steam basket and place the fruit in it.
2. cover the pot and steam for 1 to 2 minutes.
3. remove with a slotted spoon and dab with a paper
towel to remove excess moisture before dehydrating.
apples, pears, pineapples and some other fruits will brown
or darken during dehydration. to prevent discoloration,
dip fruits in pineapple juice or lemon juice after steam
blanching.
Creating a Candied Effect
to give the fruit a candied effect and to help retain color,
blanch them in a simple syrup. you can candy the fruits
mentioned above as well as figs and plums. The basic
ratio for a simple syrup is 1 cup of sugar to 1 cup of
water. add these ingredients to a 4 quart stock pot and
bring to a boil. stir until all the sugar dissolves. remove
the saucepan from the cooktop and allow it to cool. Dip
fruit into the simple syrup after it has cooled.
Preventing Tough Skins when Dehydrating
you should water blanch items with tough skins such as
grapes, prunes, dark plums, cherries, figs and some types
of berries. water blanching these types of fruit will crack
the skins so that moisture can escape and dehydration
can be done more effectively.
to water blanch...
1. bring 2 quarts of water to boil in a 4 quart sauce pot.
2. Drop the fruit in the water for 1 to 2 minutes, or until
the skin begins to crack.
3. remove the fruit with a slotted spoon and dab dry
with a paper towel before dehydrating. the pit can be
left inside or removed half way through the dehydrat-
ing process.
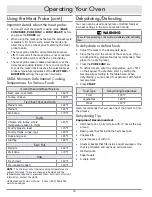
Defrosting Tips
•
food that takes an exceptional amount of time to
defrost will not defrost well in a convection oven.
•
you should not defrost anything that would normally
take over 2 hours to thaw. the food will begin to spoil
because the defrost temperature is not high enough
to cook the food.
•
if you have a partially defrosted turkey, rib roast or
other large cut of meat, you may continue to defrost it
in your convection oven. if wing tips and legs begin to
dry out when you defrost poultry, you may wrap the
tips with aluminum foil.
•
if you are defrosting a small cut of meat, lay it on a
flat cookie sheet with a 1-inch rim to catch juices as
the meat thaws.
•
thick, frozen casseroles such as lasagna will not
defrost well in your oven. instead, defrost accord-
ing to the food manufacturer’s suggestions. you can
defrost casseroles in the refrigerator overnight. you
should leave the food in its original container and
keep it covered.
•
you can bake some foods from frozen. some exam-
ples are: pizza, frozen pastries, croissants, cookies,
etc. before baking frozen food, allow the oven to
preheat.


