background image

5  Configuration  

D-Link Web Smart Switch User Manual


24 


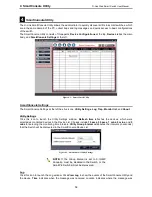
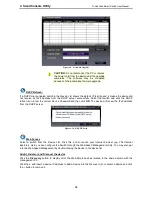
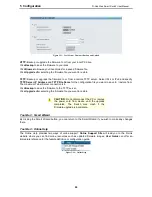
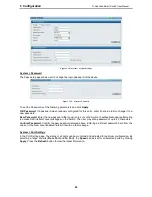
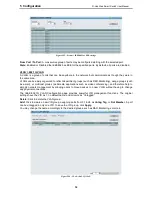
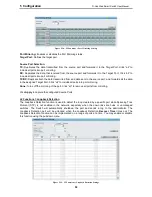
Figure 5.13 – Tool Menu > Firmware Backup and Upload 


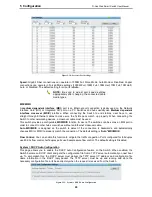
HTTP: Backup or upgrade the firmware to or from your local PC drive. 

Click Backup to save the firmware to your disk. 

Click Browse to browse your inventories for a saved firmware file. 

Click Upgrade after selecting the firmware file you want to restore. 


TFTP:  Backup or upgrade the firmware to or from a remote TFTP server. Select IPv4 or IPv6 and specify 
TFTP Server IP Address and TFTP File Name for the configuration file you want to save to / restore from. 
The maximum Telnet Server connection is 4. 

Click Backup to save the firmware to the TFTP server. 

Click Upgrade after selecting the firmware file you want to restore. 


CAUTION: Do not disconnect the PC or remove 
the power cord from device until  the  upgrade 
completes.  The  Switch may crash if the 
Firmware upgrade is incomplete. 


Tool Bar > Smart Wizard 

By clicking the Smart Wizard button, you can return to the Smart Wizard if you wish to make any changes 
there. 


Tool Bar > Online Help 

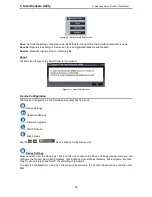
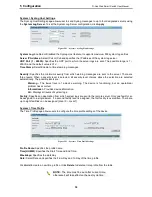
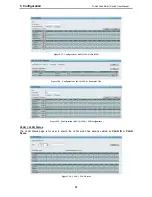
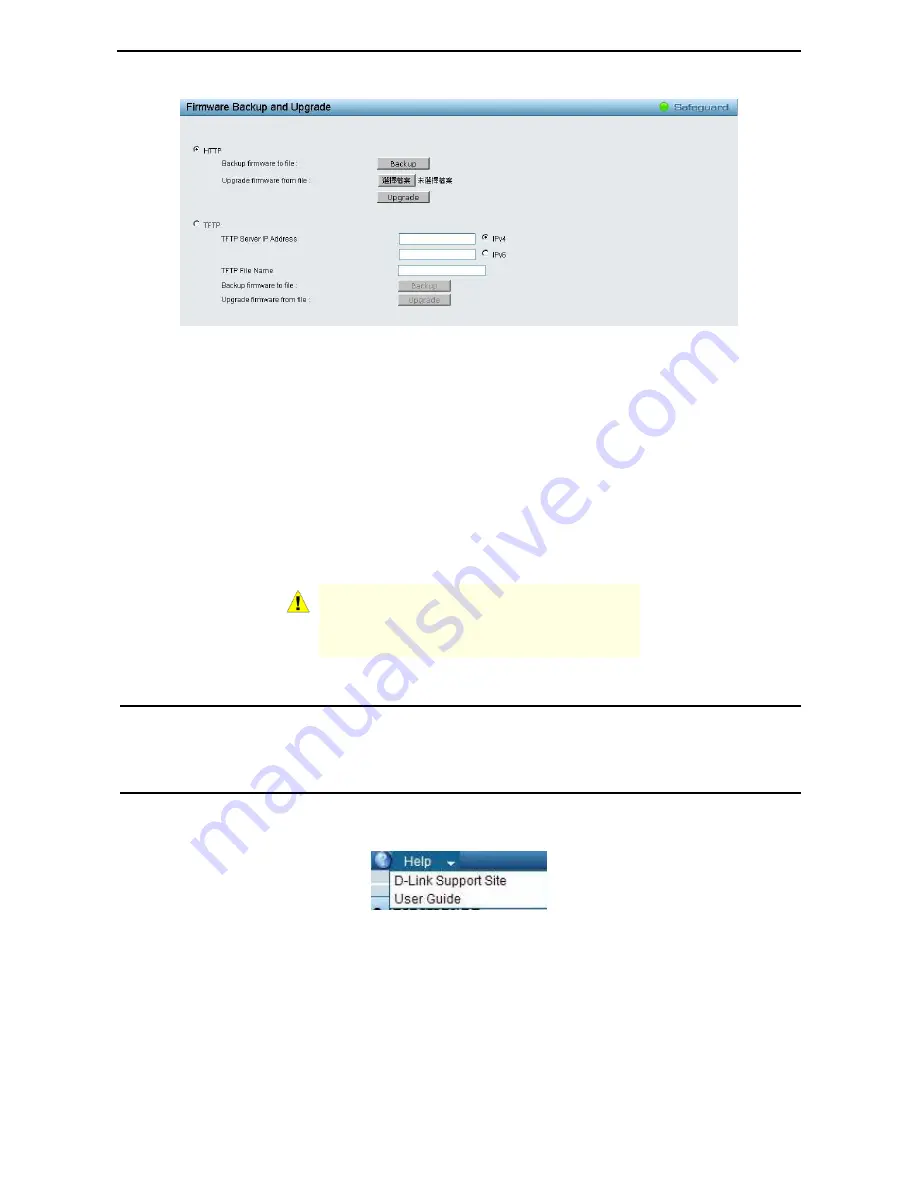
The Online Help provides two ways of online support: Online Support Site  will lead you to the D-Link 
website where you can find online resources such as updated firmware images; User Guide  can offer an 
immediate reference for the feature definition or configuration guide. 


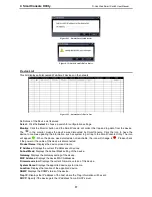
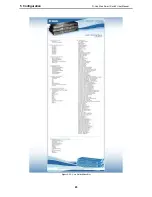
Figure 5.14 – Online Help 

Summary of Contents for SmartPro DGS-1500-20

Page 1: ......

Page 2: ...llation 6 Desktop or Shelf Installation 6 Rack Installation 6 Step 3 Plugging in the AC Power Cord 7 Power Failure 8 3 Getting Started 9 Management Options 9 Using Web based Management 9 Supported Web...

Page 3: ...s 35 VLAN Voice VLAN Voice VLAN Port Settings 36 VLAN Voice VLAN Voice Device List 37 VLAN Auto Surveillance VLAN 37 L2 Functions Jumbo Frame 38 L2 Functions Port Mirroring 38 L2 Functions Loopback De...

Page 4: ...S Bandwidth Control 61 QoS 802 1p DSCP ToS 62 QoS TCP UDP Port Priority Settings 62 QoS IPv6 Traffic Class Priority Settings 63 Security Trusted Host 63 Security Port Security 63 Security Traffic Segm...

Page 5: ...95 To connect a switch via TELNET 95 Logging on to the Command Line Interface 95 CLI Commands 95 96 download 96 upload 97 config ipif 98 logout 99 ping 99 ping6 100 reboot 100 reset config 101 show i...

Page 6: ...erms Usage In this guide the term Switch first letter capitalized refers to the SmartPro Switch and switch first letter lower case refers to other Ethernet switches Some technologies refer to terms sw...

Page 7: ...g Tree 802 3ad LACP SNTP LLDP and Loopback Detection to enhance performance and network resiliency Extensive Layer 3 Features Implemented as complete L3 devices these switches include functions such a...

Page 8: ...ts up when the Switch is connected to a power source Reset By pressing the Reset button the Switch will change back to the default configuration and all changes will be lost Port Link Act Speed LED 1...

Page 9: ...hen the Switch is connected to a power source Pwr Max The Pwr Max LED lights up when the Switch reaches the maximum power budget defined by the administrator via PoE System Settings page of Web GUI or...

Page 10: ...The Link Act Speed LED flashes which indicates a network link through the corresponding port Blinking indicates that the Switch is either sending or receiving data to the port When a port has an ambe...

Page 11: ......

Page 12: ...Loading Mounting of the equipment in the rack should be such that a hazardous condition is not achieved due to uneven mechanical loading D Circuit Overloading Consideration should be given to the conn...

Page 13: ...2 Hardware Installation D Link Web Smart Switch User Manual 8 Power Failure As a precaution the switch should be unplugged in case of power failure When power is resumed plug the switch back in...

Page 14: ......

Page 15: ...e web configuration in your web browser When the following logon dialog box appears enter the password and choose the language of the Web based Management interface then click OK The switch supports 1...

Page 16: ...Option 2 Follow these steps to install the SmartConsole Utility manually 1 Insert the Utility CD into your CD Rom DVD Rom Drive 2 From the Start menu on the Windows desktop click Run 3 In the Run dia...

Page 17: ...Monitor list and About Utility Settings Click this icon to launch the Utility Settings window Refresh time refreshes the devices which were selected as monitored devices in the Device List Choices inc...

Page 18: ...e device Time indicates when the trap message was received Location indicates where the trap message was received IP denotes where it comes from and Event shows the content of this trap message Click...

Page 19: ...6 SmartConsole About Device Configuration The Device Configuration in the SmartConsole Utility has five icons Device Settings Password Settings Firmware Upgrade DHCP Refresh Web Access and the device...

Page 20: ...rd and confirm it Figure 4 8 SmartConsole Password Settings Firmware Upgrade Select one or many switches of the same model name from the Device List Click on this icon to launch the Firmware Upgrade w...

Page 21: ...the correct Device Password and then click OK The device will renew the IPv4 address from the DHCP server Figure 4 10 DHCP Refresh Web Access Select a switch from the Device List Click this icon to la...

Page 22: ...or trap to the SmartConsole Utility The icon will appear When the device was detected as not reachable the icon will change to Please check if the power or the cable of this device is disconnected Pr...

Page 23: ...ed in the SmartConsole Device List NOTE If the devices are marked red in the device list it means that a firmware upgrade is required again NOTE If the IP address of device is showed with IPv6 address...

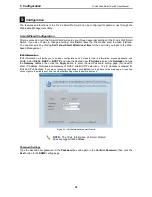
Page 24: ...configurations on 3 steps for the IP Information access password and SNMP Select Static DHCP or BOOTP and type the desired new IP Address select the Netmask and type the Gateway address then click the...

Page 25: ...efault SNMP Setting is Disabled Click Enabled and then click Apply to make it effective Figure 5 3 SNMP Setting in Smart Wizard NOTE Changing the system IP address will disconnect you from the current...

Page 26: ...provides a quick and convenient way for essential utility functions like firmware and configuration management By choosing different functions in the Function Tree you can change all the settings in t...

Page 27: ...l drive and a pop up message will prompt you for the file path You can view or edit the log file by using text editor e g Notepad Figure 5 7 Save Log Tool Bar Tool Menu The Tool Menu offers global fun...

Page 28: ...Click Browse to browse your inventories for a saved backup settings file Click Restore after selecting the backup settings file you want to restore TFTP TFTP Trivial File Transfer Protocol is a file t...

Page 29: ...ximum Telnet Server connection is 4 Click Backup to save the firmware to the TFTP server Click Upgrade after selecting the firmware file you want to restore CAUTION Do not disconnect the PC or remove...

Page 30: ...5 Configuration D Link Web Smart Switch User Manual 2 25 5 Figure 5 15 User Guide Micro Site...

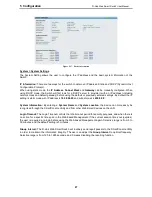
Page 31: ...ck Settings to link to L2 Functions Port Mirroring Default is disabled Storm Control Click Settings to link to Security Storm Control Default is disabled DHCP Client Click Settings to link to System S...

Page 32: ...is 10 90 90 90 and subnet mask is 255 0 0 0 System Information By entering a System Name and System Location the device can more easily be recognized through the SmartConsole Utility and from other We...

Page 33: ...you wish to set on the Switch to authenticate users attempting to access Administrator Level privileges on the Switch The user may set a password of up to 20 characters Confirm Password Confirm the n...

Page 34: ...a configurable MDI MDIX function for users The switches can be set as an MDI port in order to connect to other hubs or switches without an Ethernet crossover cable Auto MDI MDIX is designed on the swi...

Page 35: ...lection are selected automatically The possible levels are Warning The lowest level of a device warning The device is functioning but an operational problem has occurred Informational Provides device...

Page 36: ...the same as LED Therefore if the Port Shut off sate is already disabled the Time Profile function will not take effect Port Standby The system changes to standby state and wait for a wake up event Eac...

Page 37: ...ps such as e mail or multicast groups multimedia applications such as video conferencing and therefore help to simplify network management by allowing users to move devices to a new VLAN without havin...

Page 38: ...ation 802 1Q VLAN Add VID Figure 5 28 Configuration 802 1Q VLAN Example VIDs Figure 5 29 Configuration 802 1Q VLAN VID Assignments VLAN VLAN Status The VLAN Status page is for user to search the VLAN...

Page 39: ...the Join message The default value is 600ms Leave_All Time 100 100000 Used to confirm the port within the VLAN The time in milliseconds between messages sent The default value is 10000ms Click Apply...

Page 40: ...default Acceptable Frame Type This field denotes the type of frame that will be accepted by the port The user may choose between Tagged Only which means only VLAN tagged frames will be accepted and A...

Page 41: ...dor Mnemonic Name 00 E0 BB 3COM 3com 00 03 6B Cisco cisco 00 E0 75 Veritel veritel 00 D0 1E Pingtel pingtel 00 01 E3 Siemens siemens 00 60 B9 NEC Philips nec philips 00 0F E2 Huawei 3COM huawei 3com 0...

Page 42: ...rmation of Voice VLAN Figure 5 35 VLAN Voice VLAN Voice Device List Select a port or all ports and click Search to display the Voice Device information in the table VLAN Auto Surveillance VLAN Similar...

Page 43: ...five components are Video Management Server VMS VMS Client Remote viewer Video Encoder Network Storage and Other IP Surveillance Devices Description Specifies the description for the component type M...

Page 44: ...igned Target Port Click all to include all ports into port mirroring None Turns off the mirroring of the port Click all to remove all ports from mirroring Click Apply to capture the configured Source...

Page 45: ...ning off the function of learning MAC address automatically if a port isn t specified as an uplink port for example connects to a DHCP Server or Gateway By default this feature is Disabled Figure 5 40...

Page 46: ...le VLANs to be mapped to a single spanning tree instance providing multiple pathways across the network For example while port A is blocked in one STP instance the same port can be placed in the Forwa...

Page 47: ...eding a separate spanning tree BPDU filtering functions only when STP is disabled either globally or on a single interface The possible field values are Disabled BPDU filtering is enabled on the port...

Page 48: ...y are restricted in that a P2P port must operate in full duplex Like edge ports P2P ports transition to a forwarding state rapidly thus benefiting from RSTP A p2p value of false indicates that the por...

Page 49: ...1 15 Type Defines the type of edit The possible values are Add VID Indicates that edit type is add Remove VID Indicates that edit type is removed VID List 1 4094 Displays the VID List Click Apply to...

Page 50: ...ll set the quickest route automatically and optimally for an interface Priority Defines the interface priority for the specified instance The default value is 128 A higher priority will designate the...

Page 51: ...ated port group that is to add or subtract ports from the group at least one of the participating devices must designate LACP ports as active Both devices must support LACP Passive LACP ports that are...

Page 52: ...l This timer will be restarted whenever a Query control message is received over that port If there are no Query control messages received for Router Port Purge Interval time the learned router port e...

Page 53: ...ttings then click Add Figure 5 52 L2 Functaions Multicast Multicast Forwarding VID The VLAN ID of the VLAN to which the corresponding MAC address belongs Multicast MAC Address The MAC address of the s...

Page 54: ...ons SNTP Time Settings SNTP or Simple Network Time Protocol is used by the Switch to synchronize the clock of the computer The SNTP settings folders contain two windows Time Settings and TimeZone Sett...

Page 55: ...ngs Daylight Saving Time State Enable or disable the DST Settings Daylight Saving Time Offset Use this drop down menu to specify the amount of time that will constitute your local DST offset 30 60 90...

Page 56: ...ttempted The default value is 2 seconds LLDP TX Delay 1 8192 This parameter indicates the delay between successive LLDP frame transmissions initiated by value or status changes in the LLDP local syste...

Page 57: ...s whether the System Capabilities TLV is enabled on the port The possible field values are Enabled Enables the System Capabilities TLV on the port Disabled Disables the System Capabilities TLV on the...

Page 58: ...ises the Power via MDI implementations supported by the port The possible field values are Enabled Enables the Power via MDI configured on the port Disabled Disables the Power via MDI configured on th...

Page 59: ...ort Click Apply to implement changes made L2 Functions LLDP LLDP Management Address Table The LLDP Management Address Table page displays the detailed management address information for the entry Figu...

Page 60: ...lays the port ID Unit number Port number Port Description Displays the port description Click View Normal or Detailed to displays more information L2 Functions LLDP LLDP Remote Port Table This LLDP Re...

Page 61: ...ange entry was last deleted or added It is also displays the time elapsed since last change was detected Number of Table Insert Displays the number of new entries inserted since switch reboot Number o...

Page 62: ...he IP address for the interface Netmask Select the netmask of IP address Interface Admin State Enables or disables the interface administration state Click Add for the settings to take effect L3 Funct...

Page 63: ...e table Gateway Specifies the corresponding Gateway of the IP address entered into the Static Route table Metric 1 65535 Represents the metric value of the IP interface entered into the table This fie...

Page 64: ...ure 5 72 L3 Functions IPv6 Routing Table Finder IPv6 Network Address Specify the IPv6 address NOTE The Static Route settings and Routing Table Finder of IPv4 IPv6 need to be configured with different...

Page 65: ...re 5 75 L3 Functions ARP Gratuitous ARP Specifies the Send when IP Interface is up Send when duplicated IP is detected and Learn received Gratuitous ARP are enabled or disabled then click Apply to tak...

Page 66: ...MS CaS The user may set the Discovery Interval from 30 to 90 seconds Hold Time 100 255 This parameter may be set for the time in seconds the Switch will hold information sent to it from other switche...

Page 67: ...traffic from this port will be first handled by the switch For packets that are untagged the switch will assign the priority depending on your configuration Figure 5 78 QoS 802 1p DSCP ToS Select QoS...

Page 68: ...tings to take effect Security Trusted Host Use Trusted Host function to manage the switch from a remote station You can enter up to ten designated management stations networks by defining the IPv4 Add...

Page 69: ...ports on a single Switch This method of segmenting the flow of traffic is similar to using VLANs to limit traffic but is more restrictive Figure 5 83 Security Traffic Segmentation Click Apply to enabl...

Page 70: ...teps N of 64Kbps N can be from 1 to 16000 Click Apply for the settings to take effect Security ARP Spoofing Prevention ARP spoofing also known as ARP poisoning is a method to attack an Ethernet networ...

Page 71: ...t Ports to be DHCP server trusted port and then click Apply to enable the function Figure 5 87 Security DHCP Server Screening Trusted DHCP Server IP Settings To add the DHCP Trusted DHCP Server set th...

Page 72: ...89 Security SSH SSH Settings To configure the SSH server on the Switch modify the following parameters and click Apply SSH State Enabled or Disabled SSH on the Switch The default is Disabled Max Sessi...

Page 73: ...tandard encryption algorithm with Cipher Block Chaining The default is enabled 3DES CBC Use the check box to enable or disable the Triple Data Encryption Standard encryption algorithm with Cipher Bloc...

Page 74: ...orized clients can access a switch s port by either checking the pair of IP MAC address with the pre configured database or if DHCP snooping has been enabled in which case the switch will automaticall...

Page 75: ...ge of IP Address to scan all devices in the network Click Scan and the search results will be listed in below table Binding check the box to select desired binding devices Apply click Apply to set Sma...

Page 76: ...Address Select IPv4 or IPv6 and set the RADIUS server IP address Authentication Port 1 65535 Set the RADIUS authentic server s UDP port The default port is 1812 Accounting Port 1 65535 Set the RADIUS...

Page 77: ...vailable to the user or the user is denied access to the network Figure 5 97 AAA 802 1X 802 1X Global Settings NOTE The Forward EAPOL PDU option will be useless if the Authentication State is Enabled...

Page 78: ...the port transitions from down to up or when an EAPOL start frame is received The Switch then requests the identity of the client and begins relaying authentication messages between the client and the...

Page 79: ...on will be on packets from this IPv6 source address Service Type Specify the type of service The possible values are Any Indicates ACL action will be on packets from any service type Ether type Specif...

Page 80: ...Profile ID Indicates the profile Identification number The possible configured profile IDs are 1 50 and profile ID 51 57 are reserved for the pre defined features Type The owner type of ACL profile Pr...

Page 81: ...elect Packet Content to instruct the Switch to examine the packet content in each frame s header MAC ACL Defines the ACL profile Layer 2 protocols The possible values are Tagged Defines the profile La...

Page 82: ...on instructs the Switch to examine the 802 1Q VLAN identifier of each packet header and use this as the full or partial criterion for forwarding VLAN ID Selecting this option instructs the Switch to e...

Page 83: ...le to set 176 212 XX XX use mask 255 255 0 0 Destination IP Mask Defines the range of destination IP addresses relevant to the ACL rules 0 ignore 1 check For example to set 176 212 XX XX use mask 255...

Page 84: ...9 Figure 5 107 Add Access Profile IPv4 ACL IGMP Click Add button then the ACL profile is added To define the IPv4 ACL TCP profile Select IPv4 ACL with TCP and click Select button The updates to show...

Page 85: ...ACL profile is added To define the IPv4 ACL UDP profile Select IPv4 ACL with UDP and click Select button The updates to show the follows Figure 5 108 Add Access Profile IPv4 ACL UDP The Add ACL Profil...

Page 86: ...addresses relevant to the ACL rules 0 ignore 1 check For example to set 2002 0 0 0 0 0 b0d4 0 use mask 128 Destination IP Prefix Defines the range of destination IP addresses relevant to the ACL rules...

Page 87: ...range of source Ports relevant to the ACL rules 0 ignore 1 check For example to set 0 15 set mask of FFF0 Destination Port Mask Defines the range of destination IP addresses relevant to the ACL rules...

Page 88: ...ck For example to set 0 15 set mask of F Click Add button then the ACL profile is added NOTE A combination of one or several filtering masks can be selected simultaneously The page updates with the re...

Page 89: ...o which the rule is being added to including Profile ID and Ether Type In Rule Detail you can specify the details of an access rule Below are all the possible parameters that can be set Access ID Spec...

Page 90: ...5 116 ACL ACL Finder PoE PoE Global Settings DGS 1500 28P only This page allows user to configure the global PoE settings of the device and also displays current PoE status including RPS Status Total...

Page 91: ...rts or 30W for port 1 24 meeting IEEE802 3af standards and pre 802 3at standards IEEE 802 3at defined that the PSE provides power according to the following classification Class Usage Output power lim...

Page 92: ...rap to SmartConsole page allows user the set the difference status of SNMP notifications trapped to the Smartconsole Figure 5 119 SNMP Trap to SmartConsole Destination IP Specifies the destination IP...

Page 93: ...e changes Firmware Upgrade State Specifies the device to send notifications when firmware upgrades Duplicate IP Detected Specifies the device to send notifications when duplicate IP were detected SNMP...

Page 94: ...nd encrypting packets over the network Security Level This function is only available when you select SNMPv3 security level NoAuthNoPriv No authorization and no encryption for packets sent between the...

Page 95: ...ible to the SNMP community Click Add to create a new SNMP community Delete to remove an existing community SNMP SNMP SNMP Host The SNMP Host page is to configure the SNMP trap recipients Figure 5 125...

Page 96: ...configurations take effects or click to renew the details collected and displayed SNMP RMON RMON History The RMON History Control Configuration page contains information about samples of data taken f...

Page 97: ...pared to the threshold Absolute value Compares the values directly with the thresholds at the end of the sampling interval Falling Threshold 0 2 31 1 Displays the falling counter value that triggers t...

Page 98: ...ckets received successfully TxError Number of transmitted packets resulting in error RxError Number of received packets resulting in error To view the statistics of individual ports click one of the l...

Page 99: ...ows OK then cable length will be indicated for the total length of the cable The cable lengths are categorized into four types 50 meters 50 80 meters 80 100 meters and 100 meters NOTE Cable length det...

Page 100: ...is 5 minutes To change the login timeout session please refer to chapter 5 CLI Commands The Basic Switch commands in the Command Line Interface CLI are listed along with the appropriate parameters in...

Page 101: ...age To display a list of commands of the switch DGS 1500 28 USEREXEC commands config account admin password passwd config ipif ipif_name ipaddress ip address subnet mask gateway gw address dhcp bootp...

Page 102: ...nfiguration file on the TFTP server You need to specify the DOS path if the file is not at the root directory of the TFTP server Restrictions None Example usage To download a firmware file DGS 1500 28...

Page 103: ...ination URL tftp 1 1 1 23 1 running config 01 Jan 2000 01 26 16 COPY W TRAP The copy operation was completed success fully 158 bytes copied in 00 00 05 hh mm ss DGS 1500 28 config ipif Purpose To conf...

Page 104: ...pose To log out a user from the Switch s console Syntax logout Description The logout command terminates the current user s session on the Switch s console Parameters None Restrictions None Example us...

Page 105: ...ipment By default Switch sends five pings to the target IP Parameters ipv6addr Specifies the IPv6 address of the host Restrictions None Example usage To ping the IPv6 address 2009 280 C8FF FE3C 5C8A D...

Page 106: ...rs to their default values DGS 1500 28 reset config Device will reboot after reset configuration successfully DGS 1500 28 show ipif Purpose To display the configuration of an IP interface on the Switc...

Page 107: ...firmware version 1 00 001 System boot version 1 00 000 System Protocol version 2 001 004 System serial number LAB1500280022 MAC Address 00 18 E7 48 85 50 DGS 1500 28 config account admin password Pur...

Page 108: ...ion of the Switch Syntax debug info Description The debut info command displays the ARP table and MAC FDB of the Switch Parameters None Restrictions None Example usage To display the ARP table and MAC...

Page 109: ...6 Command Line Interface D Link Web Smart Switch User Manual 104 Total Mac Addresses displayed 1 DGS 1500 28...

Page 110: ......

Page 111: ......

Page 112: ......

Page 113: ......

Reviews: