background image

D-Link Systems, Inc.

11

DNS-120 Install Guide

Viewing Files and Folders

Viewing Files and Folders

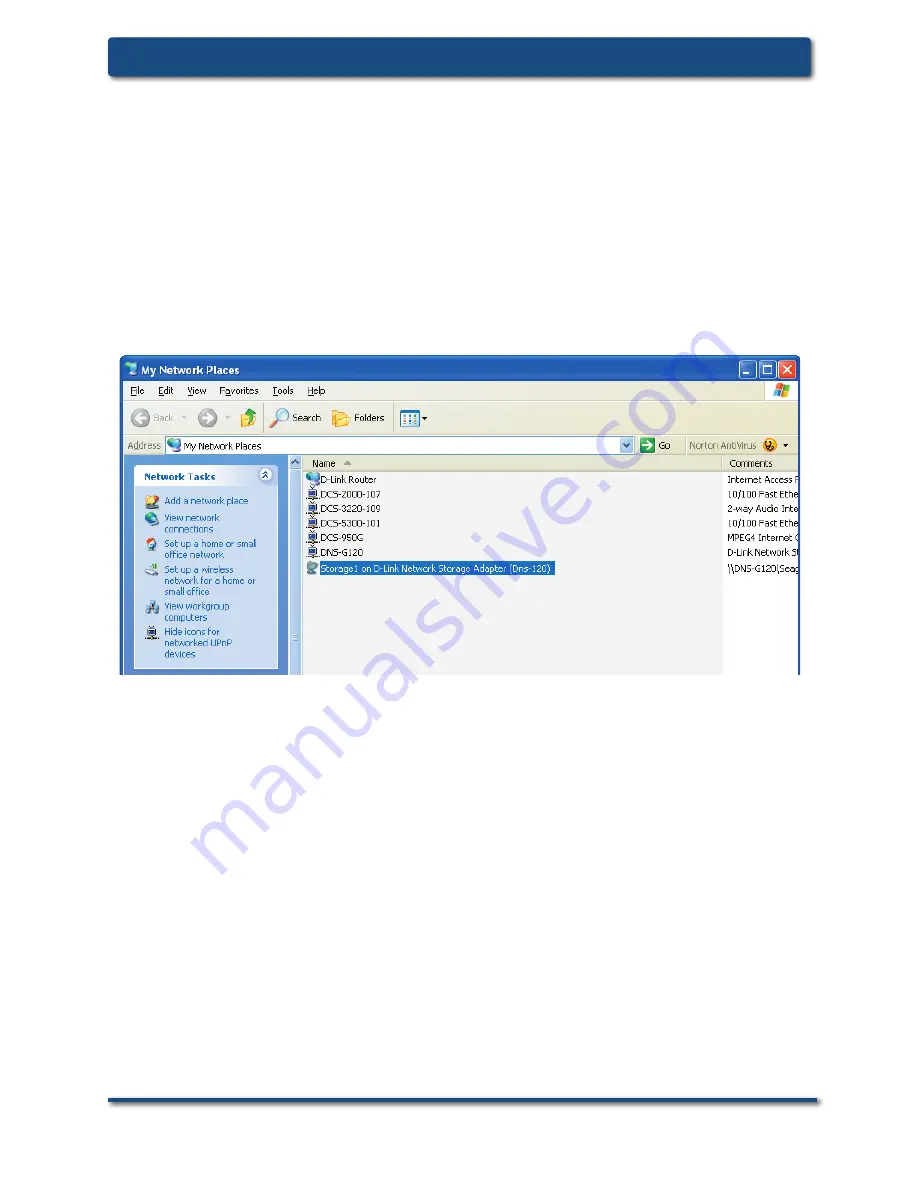
To  view  the  content  on  your  USB  drive,  double-click  on  the 

My 

Network Places

 icon on your desktop and double-click on the folder 

that represents your USB drive.

By default, all users on your network will have read/write permissions 

to all folders and fi les on the USB drive(s).

For more information on creating users and assigning permissions, 

please refer to the 

Using the Confi guration Utility

 section in the 

manual included on your DNS-120 CD.

Summary of Contents for Express EtherNetwork DNS-120

Page 1: ...DWL AG700AP Install Guide Version 1 1 DNS 120 Network Storage Adapter...

Page 2: ...equirements Computer with Windows XP or 2000 with an installed Ethernet Adapter Internet Explorer 6 0 or Netscape Navigator 7 0 and above USB Hard Drive Manual and Software on CD Package Contents D Li...

Page 3: ...Ethernet connection Blinking green indicates activity on the Ethernet network Ethernet LED Solid green indicates a good power source connection Power LED Blinking green indicates when the USB drive i...

Page 4: ...USB drives from the DNS 120 Disconnect Button Connects to your router or switch using the included Ethernet cable Ethernet Port Receptor for the provided power adapter Power Receptor This button will...

Page 5: ...D Link Systems Inc 5 DNS 120 Install Guide Installation Overview Installation Overview Once you ve completed your DNS 120 installation your network may appear similar to the diagram below...

Page 6: ...lable Ethernet port on your router or switch 2 Plug the AC adapter into the receptor located on the back of the DNS 120 Plug the other end of the AC Adapter into a power strip or wall outlet 3 4 Attac...

Page 7: ...ased con guration insert the DNS 120 CD into your CD ROM drive Con guration Type admin for the user name and leave the password eld blank Click Con g Click Launch D Link Easy Search Utility Highlight...

Page 8: ...8 D Link Systems Inc DNS 120 Install Guide Con guration Click Run Wizard Click Next Enter your new password for the DNS 120 Click Next Con guration continued...

Page 9: ...e and a description for the DNS 120 Con guration continued Click Next Click Next Leave DHCP Client enabled if your network contains a DHCP server If not select Static IP and enter the IP address infor...

Page 10: ...20 Install Guide Con guration Your setup is complete Please close all web browser windows Use the Easy Search Utility to locate and continue advanced con guration of the DNS 120 Con guration continued...

Page 11: ...laces icon on your desktop and double click on the folder that represents your USB drive By default all users on your network will have read write permissions to all folders and les on the USB drive s...

Page 12: ...P address highlight the DNS 120 and select Disabled from the DHCP Client drop down menu Click Apply to save the new IP settings Click Launch D Link Easy Search Utility Using the Easy Search Utility Hi...

Page 13: ...l be displayed Highlight the share you want to map Select an available drive letter from the drop down menu and click Connect You can assign a drive letter e g E to a speci c folder on your USB drive...

Page 14: ...disconnect your USB drive s from the DNS 120 please do the following Press the Disconnect button on the rear panel The USB LED will blink red for a few seconds and turn off You may now safely remove...

Page 15: ...D Link Systems Inc 15 DNS 120 Install Guide Notes Notes...

Page 16: ...ty four hours a day seven days a week World Wide Web http support dlink com E mail support dlink com Canada Telephone 800 361 5265 Monday through Friday 7 30am to 12 00am EST World Wide Web http suppo...

Reviews: