background image

1

D-Link DWM-312W User Manual

Section 1 - Product Overview

Product Overview

Package Contents

If any of the above items are missing or damaged, please contact your reseller.

System Requirements

* Subject to services and service terms available from your carrier.

•  A compatible micro-SIM/UICC card with service.*
•  Computer with Windows, Mac OS, or a Linux-based operating system, and an installed Ethernet 

adapter.

•  Java-enabled browser such as Internet Explorer 6, Safari 4.0, Chrome 20.0, or Firefox 7 or above 

(for configuration).

Power Adapter

DWM-312W 4G LTE M2M Router

3 x 3G/4G Antennas

RJ-45 Cable

4 x Mounting Screws

DIN Plate

RESE

T

PWR

INTE

RNET

SIGN

AL

SIMA

SIMB

DW

M

-3

12

W

Summary of Contents for DWM-312W

Page 1: ...Version 1 00 07 22 2020 User Manual DWM 312W 4G LTE M2M Router ...

Page 2: ...mentioned herein are trademarks or registered trademarks of their respective companies Copyright 2020 by D Link Corporation All rights reserved This publication may not be reproduced in whole or in part without prior expressed written permission from D Link Corporation Revision Date Description 1 00 July 22 2020 Initial release Preface ErP Power Usage This device is an Energy Related Product ErP t...

Page 3: ...tion 10 Getting Started 10 The Home Screen 11 Summary 12 Device Information 12 WLAN 13 WAN 14 LAN 15 Network 15 LAN Ports 16 LTE Modem 17 Statistics 18 Network Statistics 18 DHCP 19 Routing Table 20 Clients and Sessions 21 Port Statistics 22 Multicast Groups 24 Connections Setup 25 WAN 25 Change Configuration 26 Advanced Mode 40 LAN 41 IPv4 41 IPv6 43 WAN Reservation 44 Traffic Balancing 45 VPN 46...

Page 4: ...AN assignment 82 SNMP 83 DNS 84 DDNS 85 Ports Settings 86 Redirect 87 Routing 88 Remote Access 89 UPnP IGD 90 IGMP 91 ALG Passthrough 92 BGP 93 OSPF 94 Firewall 95 IP Filter 95 Virtual Servers 98 DMZ 100 MAC Filter 101 URL Filter 102 System 104 Configuration 104 Firmware Update 106 Schedule 107 Log 110 Ping 112 Traceroute 114 Telnet SSH 116 System Time 117 Auto Provision 119 Troubleshooting 120 Te...

Page 5: ...rms available from your carrier A compatible micro SIM UICC card with service ComputerwithWindows MacOS oraLinux basedoperatingsystem and aninstalled Ethernet adapter Java enabled browser such as Internet Explorer 6 Safari 4 0 Chrome 20 0 or Firefox 7 or above for configuration Power Adapter DWM 312W 4G LTE M2M Router 3 x 3G 4G Antennas RJ 45 Cable 4 x Mounting Screws DIN Plate RESET PWR INTERNET ...

Page 6: ...and watch videos on the go Configurable dual SIM fallback provides reliability and flexibility in mixed network environments Reliable High Speed Virtual Private Networks The DWM 312W 4G LTE M2M Router s integrated VPN client and server is compatible with almost any VPN policy The router s hardware engine can support and manage multiple VPN configurations It supports IPSec and GRE protocols and han...

Page 7: ...ndard 10 100 Mbps Ethernet WAN LAN port to connect any device via Cat 5 5e 6 RJ 45 cables 2 Ethernet LAN Port Standard 10 100 Mbps Ethernet LAN port 3 DI DO Grounding Port Optional Software Support DI DO Grounding port From left to right DI 1 DI 2 DO RX TX Grounding 4 DC Power Port 5 5 mm barrel connector for power 1 2 3 4 ...

Page 8: ...ong signal Red Indicates weak signal Amber Indicates fair signal Off Indicates no signal 4 Internet Solid Green Connected to SIM A LTE Network Flashing Blue Fallback to SIM B 3G 2G network Flashing Green Fallback to SIM A 3G 2G network Solid Blue Connected to SIM B LTE Network Off No service SIM Error APN Error 5 Power A green LED indicates the DWM 312W is receiving power 6 Reset Button Press and ...

Page 9: ...5 D Link DWM 312W User Manual Section 1 Product Overview Dual SIM Slots 1 SIM A Primary SIM card slot 2 SIM B Secondary SIM card slot 1 2 ...

Page 10: ...ng SMA Connectors 1 SMA Connector AUX SMA female connector auxiliary antenna 2 SMA Connector MAIN SMA female connector primary antenna 3 SMA Connector WIFI SMA male connector Wi Fi antenna 4 DIN Mounting Unit The mounting unit used to fix the DWM 312W in place 1 2 3 4 ...

Page 11: ... a cool and dry place Refer to the technical specifications in the user manual for the acceptable operating temperature and humidity ranges Install the router in a site free from strong electromagnetic sources vibration dust excessive moisture and direct sunlight Place antennas in an unobstructed area with clear mobile signal Avoid metal boxes brick walls and other dense materials It is recommende...

Page 12: ...ennas are interchangeable but third party antennas may require connection to specific ports 1 Attach the antennas labeled LTE to the SMA connectors labeled MAIN and AUX Attach the antenna labeled WIFI to the SMA connector labeled WIFI Turn clockwise to fasten the antenna 2 Position the router where it will receive an optimal signal Arrange the antennae so they point upward ...

Page 13: ...he port on the DWM 312W labeled WAN LAN To establish a mobile connection you will need an active SIM card with an Internet connection 1 Insert a micro SIM card into the slot labelled SIM A with the contacts facing down If you wish to install a second SIM card insert it into the slot labelled SIM B 2 Gently press the micro SIM into the slot until it locks into place To remove press again and the SI...

Page 14: ...with an Ethernet cable will open the configuration utility automatically To log in to the configuration utility enter the default username admin and the default password admin If this is your first time logging in you will be prompted to create a new password which must be between 8 and 30 characters and must be different from the default password Note IfyougetaPageCannotbeDisplayederror pleaseref...

Page 15: ... to the different configuration sections of the web interface There is a menu in the sidebar on the left side of the page Clicking on one of the links in the sidebar will take you to the appropriate configuration section On each page fill out the desired settings and click Apply when you are done or Refresh to revert to the old settings The Home Screen ...

Page 16: ...m information and the uptime of the router Device Information Model The model number of the router Hardware revision The hardware revision of the router Firmware version The firmware version of the router UI version The UI version of the router Serial number The serial number of the router Summary The root filesystem image for the router Uptime The amount of time that the router has been on for ...

Page 17: ...status information WLAN Status The status of the SSID Broadcasting The broadcasting status of the SSID Additional networks The number of additional Wi Fi networks the router is broadcasting Network name SSID The name of the SSID Security The encryption modes supported by the SSID ...

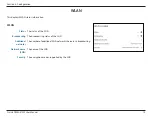
Page 18: ...onfiguration WAN The WAN menu is used to display status information for the WAN interfaces on the router WAN Connection type The type of the WAN connection Status The status of the WAN connection IP address The IP address of the WAN connection ...

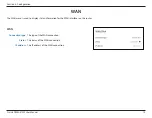
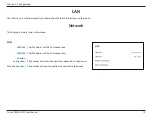
Page 19: ... IPv4 address of the LAN connection LAN IPv6 The IPv6 address of the LAN connection Wireless connections The number of wireless connections connected to the device Wired connections The number of wired connections connected to the device The LAN menu is used to display status information for the LAN interfaces on the router ...

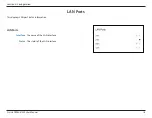
Page 20: ...16 D Link DWM 312W User Manual Section 4 Configuration LAN Ports This displays LAN port status information LAN Ports Interface The name of the LAN interface Status The status of the LAN interface ...

Page 21: ... 312W User Manual Section 4 Configuration LTE Modem This section contains a link to the LTE Modem page also available in the sidebar Click this link to view information for and configure the LTE modem and SIM cards ...

Page 22: ...isplays the network statistics for the router s various interfaces Network Statistics Name The name of the interface IP Gateway The network gateway of the interface Rx Tx The number of bytes and packets sent received on the connection Rx Tx errors The number of errors and discarded packets on the connection Duration The duration the connection has been active Network Statistics ...

Page 23: ...rmation on computers that have been identified by hostnames and MAC addresses and have received IP addresses from the DHCP server as well as their IP address expiration periods the lease time DHCP Hostname The name of the DHCP host IP Address The IP address assigned to the host MAC The MAC address of the host Expires The lease time until the IP address expires ...

Page 24: ...ntains destination IP addresses gateways subnet masks and other data Routing Table Interface The name of the interface Destination The destination IP address Subnet Mask The subnet mask of the route Gateway The gateway of the route Flags The routing table flag Metric The metric used by a router to make routing decisions ...

Page 25: ...tatistics on the clients connected to the router and their current sessions Clients MAC The MAC address of the client IP address The IP address of the client Hostname The hostname of the client Flags The flags that apply to the client Interface The network interface the client is connected to ...

Page 26: ...t Status The status of the port Traffic sent The amount of traffic sent through the port in Mb Traffic received The amount of traffic received through the port in Mb Click a port to display in depth information about it This page displays information on the router s ports and the traffic passing through them ...

Page 27: ... port Packets received The number of packets received on the specified port Number of errors occurred while sending The number of errors that occurred while sending packets on the specified port Number of errors occurred while receiving The number of errors that occurred while receiving packets on the specified port Additional Counters for Received Packets Drop events The number of events in which...

Page 28: ...cast group to which the device is subscribed Interface The interface over which the device is subscribed This page displays addresses of active multicast groups including IPTV channels and groups for transferring service information to which the device is subscribed and the interface through which the device is subscribed to ...

Page 29: ...ellular Internet service to connect to the Internet WAN Change Configuration To change the configuration of the WAN connection click the Change Configuration button WAN Connection type The connection type of the WAN connection Status The status of the WAN connection Interface The interface of theWAN connection WAN Ethernet port or mobile SIM card IP address The IP address of the WAN interface Subn...

Page 30: ... connection Enable connection Toggle this to enable or disable the selected connection NAT Toggle this to enable or disable the NAT function of the router allowing it to act as a link to your Internet connection but without routing functions Ping Toggle this switch to enable WAN Ping This setting is disabled by default RIP Toggle this switch to enable Routing Information Protocol RIP This setting ...

Page 31: ... changed it Dynamic IPv4 Obtain DNS server addresses automatically Toggle this switch to enable DNS information to be acquired automatically through DHCP This setting is enabled by default Primary DNS Specify the primary DNS server IP address assigned by your ISP This address is usually obtained automatically from your ISP Secondary DNS Specify the secondary DNS server IP address assigned by your ...

Page 32: ...s provided by your ISP Subnet mask Enter the subnet mask provided by your ISP Gateway IP address Enter the default gateway address provided by your ISP Primary DNS Enter the primary DNS server address assigned by your ISP Secondary DNS Enter the secondary DNS server IP address assigned by your ISP ...

Page 33: ...r address manually This setting is enabled by default Primary IPv6 DNS server Specify the primary DNS server IP address assigned by your ISP Secondary IPv6 DNS server Specify the secondary DNS server IP address assigned by your ISP Static IPv6 IPv6 address Specify the IPv6 address provided by your ISP Prefix Specify the prefix provided by your ISP Gateway IPv6 address Specify the default gateway a...

Page 34: ...he PPP password provided by your ISP Service name Specify the ISP service name optional MTU Specify the Maximum Transmission Unit of your Internet connection You may need to change the MTU for optimal performance The default setting is 1500 Encryption protocol Select the encryption scheme to use The options are No encryption MPPE40128 bit MPPE56 bit andMPPE128 bit Authentication protocol Choose fr...

Page 35: ... Keep Alive specify the LCP Echo frequency in seconds The default setting is 30 LCP falls If you have enabled Keep Alive specify the maximum number of LCP fails before the connection is dropped Dial on demand Enable this option to automatically dial a PPPoE connection when data flow is detected ...

Page 36: ... Specify the IP address provided by your ISP PPP debug Toggle this switch to enable PPP debug This feature is disabled by default PPPoE IPv4 Dual Stack Obtain DNS server addresses automatically Toggle this switch to enable DNS information to be acquired automatically through DHCP This setting is enabled by default Primary DNS Specify the primary DNS server IP address assigned by your ISP Secondary...

Page 37: ...fix delegation This setting is enabled by default Obtain DNS server addresses automatically Disable this to enter the DNS server address manually This setting is enabled by default Primary IPv6 DNS server IfObtainDNSserveraddressesautomaticallyisdisabled specify the primary DNS server IP address assigned by your ISP Secondary IPv6 DNS server If Obtain DNS server addresses automatically is disabled...

Page 38: ... ISP VPN server address Specify the VPN server address provided by your ISP MTU Specify the Maximum Transmission Unit of your Internet connection You may need to change the MTU for optimal performance with your ISP The default setting is 1456 Encryption protocol Choose No Encryption MPPE 40 125 bit MPPE 40 bit or MPPE 128 bit Authentication protocol ChoosefromAUTO PAP CHAP MS CHAP orMS CHAPv2 AUTO...

Page 39: ...ges 30 32 L2TP over IPsec Pre shared key Specify a pre shared key Enable PFS Toggle this switch to enable Perfect Forward Secrecy for second phase Specify connection port Toggle this to set the connection port manually The default is 1701 For the remainder of the L2TP over IPsec options refer to pages 30 32 ...

Page 40: ...Selecting a single SIM card either SIMA or SIMB will connect over a single SIM only Selecting a backup option will change cause the connection to switch to the specified backup if the primary SIM cannot connect after the specified time Click a SIM card to display options on the configuration page ...

Page 41: ...urISP Without authorization Enable this setting to connect without a username and password This configuration is uncommon and is disabled by default Authentication protocol ChoosefromAUTO PAP CHAP MS CHAP ORMS CHAPv2 AUTO is selected by default Username If Without authentication is disabled enter the username provided by your ISP Password If Without authentication is disabled enter the password pr...

Page 42: ...f you have enabled Keep Alive specify the LCP Echo frequency in seconds The default setting is 30 LCP fails If you have enabled Keep Alive specify the maximum number of LCP fails before the connection is dropped Dial on demand Enable this option to automatically dial a PPPoE connection when data flow is detected Maximum idle time If you have enabled Dial on demand specify a maximum idle time in se...

Page 43: ...atically check the status of your connection with the Ping command The maximum number of attempts Specify the maximum number of Ping attempts to make when performing a health check Timeout Specify the maximum response time for one attempt Addresses Add addresses to attempt to reach with the Ping command ...

Page 44: ... click Advanced Mode Advanced Mode Advanced Mode Default Gateway IPv4 The default gateway that serves as an access point to another network in Internet Protocol version 4 IPv4 Default Gateway IPv6 The default gateway that serves as an access point to another network in Internet Protocol version 6 IPv6 IGMP Refer to page 87 Connections List A list of connections on the router ...

Page 45: ... subnet mask of the connection Hostname The web based interface using the domain name Enter this name with a dot and a slash at the end in the address bar of the web browser for example dlinkrouter local Dynamic IP Addresses Model of dynamic IP address assignment The mode of dynamic IP assignment Choose between Disable DHCP server or DHCP relay The default is DHCP server Start IP The start of the ...

Page 46: ...ggle this switch to enable the Address Resolution Protocol proxy This setting is disabled by default DHCP Options Specify DHCP options to apply to a given client Static IP Addresses Specify the IP address you wish to reserve for a given client Hosts Specify the hostname you would like to use for a given client ...

Page 47: ...of dynamic IPv6 address assignment Select Disable Stateful or Stateless Lease time If Stateful or Stateless has been selected specify the lease time in minutes for dynamic IPv6 addresses The default route for LAN clients Toggle this option to make this the default route for LAN clients ...

Page 48: ... connection which will be used as the main one Backup connections From the drop down list select a WAN connection which will be used as the reserve one Check interval A time period in seconds between attempts to check the status of the main connection By default the value 10 is specified Timeout check A time period in milliseconds for an attempt to check the status of the main connection At the en...

Page 49: ...balance traffic between multiple WAN connections to ensure an even distribution of bandwidth Enable Toggle this to enable or disable traffic balancing Connection Specify the connection to apply a traffic adjustment rule to Traffic adjustment Select Auto or Manual If you select Manual you must also enter a traffic weight ...

Page 50: ...gorithms Supported protocols as a client include IPSec PPTP L2TP and GRE Supported protocols as a server include PPTP and L2TP IPSec Enable Toggle this to enable or disable IPsec client functionality Tunnels Add Click here to add a new IPsec client described in IPsec Adding on page 49 Delete Click this button to delete the selected tunnel s Remote host Indicates the remote host of the tunnel Encry...

Page 51: ...4 Configuration Status Remote host Indicates the status of the remote host of the tunnel IKE phase 1 Indicates the status of Internet Key Exchange IKE phase 1 IKE phase 2 Indicates the status of IKE phase 2 State Indicates the tunnel status ...

Page 52: ...QDN Remote host Enter the IP address of the remote host If Dynamic IPsec is enabled this field will be disabled Identifier value Specify the local identifier value Pre shared key Specify a pre shared key Local WAN Specify the WAN from the drop down list NAT Traversal Specify either Disabled Enabled or Force Type Specify the IPsec mode of operation either TUNNEL or TRANSPORT ...

Page 53: ...first phase Hashing mode Choose the hashing mode to use for the first phase Size of hash Select the hash size to use Hashing algorithm Select the hash function to use from MD5 SHA1 and SHA2 recommended First phase DHgroup type Specify the DHgroup type for the first phase from the drop down list IKE SA lifetime Enter a value between 60 and 864000 seconds IKE version Select either IKE version 1 or 2...

Page 54: ...l Section 4 Configuration Dead Peer Detection Enable Toggle this to enable dead peer detection DPD delay Enter the DPD delay in seconds DPD timeout Enter the DPD timeout in seconds TCP MSS Select either Manual or Path MTU discovery ...

Page 55: ...e Hashing mode Choose the hashing mode to use for the second phase Size of hash Select the hash size to use Hashing algorithm Select the hash function to use from MD5 SHA1 and SHA2 recommended Enable PFS Toggle this switch to enable Perfect Forward Secrecy for the second phase Second phase DHgroup type Specify the DHgroup type for the second phase from the drop down list IPsec SA lifetime Enter a ...

Page 56: ...establish the GRE tunnel Remote IP Enter the IP address of the remote end of the tunnel MTU Specify the Maximum Transmission Unit of the connection The default setting is 1400 Allow traffic GRE LAN Toggle this to disable traffic over the LAN interface Static route settings Remote LAN IP address Enter the IP address to use for the local LAN subnet Remote LAN mask Enter the IP mask for the remote LA...

Page 57: ...artclientIP Enter a starting address for the range of IPs to be assigned to clients End client IP Enter an ending address for the range of IPs to be assigned to clients Interface Select the interface to use from the drop down Enable authentication Toggle this to enable authentication and select a protocol Enable MMPE Toggle this to enable MMPE encryption ...

Page 58: ...o allow clients using the VPN to send or receive data using the interface in question Advanced settings Maximum number of connections Specify the maximum number of connections MTU Specify the Maximum Transmission Unit of the connection The default setting is 1400 Enable debug mode Toggle this switch to enable debug mode ...

Page 59: ...in DNS server addresses automatically Toggle this to obtain DNS server addresses automatically PrimaryDNS If the previous option is disabled enter the primary DNS server address Secondary DNS If the previous option is disabled enter the secondary DNS server address ...

Page 60: ...hould use as the client gateway Start client IP Specify the start of the IP range End client IP Specify the end of the IP range Interface Select the interface to use for thisVPN Enable authentication Toggle this to enable authentication MMPE Toggle this to enable or disable MMPE security For the rest of the L2TP options refer to page 53 ...

Page 61: ...57 D Link DWM 312W User Manual Section 4 Configuration VPN Users You can use this page to add VPN users to the router or modify existing users by changing their username or password ...

Page 62: ...P address Specify the tunnel destination address Tagged Toggle this to specify whether the tunnel will be tagged or untagged Tag ID If Tagged is enabled enter an ID that will identify the tag Interface Specify the interface over which the tunnel will be created MTU Specify the maximum transmission unit The default is set to 1400 ...

Page 63: ...prioritized over other network traffic such as FTP or web traffic Classification Settings Name Specify the name to use to refer to the rule Destination Network Specify the destination network for the rule to affect Source Network Specify the source network for the rule to affect Interface Specify the interface VLAN ID Specify theVLAN ID COS Enter the COS Protocol Specify the protocol to use e g TC...

Page 64: ...MAC Address Enter the MAC address of the destination Source MAC Address Enter the MAC address of the source Destination port Enter the destination port Source port Enter the source port DSCP Enter the Differentiated Service Code Point DSCP value ToS Enter theToS value ...

Page 65: ...This page allows you to set QoS settings for your router QoS Settings Interface Specify the interface e g LAN WAN etc Algorithm Select the algorithm to use from the drop down menu Add class Click this to create a new class Number of classes Specify the number of classes ...

Page 66: ...this option the following parameters become available Country The country that your network is located in Wireless mode Select the IEEE 802 11 standard used by your wireless clients Select channel automatically Enabling this feature will allow the router to automatically scan for the best wireless channel to use Enable additional channels Select this if you would like to set your router to allow c...

Page 67: ...f Select Channel Automatically is disabled select the desired channel here Enable periodic scanning Select this to set the router to automatically repeat the channel scan Scanning period If the previous option is enabled use this to instruct the router how often to perform the scan ...

Page 68: ...t this network from appearing in lists when users scan for Wi Fi networks Max associated clients Enteranumberheretolimitthenumberofclientsallowedtoconnect to this network Enable shaping Enable or disable traffic shaping to manage bandwidth Broadcast wireless network Disable this to temporarily stop broadcasting the Wi Fi network Clients isolation Enable this to block traffic between devices connec...

Page 69: ...l to use to restrict access to your network Password PSK The password required to access your network Encryption type The cipher used to encrypt your data This is set to AES by default Ground key update interval If you selected WPA encryption use this to set the interval at which new encryption keys will be created ...

Page 70: ...networks Max associated clients Enteranumberheretolimitthenumberofclientsallowedtoconnect to this network Enable shaping Enable or disable traffic shaping to manage bandwidth Broadcast wireless network Disable this to temporarily stop broadcasting the Wi Fi network Clients isolation Enable this to block traffic between devices connected to the access point Enable guest network Toggle this switch t...

Page 71: ...l to use to restrict access to your network Password PSK The password required to access your network Encryption type The cipher used to encrypt your data This is set to AES by default Ground key update interval If you selected WPA encryption use this to set the interval at which new encryption keys will be created ...

Page 72: ... network that this device is connected to Network name SSID The name of the Wi Fi network that this device is connected to Signal level The strength of the connection between the client and your network Online The length of time the device has been connected to your network This screen enables you to view information for and manage the devices that are connected to your Wi Fi network ...

Page 73: ...tion When the WPS function is enabled the Information section will become available on the page On the Wi Fi WPS page you can enable the Wi Fi Protected Setup feature Before using the function you need to configure one of the following authentication types Open no encryption WPA2 PSK WPA PSK WPA2 PSK with the AES encryption method ...

Page 74: ...rs of the WPS function Network name SSID The name of the router s wireless network Network authentication The network authentication type specified for the wireless network Encryption The encryption type specified for the wireless network Password PSK The encryption password specified for the wireless network Click on the UPDATE button to update the router s WPS settings Click on RESETTO UNCONFIGU...

Page 75: ...ic print jobs file downloads etc BE Best Effort For traffic from legacy devices or devices applications that do not support QoS VI Video For video traffic VO Voice For voice traffic Parameters of the Access Categories are defined for both the router itself in the Access Point section and wireless devices connected to it in the Station section On this page you can enable theWi Fi Multimedia functio...

Page 76: ...Toggle the Enable switch to enable or disable the feature If enabled Broadcast wireless network 2 4 5 GHz Toggle these switches to enable or disable broadcasting on the frequency in question Connecting to network Use this drop down to either select a network from the list below or connect to a hidden network entered manually ...

Page 77: ...etween 20 MHz and 20 40 MHz Autonegotiation 20 40 Toggle to enable or disable TX power in percent Specifytherouter stransmissionpowerasapercentage Choosefrom 300 100 75 50 25 and 10 Drop multicast Toggle to enable or disable multicasting IGMP SSDP etc for the wireless network Adaptivity mode Toggle to enable or disable adaptivity mode ...

Page 78: ...val Beacon period in milliseconds Specify the time interval in milliseconds between packets sent to synchronize the wireless network The default setting is 100 ms RTS threshold in bytes Specifytheminimumsize inbites ofapacketforwhichanRTSframecan be transmitted The default size is 2347 bytes and the standard range is 256 2346 bytes Frag threshold in bytes Specify in bytes the maximum frame size fo...

Page 79: ...d to restrict or allow certain types of Ethernet frames through the gateway based on their source or destination MAC address These filters are helpful in securing or restricting traffic on your local network Your current MAC filters are displayed in the table You may define up to 32 MAC filtering rules If you wish to remove a rule click the corresponding checkbox to select it and then click Delete...

Page 80: ...card to use Information Model The model number of the modem Vendor The modem s vendor IMEI The International Mobile Equipment Identity This is a unique number assigned to every mobile device Interface The interface of the modem Revision The device s revision number Serial number The serial number of the modem Click Disable Power to disable the LTE modem ...

Page 81: ...ed Signal Strength Indicator RSSI of the signal RSCP Indicates the Received Signal Code Power RSCP of the signal Signal level Indicates the signal strength Roaming Indicates whether roaming is enabled or disabled IMSI The international mobile subscriber identity of the SIM card PIN status The PIN status of the SIM card SMS Indicates the SMS setting of the SIM card USSD Click this link to send a US...

Page 82: ... the SIM card to configure SIM cards list Name The name of the SIM card The DWM 312W can have up to two SIM cards labeled A and B IMSI The international mobile subscriber identity of the SIM card PIN status The PIN status of the SIM card SMS The SMS configuration of the SIM card ...

Page 83: ...s to refresh the list of messages SMS Memory Incoming The number of incoming messages Outgoing The number of outgoing messages Total The total number of SMS both sent and received Used memory The memory used by incoming and outgoing messages respectively On this page you can view incoming and outgoing SMS sent using either of the router s SIM cards ...

Page 84: ...USSD Number Enter the USSD code to send to your ISP Response The response to your USSD code will show up here It may take a minute or two for it to show up Unstructured Supplementary Service Data USSD allows ISP specific applications to be activated with an SMS ...

Page 85: ... The ID of the VLAN Name The name used to identify the VLAN Tagged Ports The tagged ports included in theVLAN Untagged ports The untagged ports included in theVLAN VLAN Add Ports The ports to include or exclude in the VLAN Wireless interfaces The wireless interfaces to include or exclude in the VLAN This page allows you to set up and configure virtual LANs VLANs ...

Page 86: ...User Manual Section 4 Configuration WAN assignment The WAN assignment menu allows you to designate a different port to use to access the external network Select the desired port and then click Apply to save your settings ...

Page 87: ... SNMP Remote subnet Enter the address of the remote subnet Hostname Enter the hostname The contact information for this administrator Enter an email that can be used to contact the administrator System location Enter the physical location of the system Users Click the Add button to add SNMP users Communities Click the ADD button to add SNMP communities ...

Page 88: ...bled apply below Interface setting as default Interface Select the interface to which your DNS settings will apply Reserve servers IPv4 IPv6 Enter the address of the reserve server Domain Name System DNS servers convert URLs into IP addresses to make it easier to navigate the Internet This screen allows you to manually configure DNS servers if required by your ISP or if a custom configuration is n...

Page 89: ...ame used with the DDNS service Password Specify the password associated with the DDNS username Update period Specify the update period in minutes of the DDNS service Dynamic Domain Name Service allows your router to associate an easy to remember domain name with the regularly changing IP address assigned by your Internet Service Provider This feature is helpful when running a virtual server ...

Page 90: ...rol is on or off To configure a port click on it to bring up the configuration menu Configure Ports Speed Specify the desired port speed from the drop down list Autonegotiation Modes Toggle this switch to enable or disable autonegotiation modes Flow control Toggle this switch to enable or disable symmetric flow control The Ports Settings page allows you to configure or disable autonegotiation of s...

Page 91: ...to a physical error No connection Toggle this switch to enable notifications if the failure comes from no connection being detected The device is not configured Toggle this switch to enable notifications if the connection failure is due to the device not being configured The Redirect page allows you to enable or disable notifications to alert you when the Internet connection has failed ...

Page 92: ...se the interface used by the static route Destination network Specify the IP address of the destination Destination netmask Specify the netmask used by the destination IP Gateway Specify the gateway used by the static route Metric Specify a metric between 1 and 255 Table Specify the table which the route should belong to On this page you can configure the routing feature and add new routes ...

Page 93: ... access the GUI This is not recommended IP address Specify the IP address of the remote host allowed to access the GUI Mask Specify the subnet mask of the remote host allowed to access the GUI Public port Specifytheportoverwhichtheremotehostmayaccess the GUI Protocol Choose HTTP HTTPS or TELNET as the protocol for remote access On this page you can allow and configure remote access to the router s...

Page 94: ...ion Private port Indicates the internal port used by the used by the UPnP connection Public port Indicates the port exposed to the Internet used by the UPnP connection Description Indicates the description of the protocol used by the UPnP connection Duration Indicates the duration that the UPnP connection in question has been active Use this page to configure Universal Plug and Play UPnP Internet ...

Page 95: ...able IGMP IGMP version Choose from the drop down list which IGMP version to use Interface Choose from the drop down list which interface to apply IGMP to The IGMP page allows you to enable disable Internet Group Management Protocol IGMP IGMP is used to managed multicast traffic for IPv4 based networks ...

Page 96: ...ceive audio video from the Internet PPPoE passthrough The PPPoE passthrough function allows PPPoE clients to connect to the Internet through the router PPTP L2TP IPsec passthrough The PPTP passthrough L2TP passthrough and IPsec passthrough functions allowVPN PPTP L2TP and IPsec traffic to pass through the router so that clients from your LAN can establish relevant connections with remote networks ...

Page 97: ... allows you to set BGP rules for your router Adding a rule Enable Toggle this to enable the BGP rule Autonomous systems Enter the AS number for the rule No synchronization Toggle this to enable or disable synchronization WAN group Select a WAN group from the drop down list Click the appropriate Add button to add a route map network neighbor access rule or prefix ...

Page 98: ...oggle this to enable or disable OSPF Status The status of OSPF RouterID Enter the router ID Networks list Click the plus sign to add a network to apply the OSPF routing protocol to This page allows you to configure your router s Open Shortest Path First OSPF routing protocol ...

Page 99: ... Ifyouwishtoremovearule clickthecorresponding check box to select it and then click Delete If you wish to create a new rule click the Add button General Settings Enable rule Toggle this switch to enable the rule Name Specify a name for the rule This name is for reference only and does not affect functionality Action Choose the action to be taken when the rule is triggered Choose Allow or Deny Prot...

Page 100: ... leave the End IPv4 IPv6 address field blank Subnet IPv4 IPv6 address If you have selected Subnet specify the destination subnet to filter Source IP Address Set as Choose Range or single IP address to enter a specific IP address or ranges for the source filter Choose Subnet to specify a subnet only Start End IPv4 IPv6 address IfyouhaveselectedRangeorsingleIPaddress specifyanIPaddress range for the...

Page 101: ...t rangesbyseparatingthebeginningandendoftherangewithacolon Set source port manually Togglethisswitchtospecifysourceportstowhichthefilterwillapply Source port If Set source port manually has been enabled specify the source porttowhichthefilterwillapply Specifymultipleportsbyseparating them with commas Specify port ranges by separating the beginning and end of the range with a colon Click Apply when...

Page 102: ...e drop down list or select Custom to specify all parameters of the new virtual server manually Interface AWAN connection to which this virtual server will be assigned Protocol A protocol that will be used by the new virtual server Select a value from the drop down list NAT Loopback Toggle this to enable or disable NAT loopback On the Firewall Virtual servers page you can create virtual servers for...

Page 103: ... the IP address specified in the Private IP field General Settings Private IP The IP address of the server from the local area network To choose a device connected to the router s LAN at the moment select the relevant value from the drop down list the field will be filled in automatically Private port A port of the IP address specified in the Private IP field to which traffic is directed from the ...

Page 104: ...oopback Toggle this switch to enable NAT Loopback This allows LAN devices to connect directly to the DMZ host by using the WAN IP address IP address If DMZ is enabled specify the IP address of the DMZ host The Demilitarized Zone DMZ feature directly exposes the client to the Internet and is not recommended in ordinary situations ...

Page 105: ...raffic except from MAC addresses in the List of exceptions with the Allow action List of Exceptions Add MAC addresses to exempt from the filter Add Rule Enable rule Choose whether to enable or disable the rule Allow Choose the action to be taken when the rule is triggered Choose Allow or Deny MAC address Indicates the MAC address to which the filter applies Name Indicates the hostname of the devic...

Page 106: ...gle this switch to enable or disable web filtering Address filtering Choose from the dropdown list whether you want to Block Listed URLS or Block all URLs except listed Client filtering Choose from the dropdown list whether you want to filter Devices from list or All but devices from list ...

Page 107: ...2W User Manual Section 4 Configuration Filter URL address Enter the URL to filter Match with template Specify whether to filter exact or partial matches Client MAC address The MAC address of the client device to filter ...

Page 108: ...he router s system configuration for instance by upgrading the firmware or by changing the admin password User User Username to login to router s configuration UI as the administrator This cannot be changed New password Specify new password Password needs to be between 1 31 ASCII characters Confirm password again below ...

Page 109: ...Click to reset the router to factory default settings Backup Click to save the current configuration to a file Restore Click to load a previously saved configuration file to the device Save Click to save the current settings Reboot Click to reboot the device Idle time Specify a period of inactivity in minutes after which the device will log you out ...

Page 110: ...for updates automatically Toggle this to automatically check for online firmware updates and download and install them if they are available Interval Enter the interval at which the router should check for updates in seconds Click CHECK FOR UPDATES to manually check for online firmware updates or APPLY SETTINGS to change the router s settings without checking for updates On this page you can check...

Page 111: ...anual Section 4 Configuration Schedule This feature allows you to schedule tasks such as rebooting the router to perform at a set time or after a specified interval has passed To add a task click the plus sign next to All Tasks ...

Page 112: ...elow Simplified Mode Interval of execution Specify how often the task should be performed Time The time of day in hours and minutes to perform the specified task Duration The length of time measured in days hours minutes and seconds to wait before executing the task again Which fields are available depends on your selection in the Interval of execution drop down menu ...

Page 113: ... User Manual Section 4 Configuration Advanced Mode Enabling Advanced Mode allows you to schedule tasks with more precision by specifying the month day of the month and day of the week on which to perform a particular task ...

Page 114: ...anual Section 4 Configuration Log Logging Settings Refresh Click to refresh log for new updates Export Click to export log as text file On this page you can set the system log options and export and save a copy of the system log ...

Page 115: ...ction 4 Configuration Logging Settings Enable Toggle this switch to enable disable logging function Type Choose the type of diagnostics to log from the drop down list Level Choose the level of diagnostics to log from the drop down list ...

Page 116: ...of the host Count of packets The number of packets to send IPv6 Toggle this switch to check through the IPv6 protocol Click START to begin the ping test or CLEAR to clear the results The Ping page allows you to manually check the availability of a host from the local or global network ...

Page 117: ...Section 4 Configuration More Settings Packet size The number of data bytes to send Time to wait for a response The time to wait for a response in seconds Click OK to save or DEFAULT SETTINGS to reset back to the default configuration ...

Page 118: ...ing Host The address of the host IPv6 Toggle this switch to perform the check through the IPv6 protocol Click START to begin the traceroute test or CLEAR to clear the results On this page you can determine the route of data transfer to a host via the traceroute utility ...

Page 119: ...Configuration Settings Maximum TTL value The maximum number of hops Number of probes The number of probe packets per hop Wait time The hop response time in seconds Click OK to save or DEFAULT SETTINGS to reset back to the default configuration ...

Page 120: ...ort If the device is accepting Telnet connections specify the port number for Telnet access Enable SSH Toggle this switch to accept connections via SSH Port If the device is accepting SSH connections specify the port number for SSH access Click APPLY when finished This page allows you to enable or disable access to the device via Telnet and SSH ...

Page 121: ...for the local network Toggle this to run as an NTP server for the local network System date Displays device s current system date System Time Displays router s current system time Synchronization Indicates whether synchronization has been completed or not NTP Servers This displays the default public time server Click on the x to delete Click ADD SERVER to add a new public time server On this page ...

Page 122: ...anual Section 4 Configuration Set Time Zone ClickDETERMINETIMEZONEtoautomaticallydetermineyourtimezonebased on your device s location or choose one manually using the dropdown menu Click APPLY to save the setting to your router ...

Page 123: ...le this to use the BOOTP option This setting is disabled by default Autoconfiguration server address Enter the address of the autoconfiguration server File name Enter the name of the configuration file File check period Enter the period in seconds at which the router should check for the file Protocol type Select the protocol to use from the drop down menu Status The status of the Auto Provision c...

Page 124: ...he device itself Your computer must be on the same IP subnet to connect to the web based utility Make sure you have an updated Java enabled web browser We recommend the following Microsoft Internet Explorer 7 or higher Mozilla Firefox 3 5 or higher Google Chrome 8 or higher Apple Safari 4 or higher Verify physical connectivity by checking for solid link lights on the device If you do not get a sol...

Page 125: ...er in the address bar This should open the login page for your web management If you still cannot access the configuration unplug the power to the router for 10 seconds and plug back in Wait about 30 seconds and try accessing the configuration If you have multiple computers try connecting using a different computer 2 What can I do if I forgot my password If you forgot your password you must reset ...

Page 126: ...ering the MTU in increments of ten Ex 1492 1482 1472 etc To find the proper MTU Size you ll have to do a special ping of the destination you re trying to go to A destination could be another computer or a URL Click on Start and then click Run Windows 95 98 and Me users type in command Windows NT 2000 XP Vista and 7 users type in cmd and press Enter or click OK Once the window opens you ll need to ...

Page 127: ...he proper value the actual MTU size would be 1480 which is the optimum for the network we re working with 1452 28 1480 Once you find your MTU you can now configure your router with the proper MTU size To change the MTU rate on your router follow the steps below Navigate to the Internet configuration page To change the MTU enter the number in the MTU field and click Apply to save your settings Test...

Page 128: ...IEEE 802 3i IEEE 802 3u Advanced Features IPSecVPN Client Server modes Firmware upgrades via FOTA Web based UI Software WAN ConnectionTypes Mobile Internet PPPoE IPv6 PPPoE PPPoE Dual Stack Static IPv4 Dynamic IPv4 Static IPv6 Dynamic IPv6 PPPoE Static IP PPPoE Dual Access PPPoE Dynamic IP PPPoE Dual Access PPTP L2TP Static IP PPTP L2TP Dynamic IP Network Functions DHCP server relay Advanced confi...

Page 129: ...riodic scanning of channels automatic switching to least loaded channel Auto negotiation of channel bandwidth in accordance with environment conditions 20 40 coexistence LTE Module Functions Auto connection to available supported networks 4G 3G Auto configuration upon plugging in a SIM card Enabling disabling PIN code check Support for changing PIN code Sending receiving reading deleting SMS messa...

Page 130: ...re Operating 20 to 60 C 4 to 140 F Storage 30 to 80 C 22 to 176 F Humidity Operating 10 to 90 non condensing Storage 5 to 95 non condensing Certifications RoHS CE Order Information PartNumber Description DWM 312W 4G LTE M2M Router 1 Data rates are theoretical Data transfer rate depends on network capacity signal strength and environmental factors 2 Available frequencies and speeds vary and may not...

Page 131: ...stehen Ihnen zum Herunterladen von der Produktseite im Internet auf www dlink com zur Verfügung Eesti Estonian Käesolevaga kinnitab D Link Corporation et see toode tarvikud ja tarkvara on kooskõlas direktiiviga 2014 53 EL Euroopa Liidu vastavusdeklaratsiooni täistekst ja toote püsivara on allalaadimiseks saadaval tootelehel www dlink com English Hereby D Link Corporation declares that this product...

Page 132: ...es en software voldoen aan de richtlijnen 2014 53 EU De volledige tekst van de EU conformiteitsverklaring en productfirmware is beschikbaar voor download van de productpagina op www dlink com Malti Maltese Bil preżenti D Link Corporation tiddikjara li dan il prodott l aċċessorji u s software huma konformi mad Direttiva 2014 53 UE Tista tniżżel it test sħiħ tad dikjarazzjoni ta konformità tal UE u ...

Page 133: ...krar härmed att denna produkt tillbehör och programvara överensstämmer med direktiv 2014 53 EU Hela texten med EU försäkran om överensstämmelse och produkt firmware kan hämtas från produktsidan på www dlink com Íslenska Icelandic Hér með lýsir D Link Corporation því yfir að þessi vara fylgihlutir og hugbúnaður eru í samræmi við tilskipun 2014 53 EB Sækja má ESB samræmisyfirlýsinguna í heild sinni ...

Page 134: ...your product uses 2 4 GHz and or 5 GHz wireless HINWEIS ZUR VERWENDUNG VON DRAHTLOS NETZWERK WLAN IN DER EUROPÄISCHEN GEMEINSCHAFT NUR FÜR EIN DRAHTLOSES PRODUKT Der Betrieb dieses Geräts in der Europäischen Gemeinschaft bei Nutzung von Kanälen im 5 15 5 35 GHz Frequenzband ist ausschließlich auf Innenräume beschränkt um das Interferenzpotential zu reduzieren Bei diesem Gerät handelt es sich um ei...

Page 135: ...5 GHz au sein de l UE Merci de vous référer au guide d utilisation ou de la fiche technique afin de vérifier si votre produit utilise 2 4 GHz et ou 5 GHz sans fil AVISO DE USO DE LA LAN DE RADIO INALÁMBRICA EN LA COMUNIDAD EUROPEA SOLO PARA EL PRODUCTO INALÁMBRICO El uso de este dispositivo está restringido a interiores cuando funciona en la Comunidad Europea utilizando canales en la banda de 5 15...

Page 136: ...l richieste per operare a 5 Ghz nell Unione europea Ti invitiamo a fare riferimento al manuale del prodotto o alla scheda tecnica per verificare se il tuo prodotto utilizza le frequenze 2 4 GHz e o 5 GHz KENNISGEVING VAN DRAADLOOS RADIO LAN GEBRUIK IN DE EUROPESE GEMEENSCHAP ALLEEN VOOR DRAADLOOS PRODUCT Dit toestel is beperkt tot gebruik binnenshuis wanneer het wordt gebruikt in de Europese Gemee...

Page 137: ...Sicherheitsvorschriften dienen als Hilfe zur Gewährleistung Ihrer eigenen Sicherheit und zum Schutz Ihres Produkts Weitere Details finden Sie in den Benutzeranleitungen zum Produkt Statische Elektrizität kann elektronischen Komponenten schaden Um Schäden durch statische Aufladung zu vermeiden leiten Sie elektrostatische Ladungen von Ihrem Körper ab z B durch Berühren eines geerdeten blanken Metall...

Page 138: ...ébranchez toujours le produit de l alimentation avant de le nettoyer et utilisez uniquement un chiffon sec non pelucheux INSTRUCCIONES DE SEGURIDAD Las siguientes directrices de seguridad general se facilitan para ayudarle a garantizar su propia seguridad personal y para proteger el producto frente a posibles daños No olvide consultar las instrucciones del usuario del producto para obtener más inf...

Page 139: ...are sempre il prodotto dalla presa elettrica prima di pulirlo e usare solo un panno asciutto che non lasci filacce VEILIGHEIDSINFORMATIE De volgende algemene veiligheidsinformatie werd verstrekt om uw eigen persoonlijke veiligheid te waarborgen en uw product te beschermen tegen mogelijke schade Denk eraan om de gebruikersinstructies van het product te raadplegen voor meer informatie Statische elek...

Page 140: ...s Symbol auf dem Produkt oder der Verpackung weist darauf hin dass dieses Produkt gemäß bestehender örtlicher Gesetze undVorschriftennichtüberdennormalenHausmüllentsorgtwerdensollte sonderneinerWiederverwertungzuzuführenist Bringen Sie es bitte zu einer von Ihrer Kommunalbehörde entsprechend amtlich ausgewiesenen Sammelstelle sobald das Produkt das Ende seiner Nutzungsdauer erreicht hat Für die An...

Page 141: ...n savoir plus sur les produits et emballages respectueux de l environnement veuillez consulter le www dlinkgreen com ESPAÑOL ES Este símbolo en el producto o el embalaje significa que de acuerdo con la legislación y la normativa local este producto no se debe desechar en la basura doméstica sino que se debe reciclar Llévelo a un punto de recogida designado por las autoridades locales una vez que h...

Page 142: ...energia e a ridurre le emissioni di anidride carbonica Per ulteriori informazioni sui prodotti e sugli imballaggi D Link a ridotto impatto ambientale visitate il sito all indirizzo www dlinkgreen com NEDERLANDS NL Ditsymboolophetproductofdeverpakkingbetekentdatditproductvolgensdeplaatselijkewetgevingnietmagwordenweggegooid met het huishoudelijk afval maar voor recyclage moeten worden ingeleverd Zo...

Page 143: ...dku samych produktów jak i opakowań Firma D Link zaleca aby Państwo zawsze prawidłowo wyłączali z użytku swoje produkty D Link gdy nie są one wykorzystywane Postępując w ten sposób pozwalają Państwo oszczędzać energię i zmniejszać emisje CO2 Aby dowiedzieć się więcej na temat produktów i opakowań mających wpływ na środowisko prosimy zapoznać się ze stroną Internetową www dlinkgreen com ČESKY CZ Te...

Page 144: ...rításában és a széndioxid kibocsátásának csökkentésében Környezetbarát termékeinkről és csomagolásainkról további információkat a www dlinkgreen com weboldalon tudhat meg NORSK NO Dette symbolet på produktet eller forpakningen betyr at dette produktet ifølge lokale lover og forskrifter ikke skal kastes sammen med husholdningsavfall men leveres inn til gjenvinning Vennligst ta det til et innsamling...

Page 145: ...ledningerne Du kan finde flere oplysninger om vores miljømæssigt ansvarlige produkter og emballage på www dlinkgreen com SUOMI FI Tämä symboli tuotteen pakkauksessa tarkoittaa että paikallisten lakien ja säännösten mukaisesti tätä tuotetta ei pidä hävittää yleisen kotitalousjätteen seassa vaan se tulee toimittaa kierrätettäväksi Kun tuote on elinkaarensa päässä toimita se lähimpään viranomaistenhy...

Page 146: ... För mer information om våra miljöansvariga produkter och förpackningar www dlinkgreen com PORTUGUÊS PT Este símbolo no produto ou embalagem significa que de acordo com as leis e regulamentações locais este produto não deverá ser eliminado juntamente com o lixo doméstico mas enviado para a reciclagem Transporte o para um ponto de recolha designado pelas suas autoridades locais quando este tiver at...

Reviews: