2
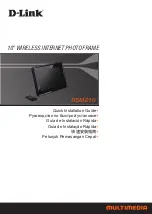
Quick Installation Guide
DSM-210
10” Wireless Internet Photo Frame
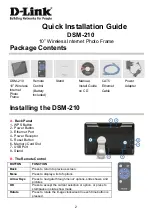
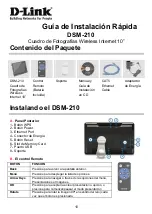
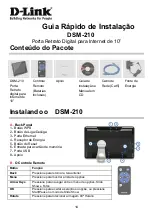
Package Contents
Installing the DSM-210
A .
Back Panel
1 - WPS Button
2 - Power Button
3 - Ethernet Port
4 - Power Receptor
5 - Reset Button
6 - Memory Card Slot
7 - USB Port
8 - Stand
B .
The Remote Control
DSM-210
10” Wireless
Internet
Photo
Frame
Remote
Control
(Battery
Included)
Stand
Manual,
Install Guide
on CD
CAT5
Ethernet
Cable
Power
Adapter
BUTTON FUNCTION
Back
Press to return to previous screen.
Menu
Press to display a list of options.
Arrow Keys
Press to navigate through menu7 options, slide shows, and
pictures.
OK
Press to accept the current selection or option, or press to
start/pause in slide show mode.
Rotate
Press to rotate the image clockwise 90o each time button is
pressed.

