


Connecting the Router to your
Computer
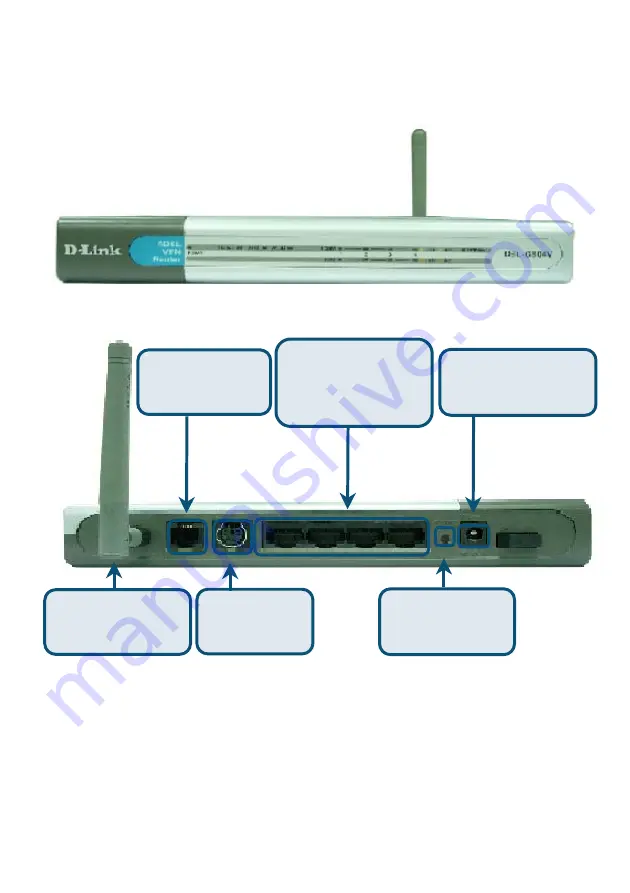
Antenna
Ensure good
wireless reception
ADSL Port
Connect to your
ADSL provider
Console Port
Connect to
PS2/RS-232
LAN Ports
Connect to the LAN
and other
computers
Reset
Push to return to
factory setting
Power Input
Connect to DC
Adapter
2
A. First, connect the power adapter to the power input at the back panel of the
DSL-G804V and then plug the other end of the power adapter to a wall outlet or
power strip.On the front of the device, the power LED will turrn ON to indicate
proper operation.
B. Insert one end of the Ethernet cable into an Ethernet(LAN) port on the back
panel of the DSL-G804V and the other end of the cable to an Ethernet Adapter
or available Ethernet port on your computer.
C. Insert the telephone cable included with theRouter into the ADSL port, then
connect the cable to your telephone line.
D. Check the LED display on the front of the Router to confirm that the
connections have been made.


