background image


Before You Begin 

Make sure you have all the necessary information and equipment on hand before beginning 

the installation. 

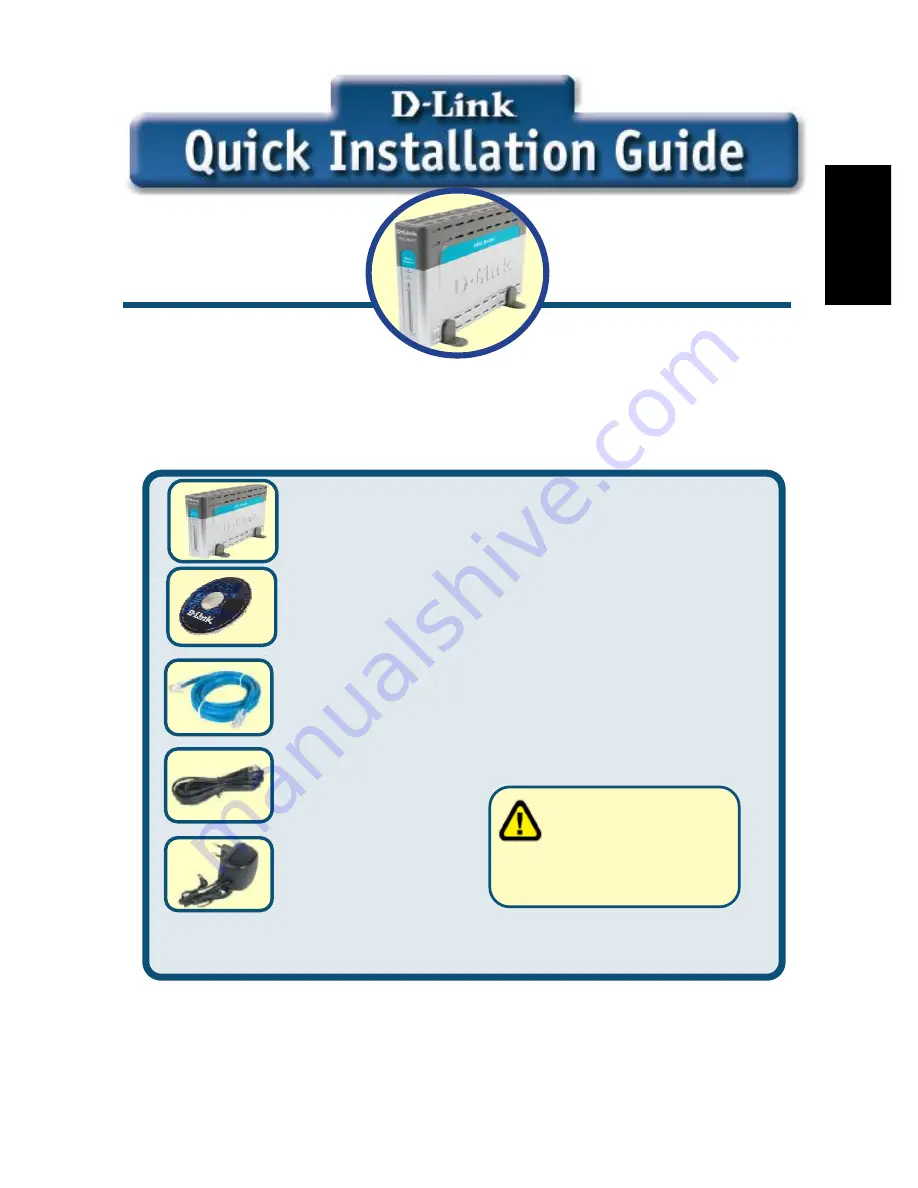
Check Your Package Contents 


This product can be set 
up using any current web 
browser, i.e., Internet 
Explorer 6 or Netscape 
Navigator 6.2.3.


DSL-564T 

ADSL Router 

©

2004 D-Link Systems, Inc. All rights reserved. Trademarks or registered trademarks are the property of their respective holders. Software and 

specifications subject to change without notice. 


DSL-564T ADSL Router 


CD-ROM (containing Manual) 


Ethernet (CAT5 UTP) Cable 


Telephone Cable 


Power Adapter 


If any of the above items are missing, please contact your reseller 


Using a power supply   

with a different voltage 

rating will damage and void 

the warranty for this product.


E

N

G

L

IS

H


Summary of Contents for DSL-564T

Page 1: ...SLRouter 2004 D Link Systems Inc All rights reserved Trademarks or registered trademarks are the property of their respective holders Software and specifications subject to change without notice DSL 564T ADSL Router CD ROM containing Manual Ethernet CAT5 UTP Cable Telephone Cable Power Adapter If any of the above items are missing please contact your reseller Using a power supply with a different ...

Page 2: ...to any Ethernet port on the back panel of the DSL 564T and the other end of the cable to an Ethernet Adapter or available Ethernet port on your computer C Insert one end of the Telephone cable into the ADSL port on the rear panel of the Router and insert the other end into the wall socket If you need to install a low pass filter follow the instructions of your ISP ADSL port connect to ADSL line Et...

Page 3: ...ou are using Windows XP and do not know how to change your network settings skip ahead to Appendix and read the instructions provided You may also read the User Manual for instructions on changing IP settings for computers running Windows operating systems Open your Web browser and type http 192 168 1 1 into the URL address box Then press theEnter or Returnkey The Login page appears Type admin for...

Page 4: ...4 Configuring the Router continued Once you have logged in the Home screen will appear Click the Setup tab to go to the Setup menu and configure the Router Click Setup ...

Page 5: ...5 Configuring the Router continued In the Setup menu click the Connection 1 button to go to the configuration menu for the Internet connection Click Connection 1 ENGLISH ...

Page 6: ... if they need to be changed Click the Apply button when you have entered all the information To save the changes made to Connection 1 click the Tools tab and follow the instructions on the next page A Type the Username and Password used for your account D Click Tools when you have applied the new settings C Click the Apply button after you have entered the account information B Check the PPP encap...

Page 7: ...ontinued Now save the changes you have just made The Save function is accessed from the System Commands menu Click the System Commands button to view that menu Click System Commands to view the menu used to save changes ENGLISH ...

Page 8: ...ands menu After a few seconds the changes will be saved The Router will automatically establish the Internet connection after a few more seconds Wait a few seconds for the Internet connection to be established and proceed to access the Internet via your web browser Click Save All to save the new settings ...

Page 9: ...indows XP Use the following steps to configure a computer running Windows XP to be a DHCP client 1 From the Start menu on your desktop go to Settings then click on Network Connections 2 In the Network Connections window right click on LAN Local Area Connection then click Properties Right click on the Local Area Connection icon and Select the Properties option from the pull down menu ENGLISH ...

Page 10: ...e following items by clicking on it once Click on the Properties button 4 Select Obtain an IP address automatically by clicking once in the circle Click the OK button Your computer is now ready to use the Router s DHCP server Click Properties Select Obtain an IP address automatically in the Internet Protocol TCP IP Properties window ...

Page 11: ...877 453 5465 24 hours a day seven days a week D Link Technical Support over the Internet http support dlink com email support dlink com Tech Support for customers within Canada D Link Technical Support over the Telephone 800 361 5265 Monday to Friday 8 30am to 9 00pm EST D Link Technical Support over the Internet http support dlink ca email support dlink ca Tech Support for customers within the Un...

Page 12: ...ab DSL 564T ADSLRouter 2004 D Link Systems Inc Alle Rechte vorbehalten Marken und eingetragene Marken sind Eigentum ihrer jeweiligen Inhaber Ä nderungen vorbehalten DSL 564T ADSL Router CD ROM mit Handbuch Ethernet Kabel CAT5 UTP kompatibel Telefonkabel Netzteil Sollte eines dieser Teile fehlen wenden Sie sich bitte an Ihren Fachhändler U Die Verwendung eines Netzteils mit abweichender Spannung fü...

Page 13: ...et Anschluss auf der Rückseite des DSL 564T und das andere Ende mit einem Ethernet Adapter oder einem verfügbaren Ethernet Anschluss an Ihrem Computer C Stecken Sie das eine Ende des Telefonkabels in den ADSL Anschluss auf der Rückseite des Routers und das andere in die Wandbuchse Wenn Sie einen Tiefpassfilter installieren müssen folgen Sie bitte den Anweisungen Ihres Internetdienstanbieters ADSL ...

Page 14: ...icht wissen wie Sie Ihre Netzwerkeinstellungen ändern kö nnen fahren Sie mit den Anweisungen in Anhang fort Weitere Informationen zur Ä nderung der IP Einstellungen bei Computern mit Betriebssystemen von Windows finden Sie auch im Benutzerhandbuch Starten Sie den Webbrowser und geben Sie in das Adressfeld http 192 168 1 1 ein Drücken Sie anschließ end die Eingabetaste DieAnmeldeseite wird angezeig...

Page 15: ...en Fortsetzung Nach der Anmeldung wird das Fenster Home Startseite angezeigt Klicken Sie auf die Registerkarte Setup Einrichten um das Setup Menü aufzurufen und konfigurieren Sie den Router Klicken Sie auf Setup Einrichten ...

Page 16: ...figurieren Fortsetzung Klicken Sie im Setup Menü auf die Schaltflä che Connection 1 Verbindung 1 um zu dem Konfigurationsmenü fü r die Internetverbindung zu gelangen Klicken Sie auf Connection 1 Verbindung 1 DEUTSCH ...

Page 17: ...achdem Sie alle Informationen eingegeben haben Um die Ä nderungen fü r Connection 1 Verbindung 1 zu ü bernehmen klicken Sie auf die Registerkarte Tools Extras und folgen Sie den Anweisungen auf der nä chsten Seite A Geben Sie in den Feldern Username und Password den Benutzernamen und das Kennwort für Ihr Konto ein D Klicken Sie auf Tools Extras nachdem Sie die neuen Einstellungen vorgenommen haben...

Page 18: ...e Speicherfunktion erreichen Sie ü ber das Menü System Commands Systembefehle Klicken Sie auf die Schaltflä che System Commands Systembefehle um das Menü aufzurufen Klicken Sie auf System Commands Systembefehle um das Menü aufzurufen mit dem Sie die Ä nderungen speichern kö nnen DEUTSCH ...

Page 19: ...flä che Save All Alle speichern Nach wenigen Sekunden werden die Ä nderungen gespeichert Der Router stellt nach einigen weiteren Sekunden automatisch eine Internetverbindung her Warten Sie bis die Internetverbindung aufgebaut ist und ö ffnen Sie Ihren Webbrowser Klicken Sie auf Save All Alle speichern um die neuen Einstellungen zu speichern ...

Page 20: ...Fü hren Sie die folgenden Schritte aus um einen Computer mit Windows XP als DHCP Client zu konfigurieren 1 Klicken Sie auf dem Desktop im Menü Start auf Einstellungen und anschließ end auf Netzwerkverbindungen 2 Klicken Sie im Fenster Netzwerkverbindungen mit der rechten Maustaste auf LAN Verbindung und anschließ end auf Eigenschaften Klicken Sie mit der rechten Maustaste auf das Symbol LAN Verbin...

Page 21: ...mal darauf klicken Klicken Sie auf die Schaltflä che Eigenschaften 4 Wä hlen Sie IP Adresse automatisch beziehen indem Sie einmal auf den Kreis klicken Klicken Sie auf die Schaltflä che OK Der Computer ist nun so konfiguriert dass der DHCP Server des Routers verwendet wird Klicken Sie auf Eigenschaften Wä hlen Sie nun Folgende IP Adresse verwenden im Fenster Eigenschaften von Internet Protokoll TC...

Page 22: ...echnische Unterstützung über unsere Website per E Mail oder telefonisch anfordern Web http www dlink de E Mail support dlink de Telefon 00800 7250 4000 Telefonische technische Unterstützung erhalten Sie montags bis donnerstags von 08 00 bis 19 00 Uhr freitags von 08 00 bis 17 00 Uhr Wenn Sie Kunde von D Link auß erhalb Deutschlands Ö sterreichs der Schweiz und Osteuropas sind wenden Sie sich bitte...

Page 23: ...2004 D Link Systems Inc Tous droits réservés Les marques et marques déposées sont la propriété de leurs titulaires respectifs Logiciels et spécifications pouvant faire l objet de modifications sans préavis Routeur ADSL DSL 564T ADSL CD ROM contenant le manuel Câble Ethernet CAT5 UTP Câble téléphonique Adaptateur d alimentation Si l un des éléments ci dessus est manquant contactez votre revendeur L...

Page 24: ...porte lequel des ports Ethernet situés sur le panneau arrière du DSL 564T puis l autre extrémité dans un adaptateur Ethernet ou un port Ethernet disponible de votre ordinateur C Introduisez une extrémité du câble té lé phonique dans le port ADSL situé sur le panneau arrière du routeur puis l autre dans la prise murale Si vous devez installer un filtre low pass suivez les instructions de votre FAI ...

Page 25: ...vez pas modifier vos paramètres réseau passez à l Annexe et lisez les instructions qui y figurent Vous pouvez également consulter le Manuel d utilisation vous y trouverez des instructions sur la manière de modifier les paramètres IP sur les ordinateurs fonctionnant sous système d exploitation Windows Ouvrez votre navigateur web et tapez http 192 168 1 1 dans la zone réservée à l URL Puis appuyezsu...

Page 26: ...guration du routeur suite Une fois que vous êtes connecté l écran d accueil s affiche Cliquez sur l onglet Configuration pour aller au menu de configuration et configurer votre routeur Cliquez sur Configuration ...

Page 27: ...27 Configuration du routeur suite Dans le menu Configuration cliquez sur le bouton Connexion 1 pour aller au menu de configuration de la connexion à Internet Cliquez sur Connexion 1 FRANCAIS ...

Page 28: ...s valeurs à introduire Une fois que vous avez saisi toutes les informations cliquez sur le bouton Appliquer Pour enregistrer les modifications apportées à Connexion 1 cliquez sur l onglet Outils et suivez les instructions de la page suivante A Tapez le Nom d utilisateur et le Mot de passe correspondant à votre compte D Cliquez sur Outils après avoir appliqué les nouveaux paramètres C Après avoir s...

Page 29: ...modifications La fonction Enregistrer s accède à partir du menu des Commandes système que vous faites apparaître en cliquant sur le bouton Commandes système Cliquez sur Commandes système pour visualiser le menu qui permet d enregistrer vos modifications FRANCAIS ...

Page 30: ...ons sont enregistrées au bout de quelques secondes Si vous attendez quelques secondes supplémentaires le routeur établit automatiquement la connexion à Internet Attendez quelques secondes l établissement de la connexion à Internet Vous pouvez ensuite surfer à l aide de votre navigateur Cliquez sur Enregistrer tout pour enregistrer les nouveaux paramètres ...

Page 31: ...s Windows XP Suivez la procédure ci dessous pour configurer un ordinateur qui tourne sous Windows XP de manière à ce qu il devienne client DHCP 1 A partir du menu Dé marrer de votre bureau allez à Paramètres puis cliquez sur Connexions ré seau 2 Dans la fenêtre Connexions ré seau faites un clic droit sur LAN connexion locale puis cliquez sur Proprié té s Faites un clic droit sur l icône Connexion ...

Page 32: ...n cliquant dessus une fois Cliquez sur le bouton Proprié té s 4 Sélectionnez Obtention automatique d adresse IP en cliquant une fois dans l anneau Cliquez sur OK Votre ordinateur est à présent prêt à utiliser le serveur DHCP du routeur Cliquez sur Proprié té s Sé lectionnez Obtention automatique d adresse IP dans la fenêtre Propriétés du protocole Internet TCP IP ...

Page 33: ... de D Link est gratuit pour les clients aux Etats Unis durant la période de garantie Ceuxci peuvent contacter le service technique de D Link par notre site internet ou par téléphone Assistance technique D Link par té lé phone 0 820 0803 03 Assistance technique D Link sur internet Web http www dlink fr E mail support dlink fr FRANCAIS ...

Page 34: ...ificaciones pueden ser modificados sin previo aviso Esteproductopuedeconfigurarse usandocualquiernavegadorweb habitual p ej InternetExplorer6o NetscapeNavigator6 2 3 DSL 564T ADSLRouter Router ADSL DSL 564T CD ROM contiene Manual y Cable Ethernet CAT5 UTP Cable telefónico Adaptador de alimentación Si falta alguno de los componentes por favor contacte con su proveedor El uso de una fuente de alimen...

Page 35: ...ado correctamente B Introduzca un extremo del cable en un puerto Ethernet del panel trasero del DSL 564T y el otro extremo en un adaptador Ethernet o puerto Ethernet disponible en el ordenador C Conecte el cable telefónico en el puerto ADSL situado en el panel trasero del router y el otro extremo en un roseta Si necesita instalar un filtro de paso bajo siga las instrucciones del ISP Puerto ADSL pa...

Page 36: ...r ya que es un cliente DHCP Si utiliza Windows XP y no sabe cómo cambiar los parámetros de red consulte el Apé ndice También puede consultar el Manual del usuario en el que figuran las instrucciones para cambiar los parámetros IP en ordenadores con sistemas operativos Windows Abra el navegador web y escriba http 192 168 1 1 en el cuadro de direcciones URL Apriete la tecla Enter o Return Se mostrar...

Page 37: ...37 Configuració n del router continuació n Tras haber entrado en el sistema se mostrará la pantalla Home Haga clic en la ficha Setup para acceder al menúde configuración del router Haga clic en Setup ...

Page 38: ...38 Configuració n del router continuació n En el menúSetup haga clic en el botón Connection 1 para acceder al menúde configuración de la conexión a internet Haga clic en Connection 1 ESPANOL ...

Page 39: ...modificarlos Tras haber introducido toda la información haga clic en el botón Apply Para guardar los cambios realizados en Connection 1 haga clic en la ficha Tools y siga las intrucciones de la próxima página A Escriba el nombre de usuario Username y la clave de acceso Password de la cuenta D Haga clic en Tools cuando haya aplicado los nuevos parámetros B Compruebe la encapsulación PPP Type VPI y ...

Page 40: ...Guarde los cambios realizados La función guardar Save se encuentra en el menúSystem Commands Haga clic en el botón System Commands para acceder a dicho menú Haga clic en System Commands para acceder al menúque permite guardar los cambios ESPANOL ...

Page 41: ...del menúSystem Commands En unos segundos se habrán guardado los cambios El router establecerá la conexión a internet poco tiempo después Espere unos segundos a que se establezca la conexión a internet y pueda acceder a internet a través del navegador web Haga clic en Save All para guardar los nuevos parámetros ...

Page 42: ...pasos siguientes para configurar un ordenador con Windows XP de forma que actú e como un cliente DHCP 1 Desde el menúStart en el escritorio vaya a Settings y haga clic en Network Connections 2 En la ventana Network Connections haga clic con el botón de la derecha en LAN Local Area Connection y haga clic en Properties Haga clic con el botón de la derecha en el icono Local Area Connection y seleccci...

Page 43: ... para seleccionarlo Haga clic en el botón Properties 4 Seleccione Obtain an IP address automatically para ello haga clic en el cí rculo correspondiente Haga clic en el botón OK El ordenador está listo para utilizar el servidor DHCP del router Haga clic en Properties Seleccione Obtain an IP address automatically en la ventana Internet Protocol TCP IP ...

Page 44: ... de garantí a del producto Los clientes españ oles pueden ponerse en contacto con la asistencia técnica de D Link a través de nuestro sitio web o por teléfono Asistencia Técnica de D Link por teléfono 93 409 0775 de lunes a viernes desde las 9 00 hasta las14 00 y de las 15 30 hasta las 18 30 Asistencia Técnica de D Link a través de Internet http www dlink es supporto main view html email soporte d...

Page 45: ...DSL 564T ADSLRouter 2004 D Link Systems Inc Tutti i diritti sono registrati Marchi e marchi registrati appartengono ai rispettivi proprietari Software e specifiche sono soggetti a cambiamenti senza preavviso Router ADSL DSL 564T CD ROM con manuale Cavo Ethernet CAT5 UTP Cavo telefonico Trasformatore Se uno dei componenti dovesse risultare mancante contattare il rivenditore L utilizzo di un trasfor...

Page 46: ...rnet posta sul pannello posteriore del dispositivo DSL 564T e nell adattatore o nella porta Ethernet del computer C Collegare il cavo telefonico fornito con il Router alla porta ADSL posta sul pannello posteriore del dispositivo e alla linea telefonica Se necessario installare un filtro a basso passo seguendo le istruzioni fornite dall ISP Porta ADSL per la connessione alla linea ADSL Porta Ethern...

Page 47: ...odificare le impostazioni di rete in ambiente Windows XP è descritta nell Appendice del presente manuale Per modificare le impostazioni IP nel caso di computer dotati di altri sistemi operativi Windows consultare il manuale utente Aprire il browser e digitare http 192 168 1 1 nel campo Indirizzo PremereInvio oEnter Il sistema visualizzalafinestraLogin Inserire admin nel campo Login Name e nel camp...

Page 48: ...nfigurazione del Router continua Una volta eseguito il log in il sistema visualizza la finestra Home Cliccare sulla scheda Setup per accedere al menu Setup per la configurazione del router Cliccare su Setup ...

Page 49: ...49 Configurazione del router continua Nella finestra Setup Cliccare sul pulsante Connection 1 per accedere al menu di configurazione della connessione a Internet Cliccare su Connection 1 ITALIANO ...

Page 50: ...ll ISP Dopo avere inserito tutte le informazioni necessarie cliccare su Apply Per salvare le modifiche apportate nel menu Connection 1 cliccare sulla scheda Tools e seguire le istruzioni visualizzate nella pagina seguente A Inserire nome utente e password utilizzati per l identificazione dell account D Dopo avere confermato le nuove impostazioni con il pulsante Apply cliccare su Tools C Dopo avere...

Page 51: ...le modifiche appena effettuate utilizzando la funzione Save del menu System Commands Per accedere a questo menu cliccare sul pulsante System Commands Cliccare su System Commands per visualizzare il menu utilizzato per salvare le modifiche ITALIANO ...

Page 52: ...ll del menu System Commands Dopo pochi secondi le modifiche vengono salvate e il router instaura automaticamente una connessione a Internet Dopo pochi secondi viene instaurata una connessione ed è possibile accedere a Internet mediante un browser Cliccare su Save All per salvare le nuove impostazioni ...

Page 53: ...a procedura per configurare come client DHCP un computer dotato di sistema operativo Windows XP è la seguente 1 Dal menu Start del desktop selezionare Impostazioni e cliccare su Connessioni di rete 2 Nella finestra Connessioni di rete col tasto destro del mouse cliccare su LAN Connessione alla rete Locale e cliccare su Proprietà Col tasto destro del mouse cliccare sull icona Local Area Connection ...

Page 54: ...La connessione utilizza gli elementi seguenti Cliccare sul pulsante Proprietà 4 Selezionare l opzione Ottieni un indirizzo IP automaticamente Cliccare sul pulsante OK Il computer è pronto per utilizzare il server DHCP del Router Cliccare su Proprietà Selezionare Ottieni un indirizzo IP automaticamente nella finestra Proprietà Protocollo Internet TCP IP ...

Page 55: ...o D Link Supporto tecnico per i clienti residenti in Italia D Link Mediterraneo S r L Via N Bonnet 6 B 20154 Milano Supporto Tecnico dal lunedìal venerdìdalle ore 9 00 alle ore 19 00 con orario continuato Telefono 02 39607160 URL http www dlink it supporto html Email tech dlink it ITALIANO ...

Page 56: ... р 2004 D Link Systems Inc All rights reserved Trademarks or registered trademarks are the property of their respective holders Software and specifications subject to change without notice DSL 564T ADSL маршрутизатор CD ROM содержит руководство пользователя Кабель Ethernet CAT5 UTP Телефонный кабель Адаптер питания Е с л ичт о л и бои з пе ре чи с л е нно гоо т с у т с т ву е т о брат и т е с ьк В...

Page 57: ...азад не й пане л иDSL 564T а д ру го й ко не ц по д кл ю чи т екадапт ер уEthernet и л ис во бо д но мупо ртуEthernet ко мпью т е ра C По д кл ю чи т ео д и н ко не ц т елефонног о к абелякпо ртуADSL назад не й пане л и маршру т и зат о ра ад ру го й ко не ц по д кл ю чи т екнас т е нно й т е л е ф о нно й ро зе т ке Е с л ине о бх о д и моу с т ано ви т ь ф и л ь т р ни зки х час т о т с л е д у ...

Page 58: ...л ьзу е т еWindows XP ине знае т е как и зме ни т ь с е т е вы е нас тро йки про чи т айт е при ве д е нны е в При л о же ни и и нс тру кц и и По ми мо э т о го в Р у ко во д с тве По л ьзо ват е л я с о д е ржа т с я и нс тру кц и и по и зме не ни ю IP нас т ро е к д л я ко мпью т е ро в на ко т о ры х у с т ано вл е ны о пе рац и о нны е с и с т е мы Windows Вв едит е admin в по л еLogin Name и ...

Page 59: ...59 Настр о йка м ар ш р утиз ато р а п р о до л ж ение По с л ере ги с т рац и ипо я ви т с я о кноHome Нажми т еSetup чт о бы пе ре йт ивме ню Setup и нас тро и т ьмаршру ти зат о р Н ажмит е Setup ...

Page 60: ...60 Настр о йка м ар ш р утиз ато р а п р о до л ж ение В ме ню Setup нажми т екно пкуConnection 1 д л я пе ре х о д авме ню нас т ро йки с о е д и не ни я сInternet Н ажмит е Connection 1 PYCCK И Й ...

Page 61: ...е с л ибу д е тне о бх о д и мои х и зме ни т ь Нажми т екно пкуApply по с л евво д а и нф о рмац и и Д л я с о х ране ни я нас т ро е кс о е д и не ни я Connection 1 нажми т еTools и с л е д у йт еи нс т ру кц и я м при ве д е нны м нас л е д у ю щ е й с т рани ц е C Н ажмит е кно пкуApply по с л евво д аи нф о рмац и ио б у че тно й запи с и Вв едит е Username и Password Ваше й у че тно й запи с...

Page 62: ... л не нны енас тро йки К о манд ас о х ране ни я нас т ро е кнах о д и т с я в ме ню System Commands Д л я пе ре х о д ав д анно еме ню нажми т екно пкуSystem Commands Н ажмит е System Commands д л я пе ре х о д авме ню гд емо жно с о х рани т ьвы по л не нны е нас т ро йки PYCCK И Й ...

Page 63: ...у нд и зме не ни я бу д у тс о х ране ны Е щ ече ре з не с ко л ькос е ку нд маршру т и зат о р авт о ма т и че с киу с т ано ви тс о е д и не ни есИ нт е рне т По д о жд и т ене с ко л ькос е ку нд по кау с т ано ви т с я с о е д и не ни есИ нт е рне т имо же т е рабо т ат ьв И нт е рне тче ре з Web брау зе р Н ажмит е Save All д л я с о х ране ни я но вы х нас т ро е к ...

Page 64: ...л я нас т ро йкико мпью т е рапо д у правл е ни е м Windows XP в каче с т веDHCP кл и е нт а 1 В ме ню П у ск Start вы бе ри т епу нктН аст р ойк а Settings изат е м Сет ев ы е подк люч ения Network Connections 2 В о кнеСет ев ы е подк люч ениящ е л кни т еправо й кно пко й мы шина П одк люч ение по лок альной сет и Local Area Connection зат е м вы бе ри т е Св ойст в а Properties Щ елк нит е пр а...

Page 65: ... о мпо не нты и с по л ьзу е мы еэ ти м по д кл ю че ни е м Нажми т енакно пкуСв ойст в а 4 Вы бе ри т ео пц и ю П олуч ит ь IP адр есав т омат ич еск и Obtain an IP address automatically Нажми т екно пкуOK Те пе рько мпью т е р го т о вки с по л ьзо вани ю DHCP с е рве рамаршру ти зато ра Н ажмит е Св ойст в а Вы бер ит е П олуч ит ь IP адр ес ав т омат ич еск и во кнеС во йс т ва Про т о ко л И ...

Page 66: ...н ическ ую поддержк ук лиен тов в течен иег а ра н тий н ог о срок а изделия Клиен ты мог утсвя затьсясо службойтех н ическ ойподдержк и D Link через web са й т или по телефон у Т елефо н ы слу ж б ы т ехн ическо й по д д ерж ки D Link 7 095 744 00 99 Т ехн ическаяпо д д ерж ка D Link черезInternet http www dlink ru support dlink ru PYCCK И Й ...

Reviews: