4
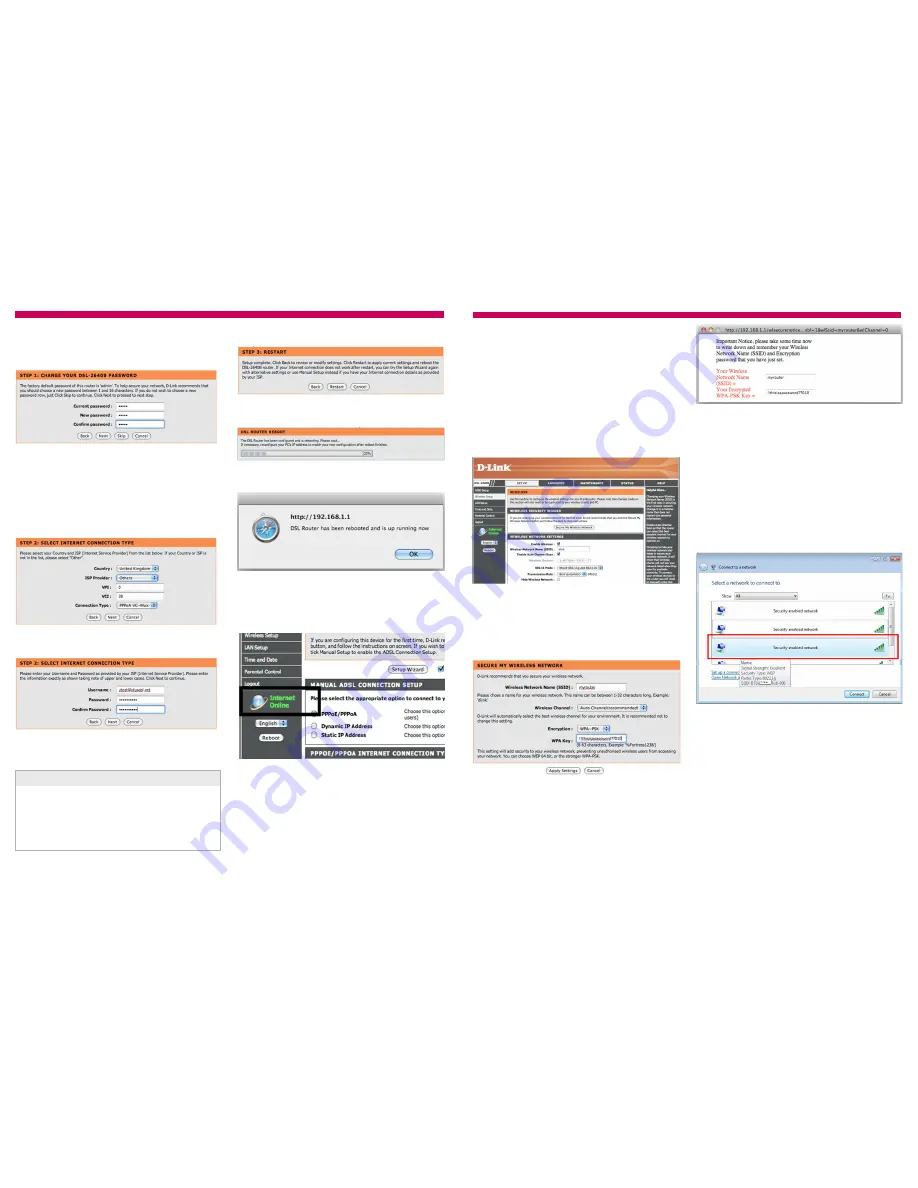
You can now change the admin password to login
to the router, enter the current password (default
is admin) and the new password and confirm it,
then click
Next
.
5)
Next, on the Select Internet Connection Type
screen choose
United Kingdom
as the Country
and ISP Provider as
Others
. Then click
Next
.
The UK broadband settings should automatically be
applied. They should be:
VPI:
0
VCI:
38
Connection Type:
PPPoA VC-Mux
6)
Type in your broadband username and your
password.
Not sure what your broadband username is? It’s in
the email we sent you when your service went live,
it looks like this:
7)
Finally click
Restart
.
The router will restart and the screen will show you
the status.
8)
You’ll receive a message when the router has
successfully restarted.
9)
Log back into the router following step 1 and 2
again, to check the connection status. If you’re
connected, you’ll see "
Internet Online
" in green
on the left hand side of the page.
The Internet light on the front of the router should
also be green.
That’s it, you’re online. See, we said it was easy.
The next section will walk you through the set up
of your wireless security. This is really important
otherwise neighbours or passers by could connect
to your network.
Item code: 00044217
Service
Broadband username format
Plusnet [email protected]
Madasafish [email protected]
Force9 [email protected]
Free-Online [email protected]
5
1)
Open up a web browser (such as Internet
Explorer), in the address line type in
“
192.168.1.1
”, then press
Enter
.
2)
Log in to the router and on the Setup page click
Wireless Setup.
3)
Click the
Secure My Wireless Network
button
and the Secure My Wireless Network page will
appear.
4)
Right now encryption will be set to None, we
recommend changing this to
WPA-PSK
as this
offers a good balance between security and ease of
use. In the WPA Key box enter a password. You’ll
will need to enter this on any PC or games console
you want to use on the Internet.
You can also change the
Wireless Network Name
on this page, this is the name that will appear in
your wireless network settings. If there are a lot of
wireless routers in your area it may be useful to
change this to identify your router, you can also
hide the name for increased security.
There is normally no need to change the wireless
channel. Click
Apply Settings
and the router will
confirm the details to you.
Setting Up Wireless Security
Make sure the details are written down somewhere
that you’ll be able to easily find in the future. The
DSL 2640B router comes with a sticker to write the
details on which you can stick on the bottom of the
router.
5)
To reconnect, you will need to enter the new
details in your wireless network settings.
6)
Check that your computer’s wireless adapter
card is installed and working properly.
7)
Use your wireless adapter’s connection utility, or
from
My Network Places
select
Connect to a
network
.
8)
Your DSL 2640B router will show up as the
Wireless Network Name you entered in step 4 or
dlink
if you left it unchanged.
You’ve now secured your wireless network against
unauthorised access.


