background image

RMA number must be prominently marked on the outside of the package. 

The packaged product shall be insured and shipped to D-Link, 53 Discovery 

Drive, Irvine CA 92618, with all shipping costs prepaid. D-Link may reject 

or return any product that is not packaged and shipped in strict compliance 

with the foregoing requirements, or for which an RMA number is not visible 

from the outside of the package. The product owner agrees to pay D-Link’s 

reasonable handling and return shipping charges for any product that is not 

packaged and shipped in accordance with the foregoing requirements, or 

that is determined by D-Link not to be defective or non-conforming. 


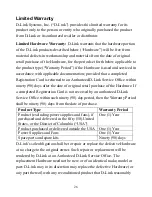
What Is Not Covered:  

This limited warranty provided by D-Link does not cover: 

Products that have been subjected to abuse, accident, alteration, 

modification, tampering, negligence, misuse, faulty installation, lack of 

reasonable care, repair or service in any way that is not contemplated in the 

documentation for the product, or if the model or serial number has been 

altered, tampered with, defaced or removed; 

Initial installation, installation and removal of the product for repair, and 

shipping costs; 

Operational adjustments covered in the operating manual for the product, 

and normal maintenance;  

Damage that occurs in shipment, due to act of God, failures due to power 

surge, and cosmetic damage; and 

Any hardware, software, firmware or other products or services provided by 

anyone other than D-Link. 


Disclaimer of Other Warranties: 

EXCEPT FOR THE LIMITED 

 29

Summary of Contents for DSB-T100

Page 1: ...D Link DSB T100 USB TV Tuner Capture User s Manual Rev 11022000 ...

Page 2: ... Panel 8 Software Guide 9 On Screen Remote 9 Scanning for Available Channels 11 TV Jukebox Options 13 How To Adjust Color 16 How To Capture Still Images from Video 17 Using the Snapshot button 17 How To Capture Video 18 Uninstalling The USB TV Tuner Driver 19 Uninstalling The USB TV Tuner AP 23 Technical Specifications 24 D Link Offices 25 Limited Warranty 26 Registration Card 34 2 ...

Page 3: ...h TV on your computer and capture video from any video source This guide will explain the features and functions of the DSB T100 Package Contents The D Link DSB T100 package should include the following items DSB T100 User s Manual Quick Install Guide Drivers and Software on CD ROM Sound Cable Stand 3 ...

Page 4: ...arket and more are being developed for future release Because of the high speed of the USB interface a USB hub can be used to connect more than one USB device to one USB port at one time The USB standard specifies that up to 127 devices can be connected to your computer USB is fast enough for webcams and other video devices to transfer large amounts of data The USB specification allows for two dif...

Page 5: ...e shown one after the other fast enough that your eyes are tricked into thinking that you are seeing a streaming video The basic function of the video capture device is to take each frame of the video and save it into a video file Another function of the video capture device is to record the audio portion of the video and attach it to the video The file that is saved can then be edited with video ...

Page 6: ...e is needed The video editing application is the key to editing video Many applications on the market are very simple and easy to use Others are geared toward the more advanced users and provide many advanced features One thing to remember when purchasing video editing software is that the cheaper the price the less features it will include and the easier it should be to use The more expensive sof...

Page 7: ... water and other damaging elements Your DSB T100 can be held in place by using the stand provided Front Panel Snapshot When pressed the TV Tuner software will capture a single frame from the video source Power LED A green LED indicates power status Audio Out Used to connect the DSB T100 to an external audio device such as PC Sound Card TV VCR or Camcorder Video Out Used to connect the DSB T100 to ...

Page 8: ... or VCR Video Input Use when connecting to an RCA video source Connect the yellow end of the video cable to this RCA jack Left Audio Input Use when connecting to an RCA audio source Connect the white end of the audio cable to this RCA jack Right Audio Input Use when connecting to an RCA audio source Connect the red end of the audio cable to this RCA jack 8 ...

Page 9: ...Software Guide On Screen Remote When you start the TV Jukebox application an on screen remote control will appear All options and features are controlled using the remote control 9 ...

Page 10: ...up scroll bar will appear for adjusting the sound level desired as illustrated below Press the Mute button to mute audio output Press the Restore Channel to jump to the previous channel Press the Minimize button to minimize the remote control Press the Help button to get help on using the remote control Press the View Control to change viewing screen from normal to small Note From the View Control...

Page 11: ... using a Cable or Antenna connection Click on the Channel Scan icon from the remote control and a prompt will appear as shown below To begin scanning click on the Yes icon and a new screen will appear with the scanned channels appearing on the remote as illustrated below 11 ...

Page 12: ...12 ...

Page 13: ...Cable or Antenna source From the Video Input System you are able to select the TV Tuner support system in your area For example NTSC PAL or SECAM The Channel Table lists all the channels available Channels with positive means it will be available for viewing and channels with negative means the channel will not be available You can remove a specific channel by clicking the Delete button The 13 ...

Page 14: ...hannel from the list When changes are made click the Save button to save all the new settings you have set The Device Process tab allows you to change the sound card that will be used for capture and playing sound Click OK to save your changes 14 ...

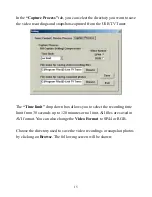
Page 15: ...The Time limit drop down box allows you to select the recording time limit from 30 seconds up to 120 minutes or no limit All files are saved in AVI format You can also change the Video Format to SP44 or RGB Choose the directory used to save the video recordings or snapshot photos by clicking on Browse The following screen will be shown 15 ...

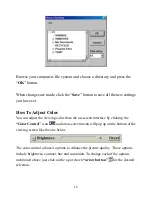
Page 16: ...iewing color from the on screen interface by clicking the Color Control icon and an on screen menu will pop up on the bottom of the viewing screen like the one below The color control allows 4 options to enhance the picture quality These options include brightness contrast hue and saturation To change each of the options mentioned above just click on the up or down arrow button for the desired sel...

Page 17: ... AV or SV Click the capture to bmp file icon on the remote control and an on screen menu will appear on the upper left side of the screen like the one below By pressing the capture icon the still video image will be displayed up to a maximum of 8 frames per row You will be able to save the frames in bmp format for your collection To delete a frame highlight the frame or frames you do not want and ...

Page 18: ... to capture video using the DSB T100 Run the TV Jukebox from the Start menu Set the desired settings using the button Refer to the section labeled TV Jukebox Settings for help on configuring the settings Preview the channel or source you would like to capture in the view window Press the Record button to begin recording Press the Stop button to stop recording Apop up window will ask you if you wan...

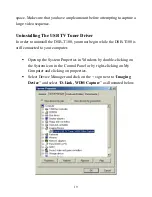
Page 19: ...SB T100 you must begin while the DSB T100 is still connected to your computer Open up the System Properties in Windows by double clicking on the System icon in the Control Panel or by right clicking on My Computer and clicking on properties Select Device Manager and click on the sign next to Imaging Device and select D Link WDM Capture as illustrated below 19 ...

Page 20: ...ing to restart your computer click on the No icon to continue the uninstallation procedure Note For Windows 2000 O S the above prompt will not appear Follow these steps to remove the USB controller of the TV Tuner Driver From the System Properties Menu select Device Manager and click on Universal Serial Bus controllers and select D Link USB TV Tuner as illustrated below 20 ...

Page 21: ...e OK button and the device will be uninstalled A prompt will appear asking to restart your computer click on the No icon to continue the uninstallation procedure Note Windows 2000 users will not see the restart your computer prompt Open the Control Panel and double click the Add Remove Programs icon 21 ...

Page 22: ...click the Add Remove button Select Remove from the Install Shield Wizard and click on the Next button to continue Click on the OK button to confirm you want to completely remove the application Click on the Finish button to finish the uninstall of the Driver 22 ...

Page 23: ...Uninstalling The USB TV Tuner AP From the Start Menu click Programs TV Jukebox Uninstall TV Jukebox Click the Uninstall icon to continue Once the uninstall process is finished click on the Exit icon 23 ...

Page 24: ... Compatible Sound Card Video Adapter That Supports 24 Bit 16 7 Million Colors Or Greater Color USB Port Standards USB Specification version 1 1 Interface USB Type A TV Tuner Support NTSC PAL or SECAM Input Connectors TV RF Phono RCA Composite Video AudioL AudioR S Video Mini Din Jack Output Connectors RCA Video Audio Phono Performance Video Playback and Capture up to 30 fps CIF 24 ...

Page 25: ... LINE 00800 7250 8000 INDIA D LINK INDIA Plot No 5 Kurla Bandra Complex Road Off Cst Road Santacruz E Bombay 400 098 India TEL 91 22 652 6696 FAX 91 22 652 8914 URL www dlink india com E MAIL service dlink india com ITALY D LINK ITALIA Via Nino Bonnet No 6 b 20154 Milano Italy TEL 39 02 2900 0676 FAX 39 02 2900 1723 URL www dlink it E MAIL info dlink it JAPAN D LINK JAPAN 10F 8 8 15 Nishi Gotanda ...

Page 26: ...ail purchase of the Hardware If a completed Registration Card is not received by an authorized D Link Service Office within such ninety 90 day period then the Warranty Period shall be ninety 90 days from the date of purchase Product Type Warranty Period Product excluding power supplies and fans if purchased and delivered in the fifty 50 United States or the District of Columbia USA One 1 Year Prod...

Page 27: ...m to D Link s then current functional specifications for the Software as set forth in the applicable documentation from the date of original delivery of the Software for a period of ninety 90 days Warranty Period if the Software is properly installed on approved hardware and operated as contemplated in its documentation D Link further warrants that during the Warranty Period the magnetic media on ...

Page 28: ...Link Service Office is provided in the back of this manual FAILURE TO PROPERLY COMPLETE AND TIMELY RETURN THE REGISTRATION CARD MAY AFFECT THE WARRANTY FOR THIS PRODUCT Submitting A Claim Any claim under this limited warranty must be submitted in writing before the end of the Warranty Period to an Authorized D Link Service Office The claim must include a written description of the Hardware defect ...

Page 29: ...rming What Is Not Covered This limited warranty provided by D Link does not cover Products that have been subjected to abuse accident alteration modification tampering negligence misuse faulty installation lack of reasonable care repair or service in any way that is not contemplated in the documentation for the product or if the model or serial number has been altered tampered with defaced or remo...

Page 30: ...SER OF THE PRODUCT Limitation of Liability TO THE MAXIMUM EXTENT PERMITTED BY LAW D LINK IS NOT LIABLE UNDER ANY CONTRACT NEGLIGENCE STRICT LIABILITY OR OTHER LEGAL OR EQUITABLE THEORY FOR ANY LOSS OF USE OF THE PRODUCT INCONVENIENCE OR DAMAGES OF ANY CHARACTER WHETHER DIRECT SPECIAL INCIDENTAL OR CONSEQUENTIAL INCLUDING BUT NOT LIMITED TO DAMAGES FOR LOSS OF GOODWILL WORK STOPPAGE COMPUTER FAILUR...

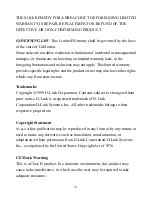
Page 31: ...ts which vary from state to state Trademarks Copyright 1999 D Link Corporation Contents subject to change without prior notice D Link is a registered trademark of D Link Corporation D Link Systems Inc All other trademarks belong to their respective proprietors Copyright Statement No part of this publication may be reproduced in any form or by any means or used to make any derivative such as transl...

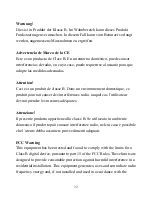
Page 32: ...er des interférences radio auquel cas l utilisateur devrait prendre les mesures adéquates Attenzione Il presente prodotto appartiene alla classe B Se utilizzato in ambiente domestico il prodotto può causare interferenze radio nel cui caso è possibile che l utente debba assumere provvedimenti adeguati FCC Warning This equipment has been tested and found to comply with the limits for a Class B digit...

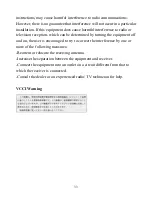
Page 33: ...hich can be determined by turning the equipment off and on the user is encouraged to try to correct the interference by one or more of the following measures Reorient or relocate the receiving antenna Increase the separation between the equipment and receiver Connect the equipment into an outlet on a circuit different from that to which the receiver is connected Consult the dealer or an experience...

Page 34: ...ns help us to support your product 1 Where and how will the product primarily be used Home Office Travel Company Business Home Business Personal Use 2 How many employees work at installation site 1 employee 2 9 10 49 50 99 100 499 500 999 1000 or more 3 What network protocol s does your organization use XNS IPX TCP IP DECnet Others_____________________________ 4 What network operating system s doe...

Page 35: ...35 ...

Page 36: ...M20010301 36 ...

Reviews: