3
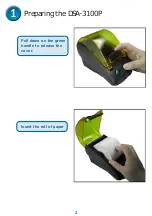
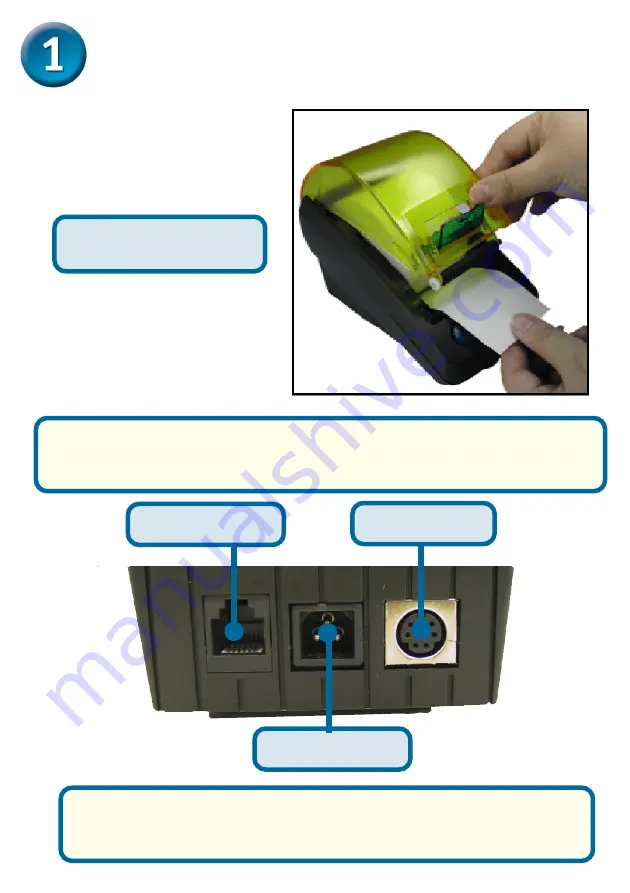
Pull some of the paper
out and close the cover.
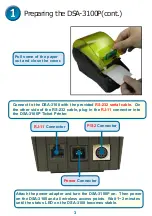
Connect to the DSA-3100 with the provided
RS-232 serial cable
. On
the other side of the RS-232 cable, plug in the
RJ-11
connector into
the DSA-3100P Ticket Printer.
Attach the power adapter and turn the DSA-3100P on. Then power
on the DSA-3100 and all wireless access points. Wait 1~2 minutes
until the status LED on the DSA-3100 becomes stable.
RJ-11
Connector
Power
Connector
P/S2
Connector
Preparing the DSA-3100P(cont.)
Summary of Contents for DSA-3100P - B/W Thermal Line Printer
Page 6: ...6 Notes ...
Page 7: ...7 Notes ...

