background image

Package Contents

Open the shipping carton of the switch and carefully unpack its contents. Please consult
the packing list to make sure all items are present and undamaged. If any item is missing
or damaged, please contact your local reseller for replacement.

One DQS-5000-32Q28 switch

Two AC power cords

One console cable (RJ-45 to RS-232)

One rack mounting kit (two brackets and screws)

Four rubber feet with adhesive backing

One Quick Installation Guide

Note: the model you have purchased may appear slightly different from those shown in the
illustrations.

Device Interfaces

Model

Port

Description

DQS-5000-32Q28

100GBase-X


QSFP28

ports

32 QSFP28 ports (100 Gbps connection speed).

USB 2.0 port

USB   2.0   Type-A   port   for   connecting   a   USB   storage
device.

RJ-45 console port

RJ-45 console port for connecting to a PC with a RJ-45
console cable (included in the package). The Command
Line Interface (CLI) is used for configuring the switch.

10/100/1000Base-T   RJ-45
management port

Out-of-band management port for configuring the switch
without   being   connected   to   the   network   (10/100/1000
Mbps connection speed).

LEDs

LED

Status

Description

PSU 1

Solid green

The switch is powered on and functioning normally.

Solid amber

The switch’s power supply has failed or is not working properly.

Light off

The switch is turned off.

PSU 2

Solid green

The switch is powered on and functioning normally.

Solid amber

The switch’s power supply has failed or is not working properly.

Light off

The switch is turned off.

FAN

Solid green

The fans are operating normally.

Solid amber

A fan has failed. Check the FAN Status LED on the rear panel to
identify which fan is malfunctioning.

Light off

The fans are powered off.

STAT

Solid green

The diagnostic test was successfully completed.

Solid amber

The self-diagnostics system has detected a fault.

Light off

The system is down, the switch is booting up, or the network OS

2

Summary of Contents for DQS-5000-32Q28

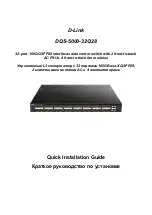
Page 1: ...interfaces data center switch with 2 front to back AC PSUs 4 front to back fan modules Управляемый L3 коммутатор с 32 портами 100GBase X QSFP28 2 источниками питания AC и 4 вентиляторами Quick Installation Guide Краткое руководство по установке ...

Page 2: ...luded in the package The Command Line Interface CLI is used for configuring the switch 10 100 1000Base T RJ 45 management port Out of band management port for configuring the switch without being connected to the network 10 100 1000 Mbps connection speed LEDs LED Status Description PSU 1 Solid green The switch is powered on and functioning normally Solid amber The switch s power supply has failed ...

Page 3: ...d to both the power connector on the switch and the electrical outlet that supplies power Install the switch in a fairly cool and dry place within the acceptable operating temperature and humidity ranges Install the switch in a site free from strong electromagnetic field generators such as motors vibration dust and direct exposure to sunlight Installing the Switch without a Rack When installing th...

Page 4: ...brackets in any available open space in the rack using the rack mounting screws Figure 3 Installing the switch in a rack Installing Transceivers into the Transceiver Ports The DQS 5000 32Q28 switch is equipped with the QSFP and QSFP28 ports for connecting the transceivers 4 ...

Page 5: ...re the switch is installed 4 Verify that the ground connections on the switch and the rack are securely attached Plugging in the AC Power Cord Plug one end of the AC power cord into the power socket of the switch and the other end into the electrical outlet Power Failure In the event of a power failure just as a precaution unplug the power cord from the switch After the power returns plug the powe...

Page 6: ...9 connector on the console cable shipped with the switch to the RS 232 serial port on the computer running terminal emulation software then insert the RJ 45 connector into the console port on the front of the switch To configure the terminal emulation software as follows Select the appropriate serial port COM1 or COM2 Set the data rate to 115200 baud Set the data format to 8 data bits 1 stop bit a...

Page 7: ...the switch in either D Link OS or ONIE 7 ...

Page 8: ...ройства Перед очисткой устройства от загрязнений и пыли отключите питание устройства Удаляйте пыль с помощью влажной салфетки Не используйте жидкие аэрозольные очистители или магнитные статические устройства для очистки Избегайте попадания влаги в устройство Устройство должно быть заземлено если это предусмотрено конструкцией корпуса или вилки на кабеле питания Для подключения необходима установка...

Page 9: ...подключения USB накопителя Консольный порт с разъемом RJ 45 Консольный порт с интерфейсом RJ 45 предназначен для подключения к ПК при помощи консольного кабеля с интерфейсом RJ 45 входит в комплект поставки Настройка коммутатора осуществляется с помощью интерфейса командной строки CLI Порт управления 10 100 1000Base T с разъемом RJ 45 Порт управления Out of band предназначен для настройки коммутат...

Page 10: ...k Activity на порт RJ 45 Горит зеленым цветом К порту подключено устройство на скорости 1000 Мбит с Мигает зеленым цветом На порту выполняется передача или прием данных Горит желтым цветом К порту подключено устройство на скорости 10 100 Мбит с Мигает желтым цветом На порту выполняется передача или прием данных Не горит К порту не подключено устройство Установка коммутатора Для безопасной установк...

Page 11: ...епла и вентиляции Оставьте по меньшей мере 10 см пространства спереди сбоку и сзади коммутатора для обеспечения вентиляции Установка в стойку Коммутатор может быть установлен в 19 дюймовую стойку Прикрепите кронштейны к боковым панелям коммутатора и зафиксируйте кронштейны с помощью входящих в комплект поставки винтов Рисунок 2 Крепление кронштейнов Установите коммутатор в стойку и закрепите его с...

Page 12: ...овода винтом заземления к задней панели коммутатора 3 Прикрепите клемму на противоположной стороне провода заземления к заземлителю 4 Проверьте надежность существующих соединений Подключение кабеля питания переменного тока Подключите кабель питания переменного тока к соответствующему разъему на задней панели коммутатора и к электрической розетке Сбой питания В случае сбоя питания коммутатор должен...

Page 13: ...ройки устройства Для подключения к консольному порту с разъемом RJ 45 потребуется следующее Терминал или компьютер с портом RS 232 и программа эмуляции терминала Консольный кабель с разъемами RS 232 и RJ 45 Для подключения к консольному порту коммутатора выполните следующее 1 Подключите кабель разъемом RS 232 к соответствующему порту компьютера 2 Подключите кабель разъемом RJ 45 к консольному порт...

Page 14: ...мутатор Самым простым способом перезагрузки коммутатора на данном этапе является отключение кабеля питания и его повторное подключение к соответствующему разъему на задней панели устройства После этого потребуется выбрать среду для загрузки на коммутаторе ONIE или ОС D Link 14 ...

Page 15: ...ии IEEE 802 3ba 40GBase X IEEE 802 3ba 100GBase X Стандарты и функции для порта управления IEEE 802 3 10Base T IEEE 802 3u 100Base TX IEEE 802 3ab 1000Base T Производительность Коммутационная матрица 6 4 Тбит с Размер таблицы МАС адресов 40K записей Макс скорость перенаправления 64 байтных пакетов 2 980 Mpps Буфер пакетов 16 МБ Jumbo фрейм 9 КБ Физические параметры Размеры Д x Ш x В 440 x 406 x 44...

Page 16: ... скорости вентилятора 57 2 дБ Система вентиляции 4 вентилятора Температура Рабочая от 0 до 45 C Хранения от 40 до 70 C Влажность При эксплуатации от 5 до 95 без конденсата При хранении от 5 до 95 без конденсата Прочее Безопасность cULus CCC BSMI CB CE EMI EMC FCC IC CCC CB CE BSMI 16 ...

Page 17: ... представитель импортер ООО Д Линк Трейд 390043 г Рязань пр Шабулина д 16 Тел 7 4912 575 305 Россия Москва Графский переулок 14 Тел 7 495 744 00 99 E mail mail dlink ru Україна Київ вул Межигірська 87 А Тел 38 044 545 64 40 E mail ua dlink ua Moldova Chisinau str C Negruzzi 8 Tel 373 22 80 81 07 E mail info dlink md Беларусь Мінск пр т Незалежнасці 169 Тэл 375 17 218 13 65 E mail support dlink by ...

Reviews: