background image

3


Hardware Installation 

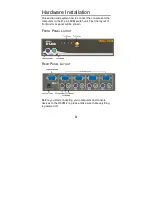
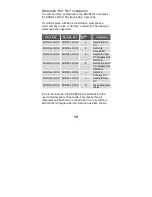
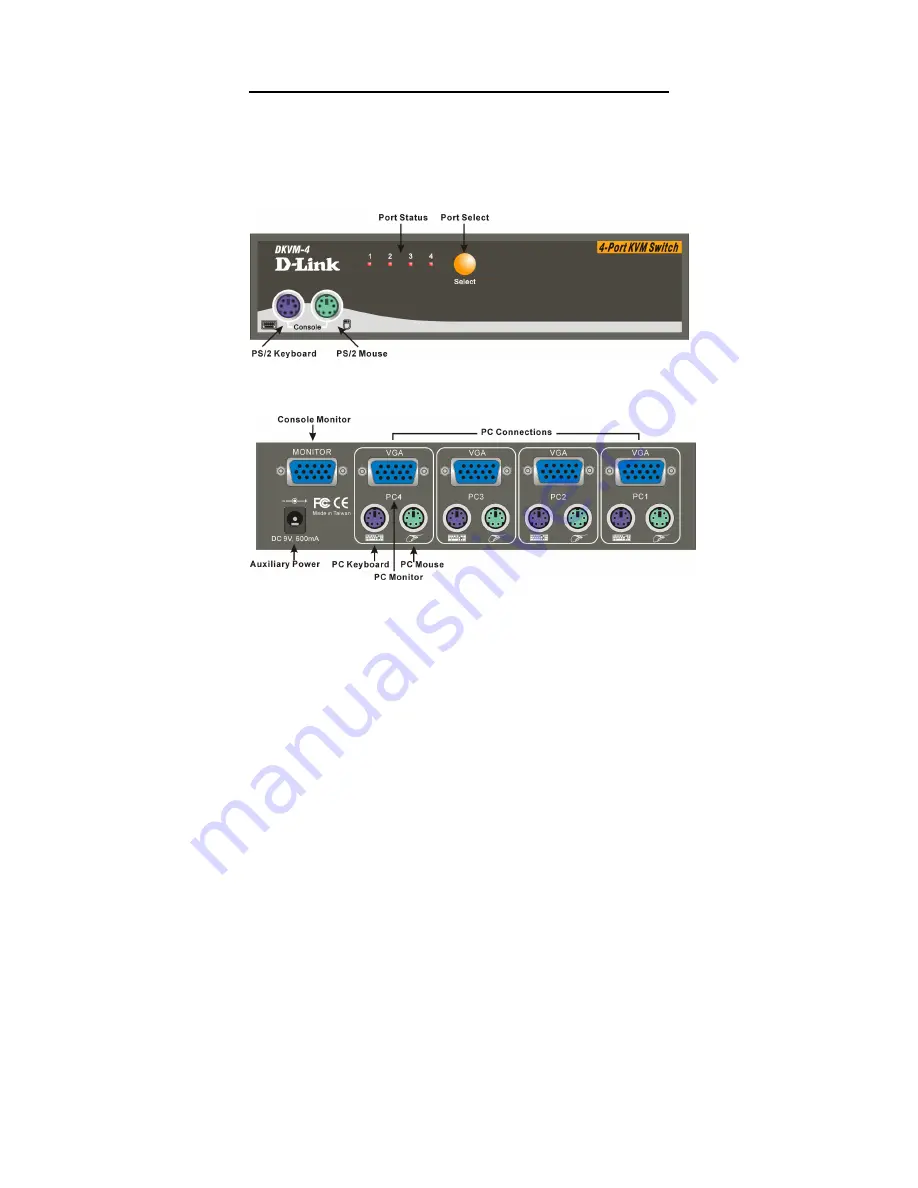
This section will explain how to connect the console and the 
computers to the D-Link KVM switch unit. First the layout of 
front and rear panel will be shown. 


F

RONT 

P

ANEL 

L

AYOUT


R

EAR 

P

ANEL 

L

AYOUT


Before you start connecting your computers and console 
devices to the DKVM-2/4, please make sure that everything 
is powered off. 

Summary of Contents for DKVM-2/4

Page 1: ...DKVM 2 4 2 4 Port Keyboard Video and Mouse Switch User s Manual Rev 1 2 ...

Page 2: ...ures 2 Package Contents 2 Hardware Installation 3 Front Panel Layout 3 Rear Panel Layout 3 Using the DKVM 2 4 9 Select button 9 Keyboard Hot Key commands 10 Optional cable 11 Troubleshooting 12 Keyboard 12 Mouse 13 Video 14 Specifications 16 ...

Page 3: ... compatible Most older style serial keyboard and mice are not compatible with PS 2 Advanced features like keyboard and mouse emulation for error free boot ups and support is also provided for the Microsoft Intellimouse and Microsoft Intellimouse Explorer The DKVM 2 4 supports high resolutions Resolutions up to 1920 x 1440 are supported with no deterioration of image quality Switching between PCs c...

Page 4: ...e and commonly available cables Molded KVM cables are recommended Model No DKVM CB Supports Monitor resolutions of up to 1920 x 1440 Supports VGA SVGA and Multisync monitors Select push button or keyboard Hot Key control Comes with Auto Scan mode for convenient automatic switching Front panel status LEDs give a clear indication of the active PC Audible feedback when switching between computers Pac...

Page 5: ...nsole and the computers to the D Link KVM switch unit First the layout of front and rear panel will be shown FRONT PANEL LAYOUT REAR PANEL LAYOUT Before you start connecting your computers and console devices to the DKVM 2 4 please make sure that everything is powered off ...

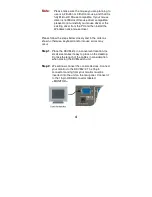
Page 6: ...ase follow the steps below closely and in the order as shown otherwise keyboard and or mouse errors may occur Step 1 Place the DKVM 2 4 in a convenient location Its small size makes it easy to place on the desktop Do take the length of the cables in consideration when placing the KVM switch unit Step 2 We will now connect the console devices Connect your monitor to the DKVM 2 4 The 15 pin connecto...

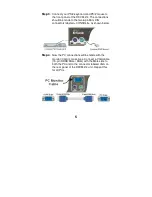
Page 7: ...e to the two 6 pin Mini DIN connectors labeled CONSOLE as shown below Step 4 Now the PC connections will be made with the monitor VGA connections Connect a VGA cable 15 pin HDDB Male Male with the Male side to both the PC and to the connector labeled VGA on the rear panel of the DKVM 2 4 unit Repeat this for all PCs ...

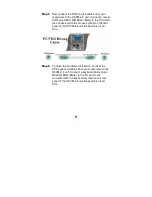
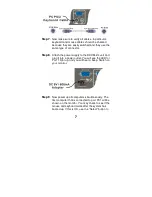
Page 8: ...h the mouse symbol on the rear panel of the DKVM 2 4 unit Repeat this for all PCs Step 6 To finish the hardware installation connect the PS 2 keyboard cables from your computers to the DKVM 2 4 unit Connect a keyboard cable 6 pin Mini DIN Male Male to the PC and to the connector with the keyboard symbol on the rear panel of the DKVM 2 4 unit Repeat this for all PCs ...

Page 9: ...r supply to the DKVM 2 4 unit and plug it into a power outlet You will see the LED for Port 1 light up and you will hear a beep Switch on your monitor Step 9 Now power up all computers simultaneously The first computer that is connected to port PC1 will be shown on the monitor You may check to see if the mouse and keyboard work after the system has booted up If this is OK use the Select button to ...

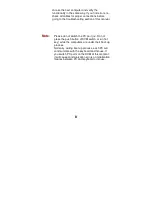
Page 10: ...manual Note Please do not switch the PC port i e Do not press the push button of KVM switch or run hot key while the computers are under their boot up process Normally during boot up process each PC will communicate with the keyboard and mouse If you switch PC ports on the KVM at this moment it will cause communication errors or initialization failures between PC and keyboard or mouse ...

Page 11: ...ton on the unit or make use of the keyboard Hot key commands You may notice that the mouse cannot be used for around 2 seconds when the DKVM 2 4 switches to another computer This is normal and is caused by synchronization that makes sure the mouse operates properly SELECT BUTTON Pressing the Select button cycles through computers 1 2 4 ...

Page 12: ...PC SCROLL LOCK SCROLL LOCK 2 Switch to Second PC SCROLL LOCK SCROLL LOCK 3 Switch to Third PC disable with DKVM 2 SCROLL LOCK SCROLL LOCK 4 Switch to Fourth PC disable with DKVM 2 SCROLL LOCK SCROLL LOCK Switch to Previous PC SCROLL LOCK SCROLL LOCK Switch to Next PC SCROLL LOCK SCROLL LOCK S Go to Auto Scan mode In Auto Scan mode the DKVM 2 4 unit will switch to the next computer every 10 seconds...

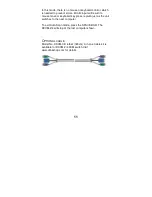
Page 13: ... mouse move or keyboard key press is given just as the unit switches to the next computer To exit Auto Scan mode press the SPACE BAR The DKVM 2 4 will stop at the last computer shown OPTIONAL CABLE Model No DKVM CB 6 feet 180cm 3 in one Cable kit is available for DKVM 2 4 KVM switch Visit www dlinkshop com for details ...

Page 14: ... functional What can be the cause One of the following may be the case Make sure the keyboard is plugged into the DKVM 2 4 unit properly Verify that the keyboard works when plugged into the computer directly You will have to shut down your computer first to do this Try using a different keyboard Read your motherboard documentation and make sure that the PS 2 keyboard IRQ is enabled This can be set...

Page 15: ...se What can be the cause One of the following may be the case Please verify that the mouse is plugged into the DKVM 2 4 unit properly Make sure the mouse works properly when plugged into a computer directly You will need to reboot the system to test this Try using a different mouse Verify that the mouse complies with the PS 2 standard A combination mouse will work but it must be set to PS 2 mode a...

Page 16: ...dless or scrolling mouse make sure you use generic PS 2 mouse drivers A non standard PS 2 mouse may have extensions on the PS 2 protocol that are not supported by the DKVM 2 4 unit Do not move the mouse or press any mouse buttons while switching from one system to the other Try resetting the mouse by unplugging it from the DKVM 2 4 unit for about 3 seconds Mouse movement will now be correct again ...

Page 17: ...refresh rate or try lowering the resolution Your video cable may be too long Video signals are high frequency signals and are therefore subject to interference Please use video cables that are as short as possible Make sure that the power adapter is plugged in at both ends and that it is working correctly Its rating must be 9V 600mA ...

Page 18: ...age parameters Operating Temperature 0 40 Degrees C 32 to 104 Degrees F Storage Temperature 20 60 Degrees C 4 140 Degrees F Humidity 0 80 RH non condensing PC port connections Keyboard Mini DIN 6 pin Female Mouse Mini DIN 6 pin Female Monitor HDDB 15 pin Female Console connections Keyboard Mini DIN 6 pin Female Mouse Mini DIN 6 pin Female Monitor HDDB 15 pin Female ...

Page 19: ...ree REPAIR LINE 00800 7250 8000 E MAIL info dlink de URL www dlink de IBERIA D LINK IBERIA Gran Via de Carlos III 84 3 Edificio Trade 08028 BARCELONA TEL 34 93 4090770 FAX 34 93 4910795 E MAIL info dlinkiberia es URL www dlinkiberia es INDIA D LINK INDIA Plot No 5 Kurla Bandra Complex Road Off Cst Road Santacruz E Bombay 400 098 India TEL 91 22 652 6696 FAX 91 22 652 8914 E MAIL service dlink indi...

Page 20: ... Period Product excluding power supplies and fans One 1 Year Power Supplies and Fans One 1 Year Spare parts and spare kits Ninety 90 days D Link s sole obligation shall be to repair or replace the defective Hardware at no charge to the original owner Such repair or replacement will be rendered by D Link at an Authorized D Link Service Office The replacement Hardware need not be new or of an identi...

Page 21: ...y D Link for the Software The Warranty Period shall extend for an additional ninety 90 days after any replacement Software is delivered If a material non conformance is incapable of correction or if D Link determines in its sole discretion that it is not practical to replace the non conforming Software the price paid by the original licensee for the non conforming Software will be refunded by D Li...

Page 22: ...ance with the foregoing requirements or for which an RMA number is not visible from the outside of the package The product owner agrees to pay D Link s reasonable handling and return shipping charges for any product that is not packaged and shipped in accordance with the foregoing requirements or that is determined by D Link not to be defective or non conforming What Is Not Covered This limited wa...

Page 23: ...ANY LOSS OF USE OF THE PRODUCT INCONVENIENCE OR DAMAGES OF ANY CHARACTER WHETHER DIRECT SPECIAL INCIDENTAL OR CONSEQUENTIAL INCLUDING BUT NOT LIMITED TO DAMAGES FOR LOSS OF GOODWILL WORK STOPPAGE COMPUTER FAILURE OR MALFUNCTION LOSS OF INFORMATION OR DATA CONTAINED IN STORED ON OR INTEGRATED WITH ANY PRODUCT RETURNED TO D LINK FOR WARRANTY SERVICE RESULTING FROM THE USE OF THE PRODUCT RELATING TO ...

Page 24: ...ce pursuant to part 15 of the FCC Rules These limits are designed to provide reasonable protection against harmful interference in a residential installation This equipment generates uses and can radiate radio frequency energy and if not installed and used in accordance with the instructions may cause harmful interference to radio communications However there is no guarantee that interference will...

Page 25: ...ca de la CE Este es un producto de Clase B En un entorno doméstico puede causar interferencias de radio en cuyo case puede requerirse al usuario para que adopte las medidas adecuadas Attention Ceci est un produit de classe B Dans un environnement domestique ce produit pourrait causer des interférences radio auquel cas l utilisateur devrait prendre les mesures adéquates Attenzione Il presente prodo...

Page 26: ... your product 1 Where and how will the product primarily be used Home Office Travel Company Business Home Business Personal Use 2 How many employees work at installation site 1 employee 2 9 10 49 50 99 100 499 500 999 1000 or more 3 What network protocol s does your organization use XNS IPX TCP IP DECnet Others_____________________________ 4 What network operating system s does your organization u...

Page 27: ......

Page 28: ......
Reviews: