1040658-0001 Revision B
December 8, 2015
Installing Your D-Link Wireless Router
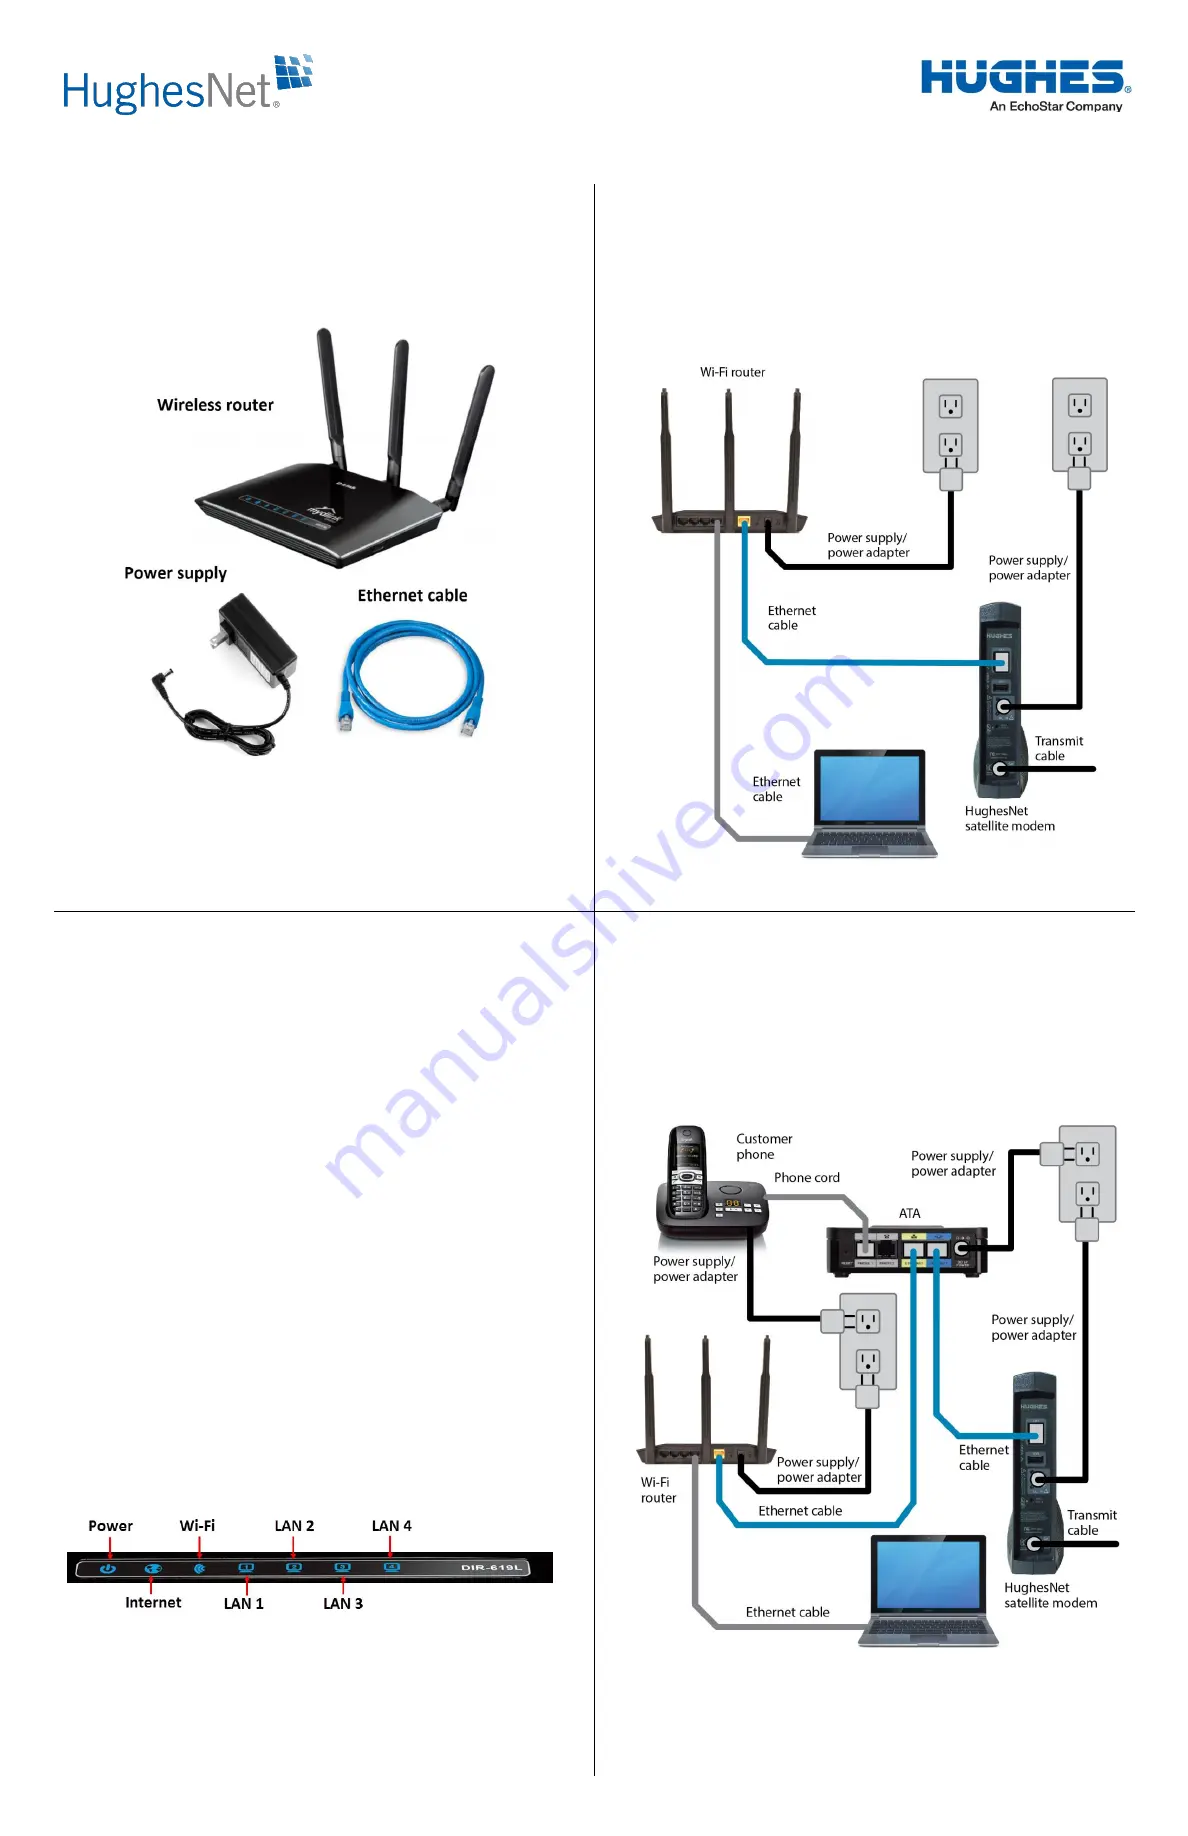
In the box
Ensure the box contains the following items. See
D-Link Wireless N300 Cloud Router, DIR-619L
Power supply, 12V/1A
Ethernet cable
Figure 1: Kit contents
If you do not subscribe to HughesNet Voice
, follow the
instructions in
Installing the router without HughesNet Voice
on
panel 2.
If you do subscribe to HughesNet Voice
, follow the instructions in
Installing the router with HughesNet Voice
on panel 4.
Installing the router without
HughesNet Voice
Only follow the steps in this section if you do not subscribe to
HughesNet Voice.
When you have completed the steps in this section, your
connections will be the same as those shown in
. Refer to
the figure when performing the steps.
Figure 2: Wireless router connections without Voice
Installing the router without
HughesNet Voice (cont.)
1.
Ensure there is nothing plugged into the LAN port on your
HughesNet modem (such as your laptop or PC). If there is,
remove it.
Leave the other modem cable connections as they are.
2.
Connect the blue Ethernet cable provided in the kit to the LAN
port on your modem.
3.
Connect the other end of the blue Ethernet cable to the
yellow LAN port on the D-Link wireless router.
4.
Connect the power supply provided in the kit to the wireless
router.
5.
Plug the power supply into an electrical outlet or surge
protector.
6.
[Optional]
Using an Ethernet cable, connect your laptop or PC
to a LAN port on the wireless router. This provides a direct,
wired connection to the network.
7.
Ensure all of your connections match those shown in
8.
Verify the power light on the wireless router is lit. See
9.
Wait 2 minutes, then check that the power, Internet, and Wi-
Fi signal lights on the top of the router are lit. If anything is
plugged into the router LAN ports, those lights will also
illuminate. See
Figure 3: Router LEDs
10.
Proceed to
Logging into your new wireless network
on
panel 6.
Installing the router with
HughesNet Voice
Only follow the steps in this section if you subscribe to
HughesNet Voice.
When you have completed the steps in this section, your
connections will be the same as those shown in
. Refer to
the figure when performing the steps.
Figure 4: Wireless router connections with Voice
1
2
4
3


