xStack® DES-3528/DES-3552 Series Layer 2 Stackable Fast Ethernet Managed Switch Web UI Reference Guide
Click the
Add
button to add a new entry based on the information entered.
Click the
Delete
button to remove the specific entry based on the information entered.
Click the
Delete All
button to remove all the entries listed.
DHCP Server
For this release, the Switch now has the capability to act as a DHCP server to devices within its locally attached
network. DHCP, or Dynamic Host Configuration Protocol, allows the Switch to delegate IP addresses, subnet masks,
default gateways and other IP parameters to devices that request this information. This occurs when a DHCP enabled
device is booted on or attached to the locally attached network. This device is known as the DHCP client and when
enabled, it will emit query messages on the network before any IP parameters are set. When the DHCP server
receives this request, it returns a response to the client, containing the previously mentioned IP information that the
DHCP client then utilizes and sets on its local configurations.
The user can configure many DHCP related parameters that it will utilize on its locally attached network, to control and
limit the IP settings of clients desiring an automatic IP configuration, such as the lease time of the allotted IP address,
the range of IP addresses that will be allowed in its DHCP pool, the ability to exclude various IP addresses within the
pool so as not to make identical entries on its network, or to assign the IP address of an important device (such as a
DNS server or the IP address of the default route) to another device on the network.
Users also have the ability to bind IP addresses within the DHCP pool to specific MAC addresses in order to keep
consistent the IP addresses of devices that may be important to the upkeep of the network that require a static IP
address.
To begin configuring the Switch as a DHCP Server, open the
L3 Features
folder, then the
DHCP Server
folder, which
will display five links to aid the user in configuring the DHCP server.
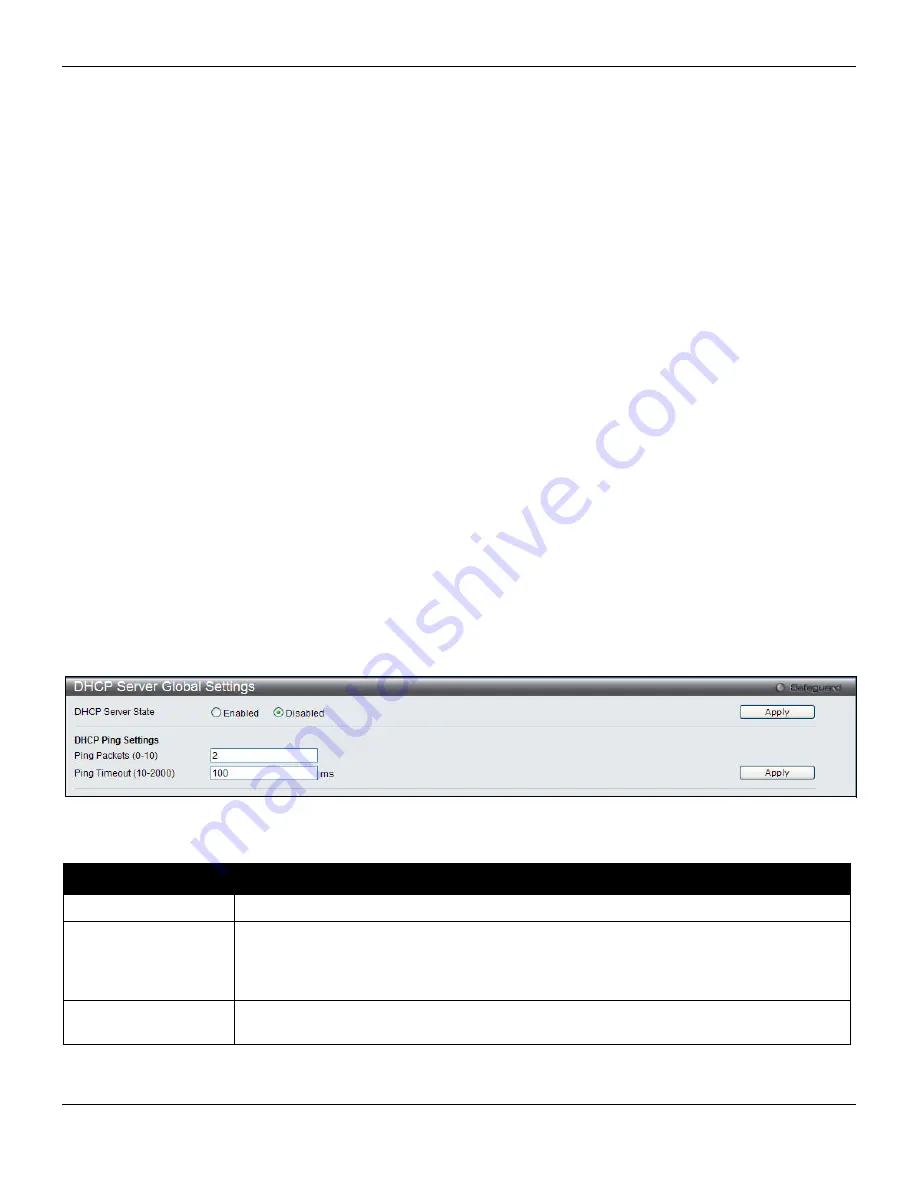
DHCP Server Global Settings
The following window will allow users to globally enable the Switch as a DHCP server and set the DHCP Ping Settings
to test connectivity between the DHCP Server and Client.
To view this window, click
Network Application > DHCP > DHCP Server > DHCP Server Global Settings
, as shown
below:
Figure 9-9 DHCP Server Global Settings window
The fields that can be configured are described below:
Parameter
Description
DHCP Server State
Click the radio buttons to enable or disable the Switch as a DHCP server.
Ping Packets (0-10)
Enter a number between
0
and
10
to denote the number of ping packets that the Switch
will send out on the network containing the IP address to be allotted. If the ping request is
not returned, the IP address is considered unique to the local network and then allotted to
the requesting client. The default setting is
2
packets.
Ping Timeout (10-
2000)
The user may set a time between
10
and
2000
milliseconds that the Switch will wait
before timing out a ping packet. The default setting is
100
milliseconds.
Click the
Apply
button to accept the changes made for each individual section.
281


