background image

6

7

Ethernet Installation Process

The Ethernet connection is OS-independent and can be used to
connect any computer that has a pre-installed Ethernet adapter.

Install the USB Software Drivers

When the computer detects the cable modem, insert the D-Link Installation and
Documentation CD into the computer’s CD-ROM drive and follow the on-screen
prompts to install the necessary driver files. Follow the instructions for your specific
operating system.

USB Installation Process (optional)

    If TCP/IP is NOT listed, you must complete the following steps:

1. Click 

Add

.

2. Click 

Protocol

, and then click 

Add

.

3. Click 

Microsoft

 in the “Manufacturers” list and then click the

    “

Network Protocols

” list.

4. Click 

OK

. You are prompted to restart your computer.

D. Click 

Yes

. You can now go to “

Install the Cable Modem

”.

Windows XP or 2000 Operating System

A.  Right-click 

My Network Places

 icon on the Windows desktop.

B.  Right-click 

Local Area Connection

 and click 

Properties

. Search for an

entry containing TCP/IP. If you see TCP/IP listed next to your Ethernet
hardware device,  you can now go to “

Install the Cable Modem

”.

Install the Cable Modem

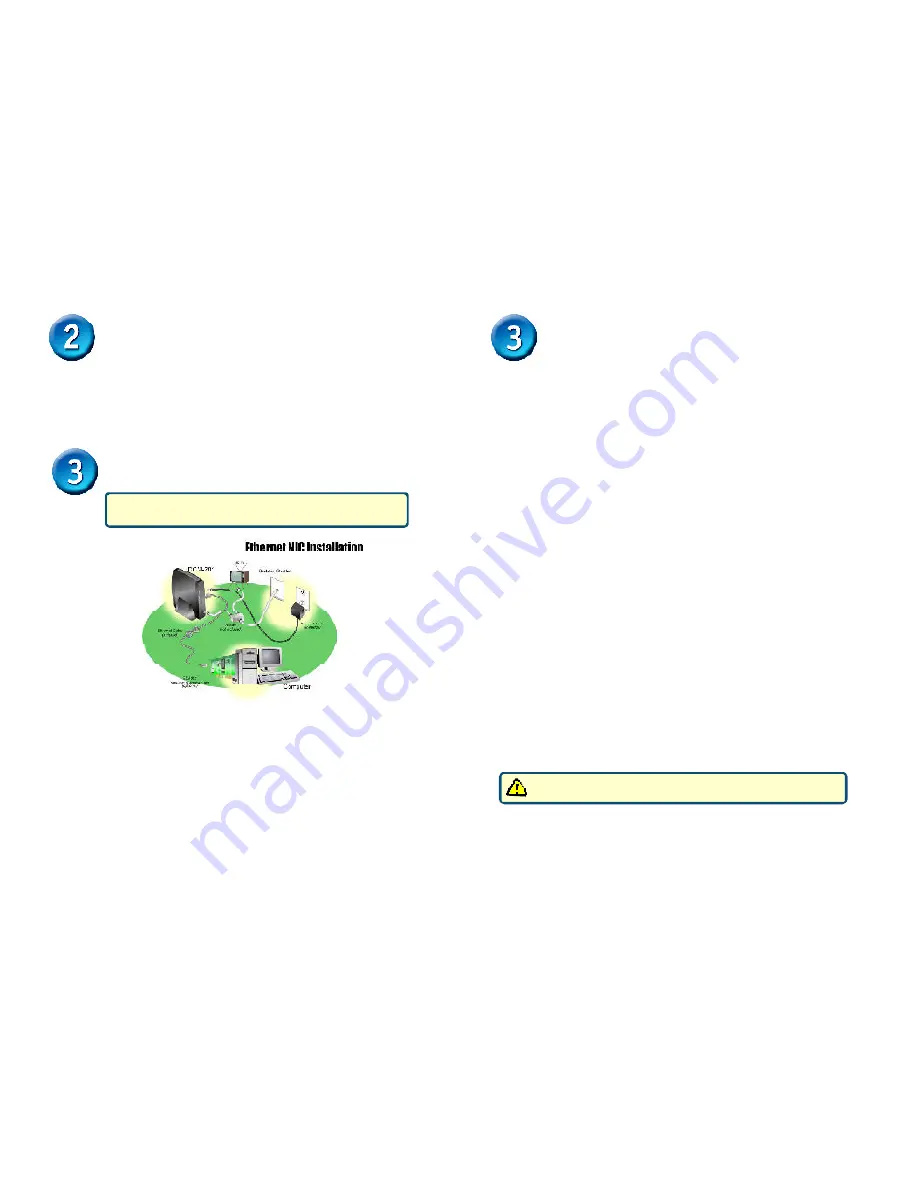
Refer to the Ethernet NIC illustration (previous page) when making the following
connections:

A. Power off the computer.
B. Unplug the computer’s power cable.
C. Connect the RF coaxial cable (not included) to the back of the cable modem labeled
    “CATV”, connect the other end to the wall cable outlet.

Note

: If you are using a cable line-splitter (not included) to connect the computer and a

television to the same wall cable outlet, you will use three lengths of coaxial cable.
As shown in the Ethernet NIC illustration (see previous page), a cable line-splitter
has three connectors. Use the illustration to make the appropriate coaxial cable
connections.

D. Connect one end of the Ethernet cable to the cable modem labeled “ETH” and the

other end to the Ethernet NIC installed on your computer.

E. Connect the 12VDC/1.25A power adapter to the back of the cable modem labeled
     “Power”.

Ethernet Installation Process


Be sure to use only the power adapter that came with the cable modem.

      Using the wrong power adapter can damage the cable modem.

F. Plug the power adapter into a surge protector or an electrical outlet.
G. Plug in power cable and turn on the computer.
H. Verify that the proper LED lights are correctly showing on the DCM-201.

Configure the TCP/IP Protocol on Your PC

Before installing the cable modem in the Ethernet mode, you must verify that your
computer has the TCP/IP protocol installed.  Follow the procedure for your computer’s
operating system to verify or install the TCP/IP protocol.

Windows 95, Windows 98, or Windows ME Operating System:

A. Click 

Start

, point to 

Settings

, and then click 

Control Panel

.

B. Double-click the 

Network

 icon. The screen displays a list of installed network

     components.
C. Search for an entry containing TCP/IP, followed by the NIC hardware device installed in
     your computer. If you see TCP/IP listed next to your Ethernet hardware device, you may
     now go to “

Install the Cable Modem

”.

Summary of Contents for DCM-201

Page 1: ...ble USB Cable 12V DC 1 25A Power Adapter Decide which setup mode Ethernet NIC or USB you want to use and follow the installation process for that setup mode Local Cable Network Service Before installing the cable modem contact your local cable service provider to check the availability of Internet Cable network access Read this Quick Installation Guide thoroughly before attempting to install the c...

Page 2: ... your local cable operator Requirements The DCM 201 USB Ethernet Cable Modem will work only with the Ethernet port and or the USB port connected USB Installation Process optional The USB connection can only be used for computers running Microsoft Windows XP 2000 or ME Modem Make and Model i e D Link DCM 201 Modem Serial Number i e 202102XXXXXXX normally found on the label on the bottom of the mode...

Page 3: ...d Documentation CD into the computer s CD ROM drive a Shut down the computer b Connect the USB cable between the DCM 201 and an available USB Port on the computer 2 Power on the computer After the computer boots up a Windows detects the cable modem b The Found New Hardware screen appears c The Found New Hardware Wizard screen appears 3 Select Search for a suitable driver for my device recommended ...

Page 4: ... Note If you are using a cable line splitter not included to connect the computer and a television to the same wall cable outlet you will use three lengths of coaxial cable As shown in the Ethernet NIC illustration see previous page a cable line splitter has three connectors Use the illustration to make the appropriate coaxial cable connections D Connect one end of the Ethernet cable to the cable ...

Page 5: ...ter s USB A type port CATV RF connector to attach the cable for broadband Internet access Appendix After installation is complete the cable modem is operating properly if the Power Cable and Status LED lights are solid green Check the LEDs LEDLABEL COLOR DESCRIPTION Green Orange Blinking Orange Green Green Blinking Green Green Blinking Green Green Green Blinking Power Cable Status ETH USB Cable mo...

Page 6: ...power jack on the cable modem and the power outlet If both ends of the power adapter are properly connected and there is still no power the cable modem might have a faulty power adapter or electrical outlet Try plugging the power adapter into a different electrical wall outlet Be sure to use only the power adapter that came with the cable modem Using the wrong power adapter can damage the cable mo...

Page 7: ...gh our website or by phone Tech Support for customers within the United States Technical Support D Link Technical Support over the Telephone 877 453 5465 24 hours a day seven days a week D Link Technical Support over the Internet http support dlink com email support dlink com D Link Technical Support over the Telephone 800 361 5265 Monday to Friday 8 30am to 9 00pm EST D Link Technical Support ove...

Reviews: