background image

DAP-2330 Install Guide

7

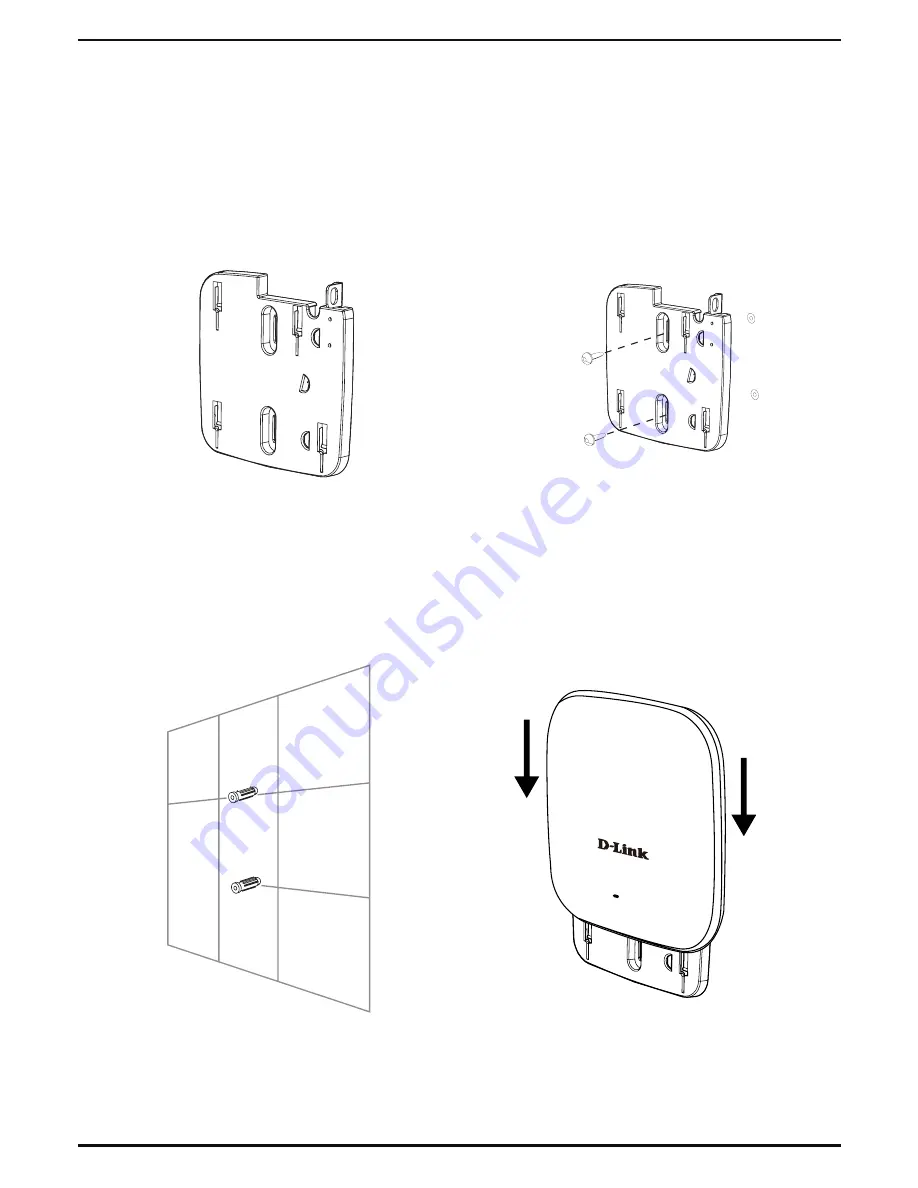
Solid wall or ceiling 

Installation

1. Place the mounting bracket on a wall or 

ceiling.

5. Plug the Ethernet cable into the 

Ethernet LAN port on the access point.

6. Attach the Access Point to the backet 

and slide it down to lock into place.

2. Use a pencil to mark the holes.

3. Drill holes in the marked points and    

insert the plastic wall anchors.

4. Use the supplied screws to attach the 

mounting bracket to the wall.

Summary of Contents for DAP-2330 v 1.0

Page 1: ......

Page 2: ......

Page 3: ...k support website System Requirements Minimum System Requirements CD ROM Drive Router switch or computer with installed Ethernet adapter Internal Explore 11 Safari 7 Firefox 28 Google Chrome 33 1 Pack...

Page 4: ...e DAP 2330 is working properly Blinking Green This light will blink green during data transmission 2 Power Receptor Connect the supplied power adapter 3 LAN PoE Port Connect to a Power over Ethernet P...

Page 5: ...do not have a power outlet near the location of the access point Method 3 Use if you do not have a PoE switch or router and have a power outlet near the location of the access point DAP 2330 PoE Swit...

Page 6: ...ter or computer 2 Connect one end of an Ethernet cable into the P Data Out port on the PoE base unit and the other end into the LAN PoE port on the Access Point 3 Use the supplied power adapter Connec...

Page 7: ...and then connect the other end to a switch router or computer 2 Use the supplied power adapter Connect the power adapter to the Power receptor on the Access Point 3 Connect the power cable to the powe...

Page 8: ...2 Plug one end of your Ethernet cable into the LAN port of the DAP 2330 and the other end into a port on a PoE switch Configure the access point To set up and manage the DAP 2330 use one of the follow...

Page 9: ...the Ethernet cable into the Ethernet LAN port on the access point 6 Attach the Access Point to the backet and slide it down to lock into place 2 Use a pencil to mark the holes 3 Drill holes in the ma...

Page 10: ...ne with each other 2 Use the provided screws to attach the mounting bracket to the ceiling bracket 3 Plug the Ethernet cable into the Ethernet port on the access point 4 Attach the Access Point to the...

Page 11: ...DAP 2330 Install Guide 9 Notes...

Page 12: ...10 DAP 2330 Install Guide Notes...

Page 13: ...DAP 2330 Install Guide 11 Notes...

Page 14: ...12 DAP 2330 Install Guide Notes...

Page 15: ......

Page 16: ...1 0_130x183 April 17 2014 6AP2330Q 01G Copyright 2014 D Link Corporation D Link Systems Inc All rights reserved D Link and the D Link logo are trademarks or registered trademarks of D Link Corporatio...

Reviews: