Downloaded from Projector.com
14
Controls and Features (cont.)
Installing Batteries
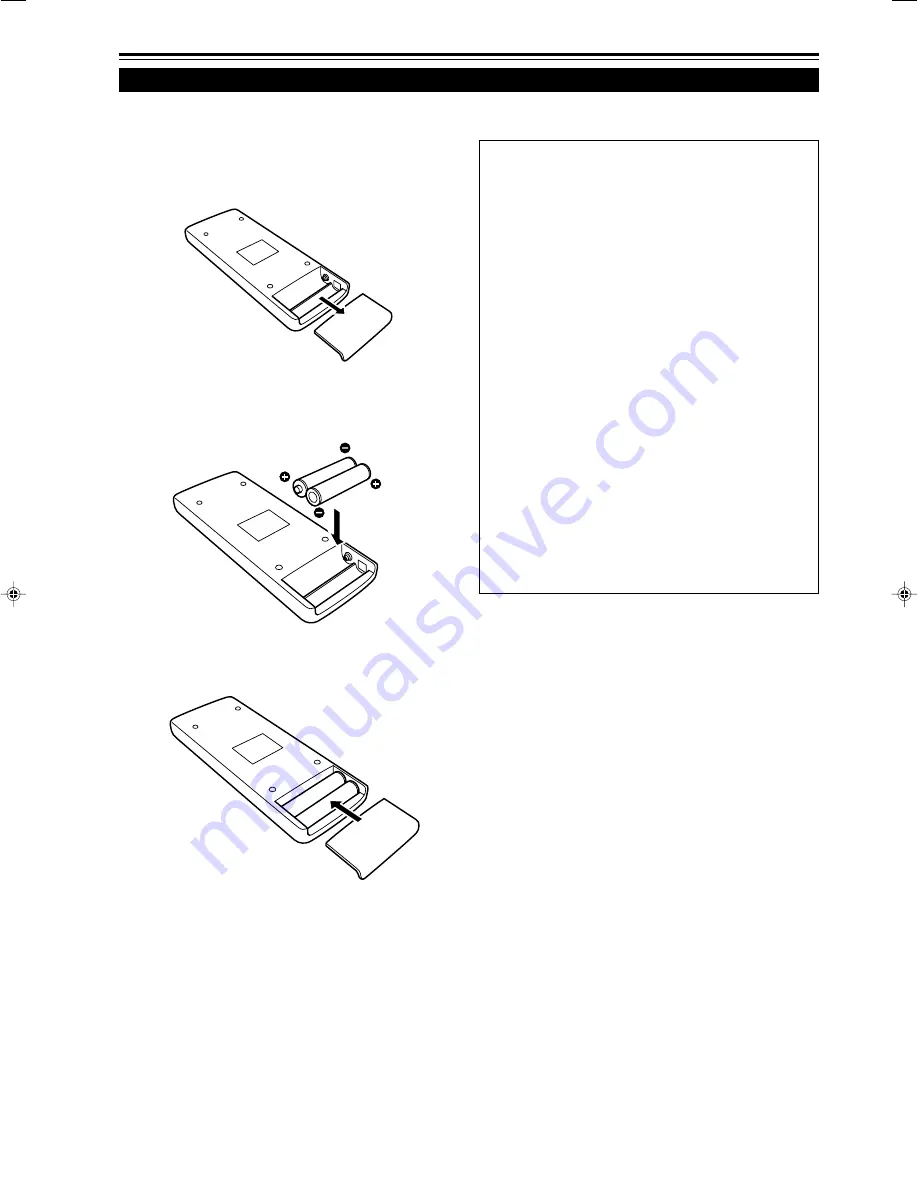
Install batteries in the remote control. If the remote control has started to work erratically, replace the batteries.
1
Open the back cover.
While pushing on the back cover, slide it in the direction
of the arrow.
2
Install the batteries.
Place the two batteries (AAA/R03-size) supplied in the
remote control as illustrated below.
3
Close the back cover.
Slide the back cover in the direction of the arrow until a
click is heard.
Precautions for using batteries
If batteries are used incorrectly, they may crack or
leak liquid. This could cause a fire, burn, malfunction,
or staining or damaging the surrounding.
Beware of the following:
• Do not mix new and old batteries.
• Do not mix different types of batteries as they differ in
characteristics.
• Place batteries so they match the polarities indicated:
(+) to (+) and (–) to (–).
• Be sure to put the minus (–) end in first to avoid short-
circuiting.
• Use only designated batteries.
• Remove the batteries if not used for a prolonged period
of time.
• When the batteries are exhausted, replace them
immediately. Otherwise, liquid could leak, or malfunction
could occur due to leaked liquids. If the leaked liquid
contacts the skin, wipe it off with a cloth, otherwise the
skin could become rough.
• Do not put batteries into fire or try to recharge them.
• Batteries run for six months to one year in normal use.
But the batteries supplied are for confirming operation
and may not run that long. When the remote control starts
failing to work properly, replace the batteries with new
ones.


