background image

Page 

 of 

12

14

ADDENDUM

Handheld Reader Channel and Address Programming

Handheld Readers will provide for field selection of Channel (2-14) and Network Address (0-1) using 
programming cards. The channel programming cards are labeled Channel 2-14. 
Handheld wireless networks are separated through the use of separate channels. A Reader is shipped 
preconfigured to communicate with its Base Unit over one specific channel. If it becomes necessary to 
configure channels using the programming cards, follow the instructions below. Note: Address and Channel 
Programming cards are used only with the Handheld Reader, not the Base Unit. 


Use high-frequency programming cards with the HHR-3157 models.


Use low-frequency programming 

cards with the HHR-3152 models. Use either low or high programming frequency cards with the 
HHR-3156 models.


To change the channel of the Base Unit

1. Remove power from the Base Unit. 
2. Using the diagram on pg. 10 of this document as a reference, modify the DIP switches of the Base Unit 

for the desired channel. 

3. Apply power to the Base Unit. 
4. Observe that the Base Unit no longer communicates with the Handheld Reader. 

To change the channel of each Handheld Reader

1. Turn the Handheld Reader on by pressing the power button momentarily. 
2. Observe that it is not communicating with the Base Unit. 
3. Present the desired channel programming card. 
4. Observe the Red LED wink for 1/2 second indicating the card was read. 
5. The Blue LED should start blinking indicating that it is communicating with the Base Unit. 

Card Programming - Troubleshooting 

For all Handheld Reader steps indicated above, the following error conditions may occur. 

Step 2 - If the Red LED does not illuminate, the batteries may need to be replaced or charged. 
Step 4 - If you do not see the Red LED wink out for 1/2 second, present the badge again.  
 - If the Red LED still does not indicate a badge read has occurred, then there may be a problem with the 
Reader.  
 - When trying multiple times, make sure the badge is at least 1 foot away from the Handheld Reader before 
presenting the badge again. 
 - Allow the unit to power off for 1 minute and try again. 

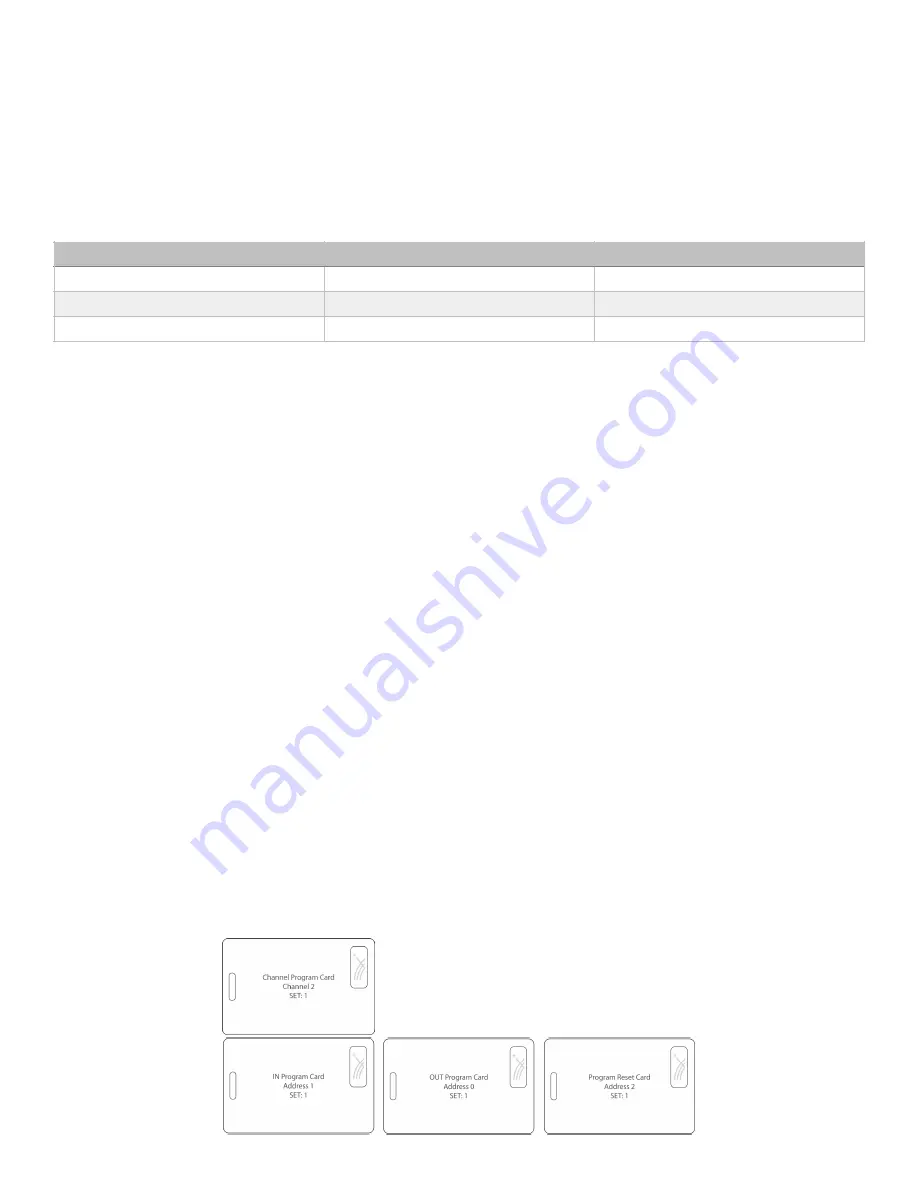
Sample Channel & Address Cards

Model

Channel Programming Card

Address Programming Card

HHR-3152 (low frequency)

HHR-CPCL

HHR-APCL

HHR-3156 (high/low frequency)

HHR-CPCL or HHR-CPCH

HHR-APCL or HHR-APCH

HHR-3157 (high frequency)

HHR-CPCH

HHR-APCH

Summary of Contents for HHR-3150 Series

Page 1: ...roximity RF Card Reader Dock HHR 6400 Card Reader base interface HHR RCHL Card Reader charging unit HHR 3156 GY gray UPC 816684007354 HHR 3156 WH white UPC 816684007361 HID Prox EM4102 AWID Prox ISO14...

Page 2: ...iceable Charging Dock Input 100 240 Vac 1A 50 60Hz Max Relays Max Switching 220Vdc 30W resistive 1A 250Vac 37 5VA 1A Running Spec with load 30Vdc 1A resistive 125 Vac 0 3A resistive 1x10⁵ operations 2...

Page 3: ...4 Important safety information 4 Bench testing 5 System overview 5 Field installation and testing 6 Handheld Reader diagram 9 LED indicators 9 Pin layout Base Unit 10 Base Unit and access control pan...

Page 4: ...e a fire which could result in personal injury and property damage Never charge batteries unattended When charging LiPo Li ion batteries batteries should constantly be observed to monitor the charging...

Page 5: ...on Board A in Base Unit will also flash green 5 Test whether Reader is communicating with Board B Press Reader s Out gate button and repeat 4 6 Test the Handheld Reader s gate selection feature Press...

Page 6: ...mounted at least 10 above the ground outdoors or 5 6 above the floor indoors and should not be mounted directly above the area where Handheld Readers will be used If obstacles are present vehicles tr...

Page 7: ...east 1 25 inches Place the wall anchors into the newly drilled holes b If NOT using wall anchors Following the hole pattern shown above use a 7 64 inch drill bit to drill holes into the surface with a...

Page 8: ...Reader s In button The red In LED will light and the Blue LED will continue to blink Repeat sequence with the Out button 4 To simulate a valid badge read make sure Handheld Reader is set to In mode t...

Page 9: ...top right card verification Illuminated Valid badge Reader should also vibrate In Gate Lane selection LED Illuminates red when In gate is selected Out Gate Lane selection LED Illuminates red when Out...

Page 10: ...Input 5VDC Output Prog Res 2 Prog Res 1 LED Input D1 Data Output D0 Clock Output Relay 4 N O Relay 4 COM Relay 4 N C Relay 3 N O Relay 3 COM Relay 3 N C Ground Aux Output Relay 2 Input Relay 1 Input...

Page 11: ...S232 Out RS232 In Ground Aux Out Relay 2 Input Relay 1 Input 8 to 16 VDC Ground exp exp 5V Out P R 4 P R 3 LED In D1 Data Out D0 Clock Out Relay 4 N O Relay 4 Com Relay 4 N C Relay 3 N O Relay 3 Com R...

Page 12: ...e Unit no longer communicates with the Handheld Reader To change the channel of each Handheld Reader 1 Turn the Handheld Reader on by pressing the power button momentarily 2 Observe that it is not com...

Page 13: ...ignal Strength Meter N o S i g n a l 9 0 d b m t o 8 0 d b m 8 0 d b m t o 6 0 d b m 6 0 d b m t o 4 0 d b m 4 0 d b m t o 2 0 d b m 2 0 d b m t o 0 d b m Link Quality Energy The signal strength of th...

Page 14: ...should be a clear line of sight between the Repeater and both units Mount the Repeater at the same height at which the Base Unit is mounted preferably on a non metal surface Connect a power supply to...

Reviews: