background image

6. Installation

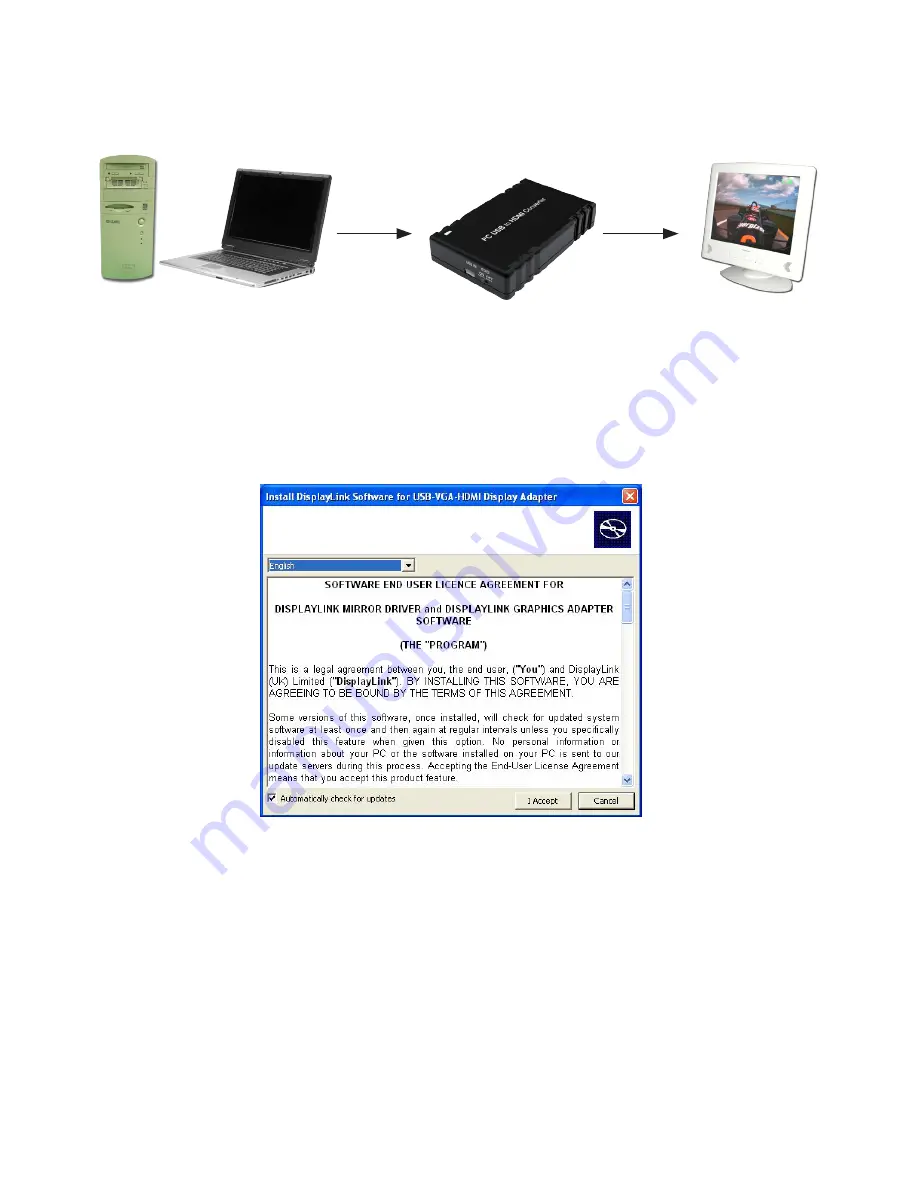
Product overview (Picture)

Step 1

:  Insert the provided driver CD into your CD-ROM drive, then click 


the

 Setup.exe

 file and select your language to begin the installation. 

Step 2: 

Connect the device to a USB 2.0 port by using the provided USB cable.

Step 3: 

Use the HDMI cable to connect your monitor or projector.

Step 4: 

Switching EDID. The default setting is on and the device will detect the


TV's EDID. Leave as is when the display is working properly. Switching  


the input source from on to off means the PC must be rebooted in   


order for the device to use the built-in EDID. However when switching  


from off to on it is not necessary to perform a reboot.

PC/NB

Monitor

CDL-125

3

Summary of Contents for CDL-125

Page 1: ...CDL 125 USB to HDMI Converter Operation Manual CDL 125 ...

Page 2: ...p current the information contained in this document Cypress Technology reserves the right to make improvements to this document and or product at any time and without notice Copyright Notice No part of this document may be reproduced transmitted transcribed stored in a retrieval system or any of its part translated into any language or computer file in any form or by any means electronic mechanica...

Page 3: ...injury to persons To prevent fire or shock hazard do not expose the unit to rain moisture or install this product near water Never spill liquid of any kind on or into this product Never push an object of any kind into this product through module openings or empty slots as you may damage parts Do not attach the power supply cabling to building surfaces Do not allow anything to rest on the power cabl...

Page 4: ...ntents 1 4 System Requirements 1 5 Features 1 6 Installation 3 7 Using the DisplayLink Manager 4 7 1 Using the DisplayLink Manager 4 7 2 Using More DisplayLink Manager 8 7 3 Firmware Update 8 8 Uninstall the Device Driver 9 9 Specifications 11 10 Troubleshooting 11 ...

Page 5: ... The Display Link Manager supports HDMI outputs and a screen resolution up to 1440 x 900 16 32 bit this follows the displays native resolution DisplayLink Manager can be used in many ways and those who are teachers designers architects or engineers will find the extra screen real estate especially useful 2 Application Duel screen display Video editing Multi tasking 3 Package Contents USB to HDMI Co...

Page 6: ... modes Adjustable screen resolution and color quality in extended mode Allows you to rotate the screen on the additional display by 90 180 or 270 degrees Automatic updates Compatible with Windows XP and Vista 32 64bit and Window 7 Mac OS X Tiger 10 4 11 or Mac OS Leopard 10 5 5 Completely new architecture to support Vista Aero 32 64bit Supports all Intel Macs No external power supply needed power ...

Page 7: ...ovided USB cable Step 3 Use the HDMI cable to connect your monitor or projector Step 4 Switching EDID The default setting is on and the device will detect the TV s EDID Leave as is when the display is working properly Switching the input source from on to off means the PC must be rebooted in order for the device to use the built in EDID However when switching from off to on it is not necessary to ...

Page 8: ...will show every available screen resolution Color Quality Select the screens color quality available only in extended mode 7 DisplayLink Manager 7 1 Using the DisplayLink Manager After the driver is installed a utility DisplayLink Manager will automatically appear in the system tray The utility allows you to quickly change the settings and resolution for DisplayLink Manager Right clicking the icon...

Page 9: ... Screen Rotation Rotate the screen on the additional display by 90 180 or 270 degrees Extend to Reposition the extended screen to the top bottom left or right of the primary display 5 ...

Page 10: ... Extend Set the DisplayLink Manager to Extended mode Main Monitor Use to select which display will be your Main Monitor Notebook Monitor Off Select this to turn off your Notebooks display 6 ...

Page 11: ...he DisplayLink Manager to Mirror mode You can see the same desktop image on the additional monitor Advanced Directly access the Display Properties You can also adjust the resolution color quality position and refresh rate via the Display Properties 7 ...

Page 12: ...playLink Manager You don t need to install the driver again as long as the previous driver installation process was completed in advance It will automatically define the ID of the new DisplayLink Manager All the DisplayLink Managers will be listed in the Display Properties or the display manager menu NOTE When connecting more DisplayLink Managers to a computer a system with higher CPU performance i...

Page 13: ...an now customize the update method and the frequency at which the system checks for updates 8 Uninstall the Device Driver Follow the steps below to uninstall the driver Step 1 Open the Control Panel Start Control Panel Add or Remove Programs Step 2 Select USB VGA HDMI DisplayLink Adapter and click Remove 9 ...

Page 14: ...Step 3 Click Yes to confirm the removal Step 4 Click Yes to restart your computer 10 ...

Page 15: ...nnectors are plugged in correctly 3 Make sure the USB port that you are using is USB 2 0 4 Make sure the additional monitor is connect ed and powered on 5 Make sure the operating system is compat ible Display Link Manager is compatible with Windows 2000 XP and Vista 32bit 6 Try a different USB 2 0 port or computer 7 Check USB cable s specification DVD player not working when move it over to the ext...

Page 16: ...20091127 MPM CDL125 Home page http www cypress com tw CYPRESS TECHNOLOGY CO LTD ...

Reviews: