Cypress Hills AXCRGREY17, Assembly Instructions Manual
The Cypress Hills AXCRGREY17 Assembly Instructions Manual is available for free download from manualshive.com. This comprehensive manual provides step-by-step guidance on assembling your product efficiently. Ensure a smooth assembly process by accessing the manual today and enjoy the benefits of your Cypress Hills AXCRGREY17 to the fullest.
Share
Download


Reviews:
No comments
Related manuals for AXCRGREY17

432
Brand: Ofs Pages: 18

SHELF CLASS BRUNO BOOKSHELF
Brand: Dutch BONE Pages: 3

Stara 6773809
Brand: Elle Decor Pages: 8

8761790686
Brand: HELD MOBEL Pages: 3

IVYL8K
Brand: Walker Edison Pages: 10

991348
Brand: WIEMANN Pages: 5
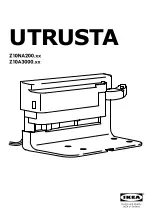
UTRUSTA Z10NA200 Series
Brand: IKEA Pages: 8

Vermont 03VER0808-V1
Brand: Mercia Garden Products Pages: 8

SQUID SMALL
Brand: MANGA STREET Pages: 6

7000GDRC
Brand: Whittier Wood Pages: 2

Cubeicals HW62969
Brand: Costway Pages: 5

SIDEBOARD LUXE
Brand: iCube Pages: 2

C-1340-A
Brand: Garden Treasures Pages: 12

Dakota 9200
Brand: Armour Home Electronics Pages: 2

Patio Premier 203028
Brand: J&J Global Pages: 4

0-65857-16963-8
Brand: Dorel Asia Pages: 16

EEI-3189
Brand: modway Pages: 5

CLAIRBORNE DY11079-7-B
Brand: HAMPTON BAY Pages: 7


