3
3. Digital audio output:
- Connects the Toslink output to the Toslink input of your display using
optical cable.
- Connects the digital SPDIF output to the digital coaxial input of the
display using coaxial cable.
4. HDMI inputs:
Connect your various HDMI sources to each of the HDMI input of the unit
using HDMI cables.
5. Digital audio inputs:
- Connects your various Toslink sources to each of the Toslink input of the
unit using optical cables.
- Connects your various S/PDIF sources to each of the coaxial input of the
unit using coaxial cables.
6. Power:
Plug the supplied 5VDC power supply into the unit.
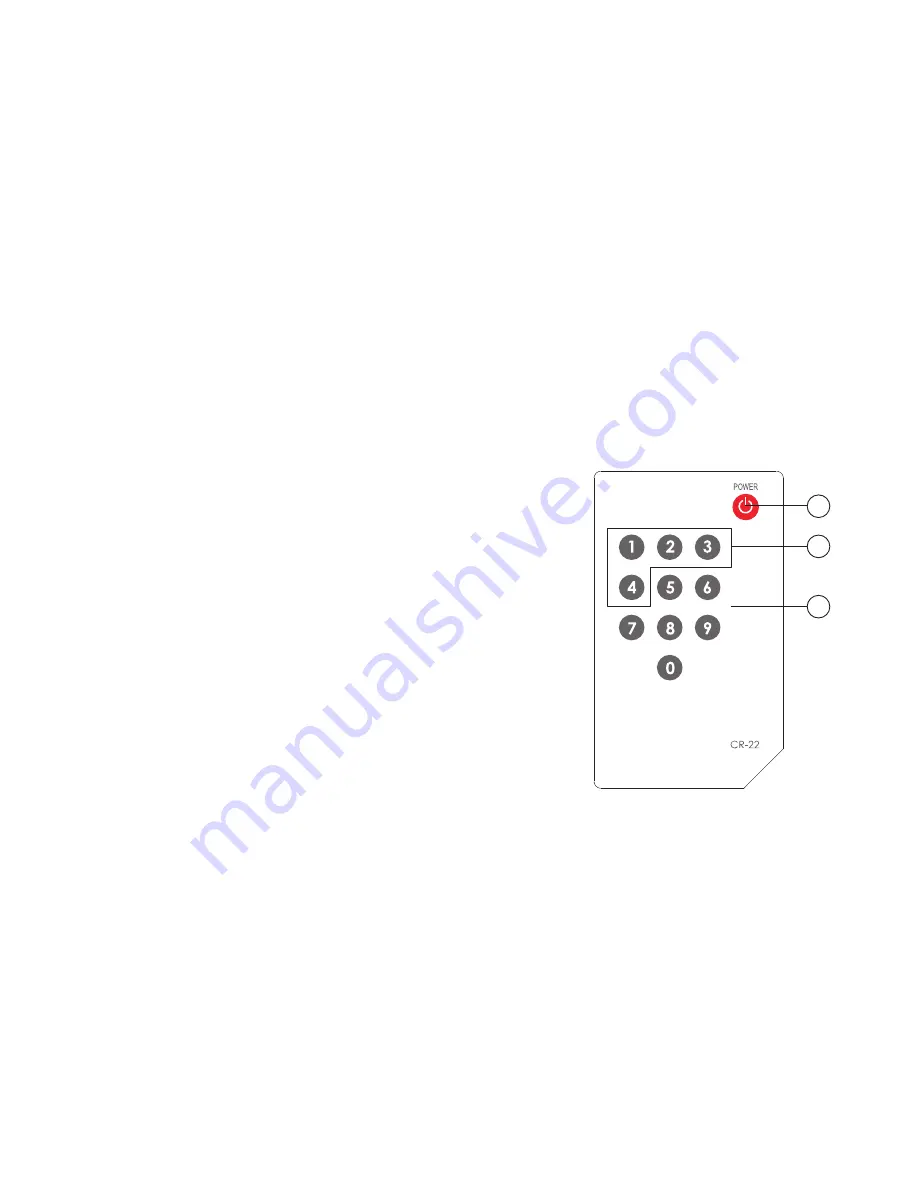
4.3 Remote Control
1. Power:
Press the button to turn on/off the unit.
2. Direct input selector:
Press 1, 2, 3 or 4 to select the desired input
source.
3. Void buttons (No function).
1
2
3
4. Operation Controls and Functions
4.1 Front Panel
1. Remote control sensor.
2. Input select/Indicators:
Press the "INPUT" button repeatedly to switch to your desired input source
(HDMI/Toslink/Coaxial) and the LED will illuminate to indicate which input
source is being selected.
3. Signal Enhancement/Indicator:
Press the "Signal Enhance" button to turn on this feature to improve signal
quality after long distance transmission. Press again to turn off. The LED will
illuminate when the signal is enhanced.
This feature is useful when encountering poor picture quality, if an
appropriate picture quality is displayed, the use of the SIGNAL ENHANCE
button will not produce a visible change.
4. Power LED Indicator:
The LED will illuminate when the power is connected.
4.2 Rear Panel
1. HDMI output:
Connect the HDMI output to the HDMI input of your display using HDMI
cable.
2. RS-232:
Connect the 9-pin D-sub female connector to your other control console
for remote control.


