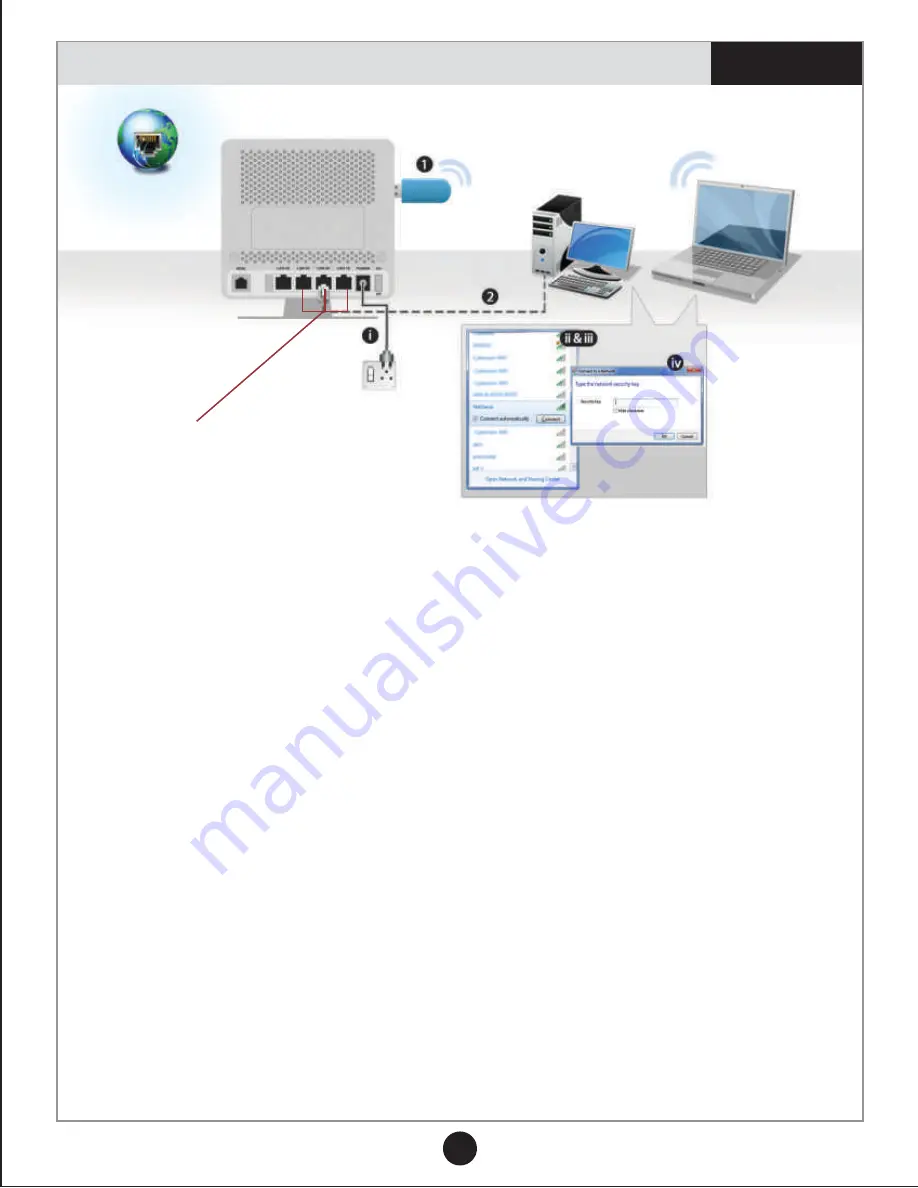
1. Plug a 3G USB modem in the USB slot provided in the NetGenie appliance.
2. Use the RJ-45 Ethernet cable provided with the NetGenie appliance to connect
your computer to any of the “LAN” NetGenie sockets and switch-on the NetGenie
appliance.
OR
i) Switch-on the NetGenie appliance. If you are connecting to the Internet over
Wi-Fi, start your laptop.
ii) Make sure your Wireless Network Adapter is enabled. Your laptop will
automatically detect the wireless network (SSID) named “NetGenie”.
iii) Click the network icon in computer's system tray (bottom-right of your screen)
and Select “NetGenie”.
iv) After selecting “NetGenie”, you will be asked to enter the exact Security/Pass
Key printed on the sticker at the back of your appliance.
3. Enter the IP address: http://10.1.1.1 in the address bar. Use the default User
Name and Password i.e. ‘admin’ to log in.
4. Go to Network Settings > Internet.
5. Select USB Modem and apply the configurations after filling in the required
details. NetGenie will automatically connect to the Internet.
6. Open your browser and start surfing the Internet, you will be served with NetGenie
Splash Screen (
).
Your computer is now secured with the Quick Security feature automatically turned
on.
Page 10
Secure Internet Connectivity using 3G USB Modem
NetGenie
Secure Internet Appliance
NetGenie
Power Cable
Internet
Connect your Computer/
LAN here to any of the ports
Scenario 3
Laptop
Desktop
6


