background image

About Multi-Session Discs

Compatibility Information for Discs with Multiple Sessions

Data is recorded onto CD-R/RW discs in units knows as “sessions”. A session consists of information regarding the 
contents of the recording, the actual data, and closing information. Using this unit, a session is created when any of 
the following operations are performed: 

Ÿ

Making a Disc Copy of a Single Session Disc

Ÿ

Pressing REC in the Burner Interface to copy selected files 

Once a session exists on a disc, any subsequent copying or recording 
operations on the same disc will result in a new session being added, 
thereby creating a “multi-session” disc. 

Although multi-function discs are fully supported by this unit, most DVD 
players and many other types of optical drive products have compatibility 
issues and limitations regarding multi-session discs. Some common 
problems are:

Ÿ

Only the first session is playable on some DVD Players

Ÿ

Only the last session is playable on PCs

Ÿ

On some DVD Players, multiple sessions may be supported in certain 
configurations - such as where the same type of data is contained in 
each session - but “mixed mode” discs, where different sessions do not 
contain the same type of data, are not supported.  

After Inserting a Multi-Session Disc

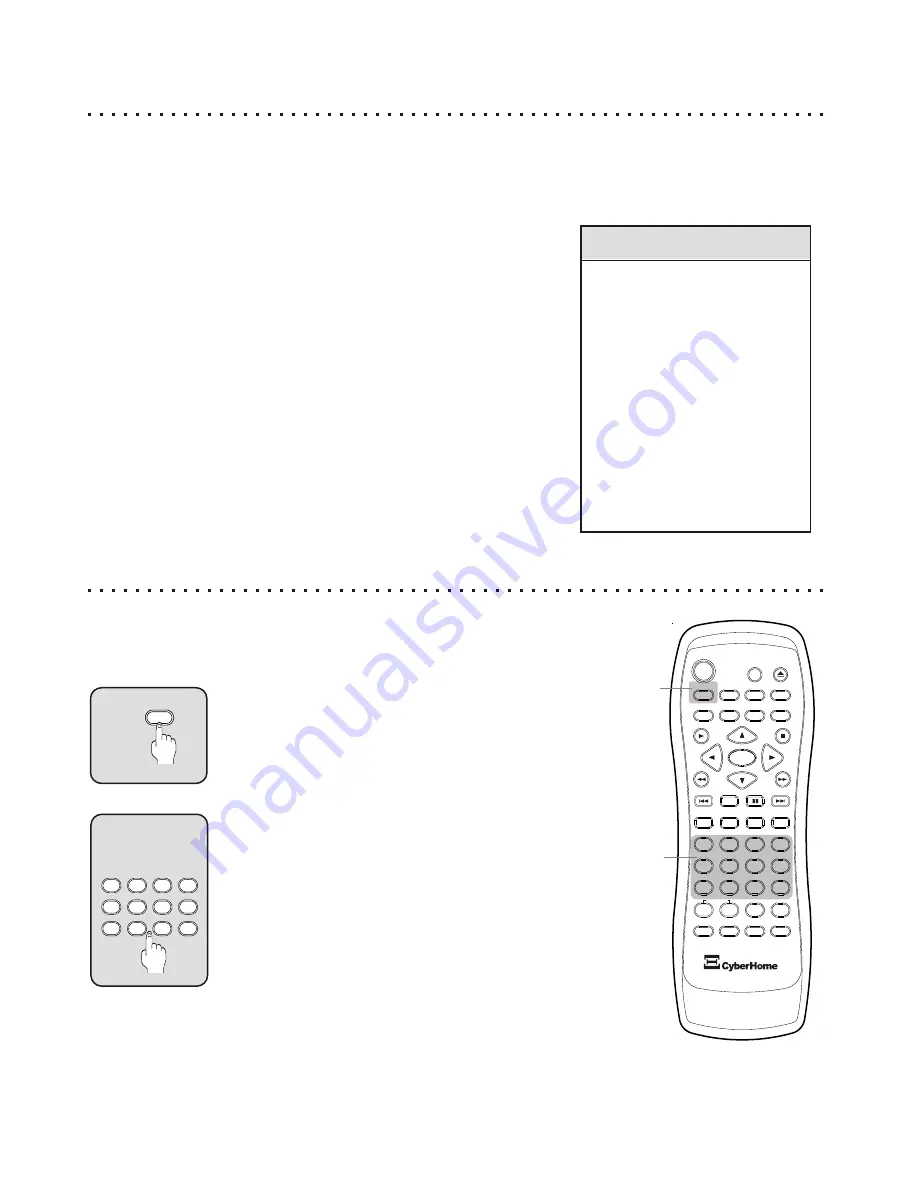
When a multi-session disc is inserted in the unit, the 
message “MULTISESSION CD” is displayed on the lower 
right of the screen, followed by the number of sessions 
available on the disc. While this prompt remains on screen, 
use the NUMBER keys to input the session number to play.  

A

B

5

4

6

C

+10

2

1

3

8

7

9

0

ZOOM

EFFECT

1/ALL

REPEAT

RETURN

SLOW

ENTER

MUTE

SUBTITLE

AUDIO

ANGLE

POWER

GOTO

PBC

SETUP

OPEN/CLOSE

TITLE

DISPLAY

PROG

MENU

A-B

PLAY

STOP

BOOKMARK

INTRO

PAUSE

BURNER

DRIVE

B

0

0

0

0

0

0

0

0

0

0

0

0

5

4

6

C

+10

2

1

3

8

7

9

0

36

GOTO 

A

Selecting a Session During Playback

The TITLE button is used to select a session after disc 
playback has started. To select a session to play, press 
TITLE, followed by the session number.  

Selecting a Session

Working with Multi-Session Discs

This unit fully supports multi-session discs and allows for the selection of a session 
when the disc is first inserted, as well as during playback. 

Quick Tips

Ÿ

Be sure to keep these 
compatibility issues in mind 
when working with CD-R and 
CD-RW discs that are 
destined for play on standard 
DVD players. 

Ÿ

In particular, remember that 
selecting the RECORD Icon 
and copying files or tracks 
will create and close a 
session. So, if you wish to 
make a single-session disc, 
select ALL the files you wish 
to copy BEFORE recording. 

Summary of Contents for CH-RDV 2000

Page 1: ...Burner Interface makes copy operations simple to perform Duplicate an entire disc or select particular files for copy to CD R RW discs The Burner Interface also lets you erase CD RW discs quickly and easily And of course your Cyber Home DVD Player is designed to provide a great Home Theater experience with super crisp Video and thundering Digital Sound Please retain this User Manual for future ref...

Page 2: ...cement of the obsolete outlet 10 Protect the power cord from being walked on or pinched particularly at plugs convenience receptacles and the point where they exit from the apparatus 11 Only use attachments accessories specified by the manufacturer 12 Use only with the cart stand tripod bracket or table specified by the manufacturer or sold with the apparatus When a cart is used use caution when m...

Page 3: ...he unit has been dropped or otherwise damaged which may become hot turn off the power and disconnect the AC power cord CONDENSATION If smoke odors or noises are emitted from the unit Moisture may form on the lens in the following cases turn off the power and disconnect the AC power cord immediately after a heater has been turned on PLACEMENT in a steamy or very humid room Avoid placing the unit in...

Page 4: ... Track or Time Position 21 Previewing Titles Chapters or Tracks Before Playback 22 Saving Locations for Quick Play with Bookmarks 22 Repeating a Title Chapter Track or Disc 23 Repeating a Specific Time Segment 23 Playing Tracks in a Particular Order with Program Play 24 Playing MP3 Files with the MP3 Navigator 25 Viewing JPG Files on Your TV 26 Using the Zoom Function 27 More Audio Video Functions...

Page 5: ...Function Specify the playback sequence JPG and Audio CDs to CD R RW discs for Audio CD or VCD Tracks Erase CD RW discs to free up space Quick Erase Coaxial and Optical Digital Audio Outputs takes only 1 minute Use Full Erase to completely 5 1 Channel and Stereo AnalogAudio Outputs wipe out sensitive data Digital Video Discs This player is suitable for DVDs of 12cm and 8cm sizes Single Sided and Do...

Page 6: ...oducts or solutions which contain benzene thinner or any other vaporizing substances as they may damage the disc surface Never add labels or adhesive tapes on the discs and be careful not to scratch or damage the disc surface Storage of Discs To prevent discs from becoming bent or deformed they should be vertically kept in the disc storage case To prevent damage avoid leaving discs in your car whe...

Page 7: ...usly If the unit will not be used for an extended length of time it s wise to remove the batteries before storage The life of the batteries depends on the amount of usage With typical use a battery life of approximately 6 months can be expected 1 Push down and then outwards to remove the battery compartment cover 2 Insert Batteries following polarity marked inside compartment 3 Slide Cover back in...

Page 8: ...me DVD or resume playback Audio CD POWER Press the power button to put player into Standby mode Press again to power unit on TITLE Used to enter the Title Menu supported on some VCD and DVD discs MENU Press to enter the menu of a DVD or VCD disc Also used to enable or disable PBC mode for VCDs that support this feature MUTE Press to temporarily turn off audio SUBTITLE Use with ARROW keys to turn s...

Page 9: ...s ZOOM Press to zoom in on picture during playback or on a still frame NUMBER BUTTONS Use the number buttons to input numerical values during programing with GOTO or to directly select a track to play REPEAT 1 ALL Press to enable repeat mode Press again to cycle through choices Repeat Chapter Title or Disc REPEAT A B Press this button to set the start of the segment you wish to repeat Press again ...

Page 10: ...Open Close Push to Open or Close the disc tray Stop Press to stop play but hold resume location Press again to completely stop play and reset playback to beginning of disc Play Press to begin Playback of the disc Pause Press to Pause disc playback Press repeatedly to step through one frame at a time To continue normal playback press Play Previous Track Next Track Advances to the next or previous t...

Page 11: ...nd other useful information Some functions require specific disc formats or features DVD Display Functions 11 Dimming the Front VFD Display Adjusting the Brightness of the Front Display With NO DISC in the unit the DISPLAY button functions as a 4 phase Dimmer for the DVD Player s front VFD Vacuum Flourescent Display DISPLAY SLOW SUBTITLE AUDIO ANGLE POWER GOTO PBC SETUP OPEN CLOSE TITLE DISPLAY ME...

Page 12: ...gital Receiver s CoAxial Input Optical Digital Audio Connector Use special Optical Digital Audio Cable to connect to Digital Receiver s Optical Input S Video Connector Use special S Video Cable to connect to TV s S Video In jack Back Panel Connectors 12 CAUTION RISK OF ELECTRIC SHOCK DO NOT OPEN RISK OF ELECTRIC SHOCK DO NOT OPEN OPTICAL VIDEO VIDEO S VIDEO OUT AUDIO AUDIO DIGITAL OUTPUT R L VIDEO...

Page 13: ...16 Page 16 Television Connections One Required In order to use your DVD Player your TV must support at least one of the Video Input types shown below To get started identify the best Video Connection shown below that your TV offers and proceed to that section If you are using your TV s speakers for audio rather than a separate receiver or amplifier you will use the Stereo Audio In outlined in sect...

Page 14: ... DVD Player s Setup Menu to 2CH See pg 40 S Video Connector Typical Connection Connecting to a TV with Composite Video In and Stereo Audio In If your TV has only a single Video Input jack typically a yellow colored plug you will use the Composite Video output of the DVD Player for the Video Connection We ll also assume your TV has Red and White Stereo Audio In connectors You will use these for the...

Page 15: ... press the SETUP button on the Remote Control to enter the DVD Player s On Screen Setup Menu Use the ARROW keys to navigate down to the VIDEO menu and press ENTER Use the ARROW keys to proceed down to the OUTPUT setting Press ENTER Use the UP DOWN keys to select YCbCr Press ENTER to confirm your choice You will now see the video disappear as the player switches to YCbCr Component Output Step 3 Con...

Page 16: ...UB WOOFER CENTER SURROUND FRONT R L COAXIAL DOLBY 5 1 CHANNEL AUDIO IN SUB RR FR CTR RL FL RECEIVER 4 Using the Optical and CoAxial Digital Audio Output Connections Your DVD Player features two DigitalAudio Outputs to provide the ultimate in realism for your Home Theater experience Use this option to get the most out of discs recorded with Dolby 5 1 Digital Surround Sound or Digital Theater System...

Page 17: ...on by the remote When the unit is turned off by the remote it will go into STANDBY MODE This allows the unit to be quickly awakened by pressing the POWER key on the remote again Opening the Disc Tray Press the OPEN CLOSE button on the remote or on the player to the right of the disc tray to insert a disc There are two grooves in the disc tray 12cm and 8cm Make sure the disc is properly set into th...

Page 18: ...he video in frame by frame mode Pressing PAUSE while playing Audio CDs will mute the sound and hold the play position Press the PLAY button to resume normal playback Quick Tips Screen Saver When a DVD or Video CD remains paused on a still frame for an extended length of time approximately 3 minutes the Screen Saver will be activated The Screen Saver guards against damage to your TV screen or scree...

Page 19: ...ng the Title Menu Title menus are available on some DVDs These menus allow you to select a particular Title or Chapter to play With some DVD discs pressing this button will bring up the normal DVD menu If the not available symbol is displayed on screen this feature is not available on your disc Navigate with the ARROW Buttons With DVDs use the ARROW buttons to navigate through the menu left right ...

Page 20: ...ow to normal speed To cycle through all speeds continue to press the SLOW key Press PLAY to resume normal playback 1 FORWARD 2 SLOW REVERSE 1 Advancing to the Next Track or Skipping Back Through Tracks Your DVD Player provides a convenient method for advancing or skipping back through tracks chapters songs or other segments on DVD VCD or Audio CD discs 1 NEXT PREVIOUS The Next and Previous Track B...

Page 21: ...le Chapter or Track depending on the disc type GOTO 1 0 0 0 0 0 0 0 0 0 0 0 0 5 4 6 C 10 2 1 3 8 7 9 0 Jumping to a Specific Chapter Track or Time Position 21 2 Navigating the GOTO Menu Select the Title Chapter or Time categories by pressing the LEFT and RIGHT ARROW keys to move to the appropriate box Use the UP DOWN ARROWs to select a Title or Chapter to go to or enter a Time Value with the NUMBE...

Page 22: ...ou can also use bookmarks with VCDs andAudio CDs Saving Locations for Quick Play with Bookmarks 1 3 4 Press the Bookmark Button Press the Bookmark button to bring up the Bookmark Menu 1 BOOKMARK Select the Location to Store the Bookmark Use the L R ARROW buttons to navigate through the available Bookmark locations 1 5 to the one that you would like to save the current disc play position to In the ...

Page 23: ... repeating segment press the REPEATA B button The following display will appear in the upper left hand corner on the screen The display indicates that the start point of your repeat segment has been marked Next you will enter the endpoint of the segment you want to repeat When you reach the ending for your segment press REPEATA B a second time Now the display reports This indicates that the player...

Page 24: ... Track to the Program List with ENTER Hit the ENTER key on a Track Number that you want to add to the Program List In this example we press ENTER on track seven Notice that it s now added to the program list 2 Playing Tracks in a Particular Order with Program Play 24 PROGRAM MENU DISC PROGRAM 1 2 3 4 5 6 7 8 9 10 11 12 13 14 15 16 C AC RETURN START PROGRAM MENU DISC PROGRAM C AC RETURN START 1 2 3...

Page 25: ...vious folder press the LEFTARROW key ENTER Press ENTER to Play Pressing ENTER will play the selected File Folder or Repeat Program Also use ENTER to open folders If no Repeat Mode is selected pressing ENTER on a file will begin playing all files on the disc in the order they are stored 25 Rock Roll Tunes Dance All Night 1 23 4 21 1 You re the girl for me 2 Joe Starls Where have all the good ones g...

Page 26: ...HT ARROW keys to Rotate the picture and the SLOW button to see a Negative of the image MENU 2 PBC File Listing List of files in current directory with selected file highlighted At the beach Nightlife 1 Vacation1 jpg 3 Vacation3 jpg MEDIA PLAYER Vacation Pics 1 2 3 Current Folder Displays the current folder on the disc 2 Vacation2 jpg RETURN 1 Exit the Slide Show with RETURN If your disc contains o...

Page 27: ...on 3 Navigate with the ARROW or NUMBER Keys You can use theARROW keys to move to a part of the screen you would like to see closer Pressing the LEFT ARROW button will move the focus of the Zoom to the left and so on 1 Return to Normal Viewing Press the ZOOM button again to return to normal playback mode The ZOOM icon disappears from the screen 4 Quick Tips Picture quality of the Zoomed Image will ...

Page 28: ...olby Digital 5 1 and Stereo Audio Video and Audio CDs offer fewer audio options usually including Mono Left Right Mix Mono and Stereo ANGLE D Multi Angle Support ANGLE BUTTON Some DVDs are recorded with a feature called Multi Angle View If you are viewing a DVD that includes this feature press the ANGLE button to bring up the Angle Menu Then use the UP DOWN ARROW keys to switch between available A...

Page 29: ...marks 22 1 2 3 4 5 6 7 8 1 2 3 4 5 6 7 8 Tr OFF PBC ON A B OFF OFF A B 00 00 00 Jump to Track 21 Repeat Playback 23 Jump to Time 21 A B Repeat Mode 23 Program Random Play 24 Bookmarks 22 1 2 3 4 5 6 1 2 3 4 5 6 Tr OFF OFF OFF A B 01 01 5 1 CH 01 03 EN C01 00 00 00 EN ON T01 OFF OFF A B 1 2 2 2 1 Navigate with the ARROW Buttons Press the RIGHT LEFT ARROW keys to move through the menu Continue to th...

Page 30: ... Disc Formats CD Recordable CD R and CD ReWritable CD RW discs of up to 700MB capacity are supported for copy and record operations Discs of 8cm and 12cm diameter are supported Copy and Record Function Buttons DRV Front Panel DRIVE Remote Control Selects the working drive When the DRIVE button is pressed the Remote Control and Front Panel functions will be transferred to the drive selected and any...

Page 31: ...generally used only for discs percentage of space used and red large percentage of containing sensitive data space used Also when selecting files to copy this bar will STATUS show a preview of the disc space that will be used for each Shows the copy progress of each file in percentage file selected completed during individual file copy operations Three OPEN CLOSE ICONS are used to display the stat...

Page 32: ...n and press ENTER Individual files will not be listed with Data CDs such as program discs Notice that the Disc Space Indicator at the bottom of the screen shows FULL since there is no disc hence no space available CD BURNER 4 40 CD RW 8x 702MB free 5 20 6 16 4 56 5 13 Insert a CD R or CD RW disc in the CD RW drive Press ENTER again to close the tray Notice the Disc Usage and Disc Type indicators a...

Page 33: ...en The RIGHT and LEFT ARROW keys are used to navigate to an icon Choose the Open Close icon and press ENTER Individual files will not be listed with Data CDs such as program discs Notice that the Disc Space Indicator at the bottom of the screen shows FULL since there is no disc hence no space available CD BURNER 4 40 CD RW 8x 232MB free 5 20 6 16 4 56 5 13 Insert a CD R or CD RW disc in the CD RW ...

Page 34: ...RACK 05 Also use the ENTER key to clear the check mark from files that have been selected for copy When files are selected for copying notice that the Disc Type and Usage Indicators at the bottom of the screen will show a preview of the disc space that will be used for each file These indicators provide a convenient method to determine how many files will fit on any given CD R RW disc 4 Begin the ...

Page 35: ...n The Disc Type indicator appears to the left of the icons and indicates the type of disc and amount of free space The Disc Usage Indicator appears at the very bottom of the screen and gives a graphical representation of the amount of disc space used In the example below an 8X CD RW disc is inserted with about 50 of its space used ENTER 3 Start the Erase Operation Use the RIGHT ARROW key to select...

Page 36: ...e same type of data are not supported After Inserting a Multi Session Disc When a multi session disc is inserted in the unit the message MULTISESSION CD is displayed on the lower right of the screen followed by the number of sessions available on the disc While this prompt remains on screen use the NUMBER keys to input the session number to play A B 5 4 6 C 10 2 1 3 8 7 9 0 ZOOM EFFECT 1 ALL REPEA...

Page 37: ... 3 4 ENTER Move Around the Menu with the ARROW Keys Use the ARROW buttons to move around the menu In this example we ll hit the DOWN key twice to go to AUDIO SETUP then hit ENTER to enter that Menu Then we ll hit the DOWN key again to select DIGITAL Pressing the ENTER key gives us the UP DOWN ARROWs Now we can use the UP DOWN ARROW keys to make a selection In this example we will choose LPCM Final...

Page 38: ...he CHILD option You can choose from 8 levels of Parental Control corresponding to the standard rating system in the USA The available levels and their equivalent ratings are listed to the right CHANGE CANCEL PASSWORD Here is where you can change or Cancel your existing password If you have not already entered the existing password in the Setup Menu you are prompted for the old password Enter the e...

Page 39: ... the type of video input jack you are using on your TV Composite Video is the most common video connection type and is supported on most TVs S Video is a higher quality video signal that is separated into brightness and color channels YCbCr or COMPONENT video is used for TVs Computer Monitors and Projectors that support three video inputs one for a color channel Yellow Blue Red LANG VIDEO AUDIO CH...

Page 40: ...ls is known as compression You can adjust the level of this compression in three levels MAXIMUM Highest compression STANDARD Normal compression and TV MODE Optimized for smaller speakers LANG VIDEO AUDIO CHILD OTHERS EXIT ANALOG DIGITAL D R C BASS ENTER RETURN SETUP 5 1CH DOLBY DTS STANDARD OFF DIGITAL DOLBY DTS LPCM Most DVDs are produced with Dolby or DTS 5 1 Channel soundtracks So normally this...

Page 41: ...frikaans 7176 Galician 7778 Mongolian 8469 Tegulu 6577 Amharic 7178 Guarani 7779 Moldavian 8471 Tajik 6582 Arabic 7185 Gujarati 7782 Marathi 8472 Thai 6583 Assamese 7265 Hausa 7783 Malay 8473 Tigrinya 6588 Aymara 7273 Hindi 7784 Maltese 8475 Turkmen 6590 Azerbaijani 7282 Croatian 7789 Burmese 8476 Tagalog 6665 Bashkir 7285 Hungarian 7865 Nauru 8479 Tonga 6669 Byelorussian 7289 Armenian 7869 Nepali...

Page 42: ...sc may not match that of the player In this case the disc cannot be used The Disc Doesn t Eject If the player is in Standby Mode the disc will not eject Turn the player on with the Remote Control and then eject the disc No Sound from TV or Speakers If the DTS soundtrack is enabled in the DVD Disc Menu but you are using Stereo Analog audio the sound will not work Try switching the soundtrack to Dol...

Page 43: ...gital Audio More than 90dB Audio dynamic range Digital Audio More than 80dB Harmonic Distortion Digital Audio Less than 0 015 Wow and Flutter Less than 0 001 W PEAK Connections Component Video Out Y 1 0Vpp 75 Ohm Negative Sync Pb Pr 7 Vpp 75 Ohm S Video Out Mini DIN 4 Pin 75 Ohm Video Out One Pin Jack 1Vpp 75 Ohm Coaxial Digital Out One Pin Jack 5Vpp 75 Ohm Analog Audio Out Two Pin Jacks 2 0VRMS 4...

Page 44: ...n most DVD discs DTS Digital Theater System Another digital surround sound system with 5 1 channels DTS is supported on some newer DVD discs Dual Layer DVD A DVD disc that has two layers on each side A single sided dual layered DVD can hold almost four hours of video and audio and is also known as a DVD 9 DVD Digital Video Disc DVDs come in different formats such as single sided or double sided Ea...

Page 45: ...es To play back a DVD title with a specific region code you will need a DVD player with the same region code S Video S Video offers significantly improved video signal performance over a basic composite video connection To use this type of connection your TV must have an S Video input VCD Digital Video Disc Adigital video disc format particularly popular in Asia Uses MPEG 1 video compression The p...

Page 46: ...ng 30 33 repeat buttons 9 repeat playback 23 dimmer 11 resetting player disc copy 32 video output 39 discs 5 6 factory defaults 38 display button 8 11 29 return button 9 display panel 11 reverse button 8 drive button 30 safety precautions 3 effect button 9 screen saver 18 effects 28 setup button 8 enter button 8 setup menu 37 41 erase 30 35 skip ahead back 20 slow button 8 factory default settings...

Reviews: