B
BRAKES
Read all of SAFETY and this section before attempting any procedure. Pay particular attention to Notices, Cautions, Warnings and Dangers.
49
Repair and Service Manual
653045
parts to lose their hardness properties. Always use
new parts.
10.
Inspect catch bracket and latch arm.
Replace if indication of wear or damage are found
11.
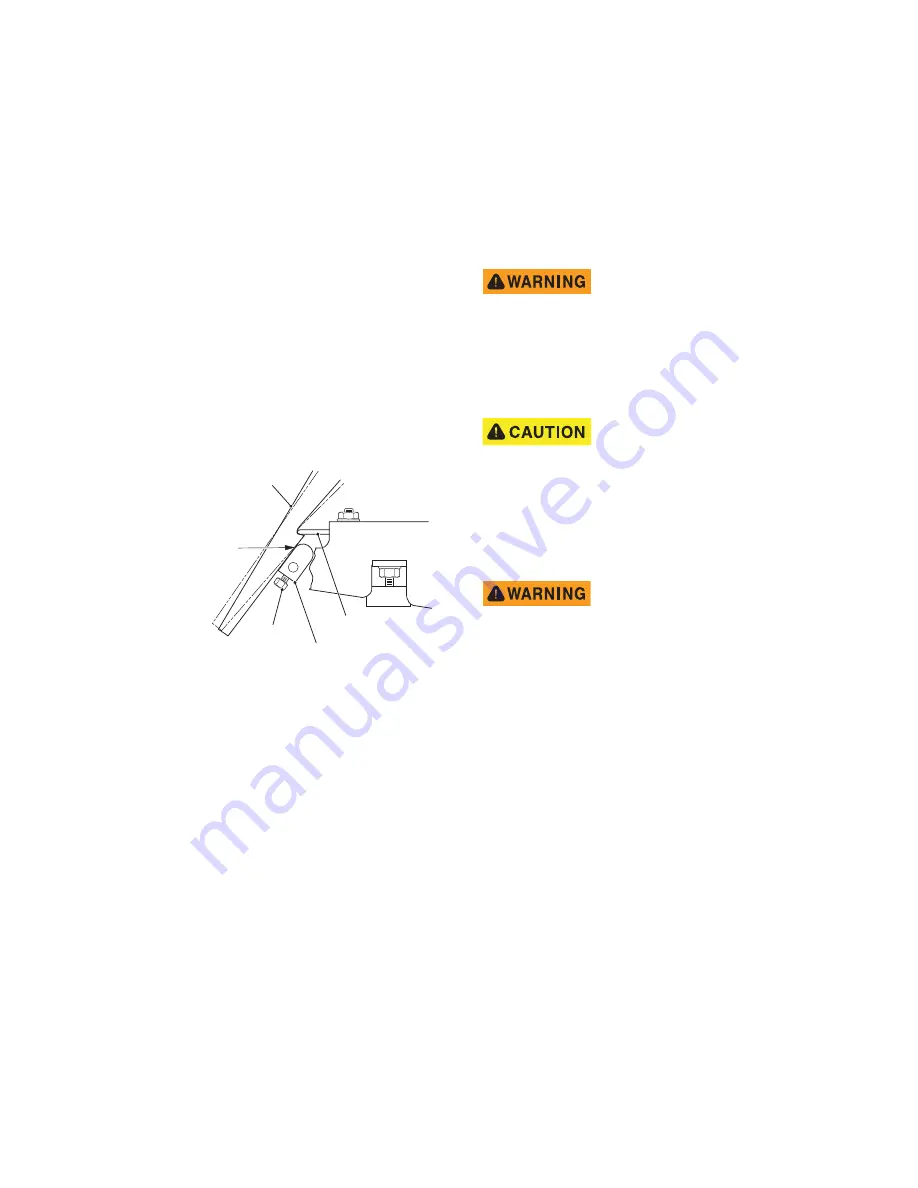
Inspect the parking brake kick-off cam.
Look for wear and ensure correct adjustment. With
the parking brake engaged and fully latched, there
must be no gap between the top of the cam and the
latch arm. Adjust the kick-off cam (3) if required (Fig-
ure 14). Correct setscrews must be used to hold the
kick-off cam to the pivot rod. Use of longer screws
prevent correct adjustment of pedal bumper (pedal
travel) and may prevent the brakes from adjusting
properly.
12.
Inspect kick-off cam linkage and bushings.
Check for wear and damage. The kick-off cam pivot
and bushings must move freely and be free of corro-
sion. The kick-off cam should rotate when the accel-
erator pedal is pressed.
Figure 14 Kick-Off Cam Inspection
Daily Brake Performance Test
NOTICE: To ensure correct braking performance, all
maintenance, inspections and procedures must be
performed as indicated in the SCHEDULED MAINTE-
NANCE section. A Daily Brake Performance Test
must be performed, and the entire brake system
must be serviced in accordance with the Scheduled
Maintenance.
NOTICE: The brake system must be bled whenever
any part of the brake system has been replaced.
Press the brake pedal. The pedal should have some ini-
tial free play, and then become resistant. This indicates
proper performance.
If the brake pedal has a soft feel or loses resistance, per-
form a brake system inspection, See
Brake System Inspection
Brake failure usually occurs as either a gradual decrease
in braking effect from the disc pads wearing away, a loss
of braking at one wheel or a sudden and complete failure
with no brakes working except the parking brake. If the
brakes at one wheel become ineffective while the brakes
at the other wheel functions properly, remove the entire
brake assembly and inspect the brake for signs of a leak-
ing or inoperative wheel cylinder assembly.
Wheel Brake Inspection
Wear a dust mask and eye protec-
tion when working on wheel brakes.
Do not use pressurized air to blow dust from the
brake assemblies.
Replace both brake shoes on both wheels if one or
more shoes are worn below .06” (1.5 mm) thickness
at any point.
Do NOT touch any of the wheel
brake mechanisms except as
instructed.
Do NOT use a commercial brake cleaner unless the
entire brake has been disassembled.
1.
Remove the brake drums.
Do not disturb adjuster mechanisms. Remove
excess dust and dirt from the drum with a brush.
The drum must not be machined to
remove grooves in the friction sur-
face. Machining the drum makes the
wall thin and can cause the drum to fail. Drum fail-
ure causes a loss of braking capacity, which can
cause severe injury or death.
2.
Inspect the brake drum.
Look for a blue coloration or blistered paint indicates
that the drum has overheated. Check for grooves in
the friction surface. Check for an area worn below
the rest of the friction surface indicating excessive
wear. Inspect the splines for galling, wear and corro-
sion. If any of these problems are present, the drum
must be replaced.
3.
Remove any accumulated brake dust from the wheel
brake assembly with a brush.
4.
Visually inspect the axle seal for oil leakage, and the
condition of the thrust washer. If oil is present, see
REAR AXLE section.
5.
Verify the inner brake drum washer is present and
check its condition. Replace if damaged or missing.
Kick-Off Cam
Setscrew
Pedal Latch Arm
Catch Bracket
Cam must be against
latch arm at this point with
no gap.
Property of American Airlines


